Setting Up Your Sender Signature
Before customizing your email templates, set up a verified sender signature so emails are delivered reliably and appear from your domain.Click Set Sender Signature
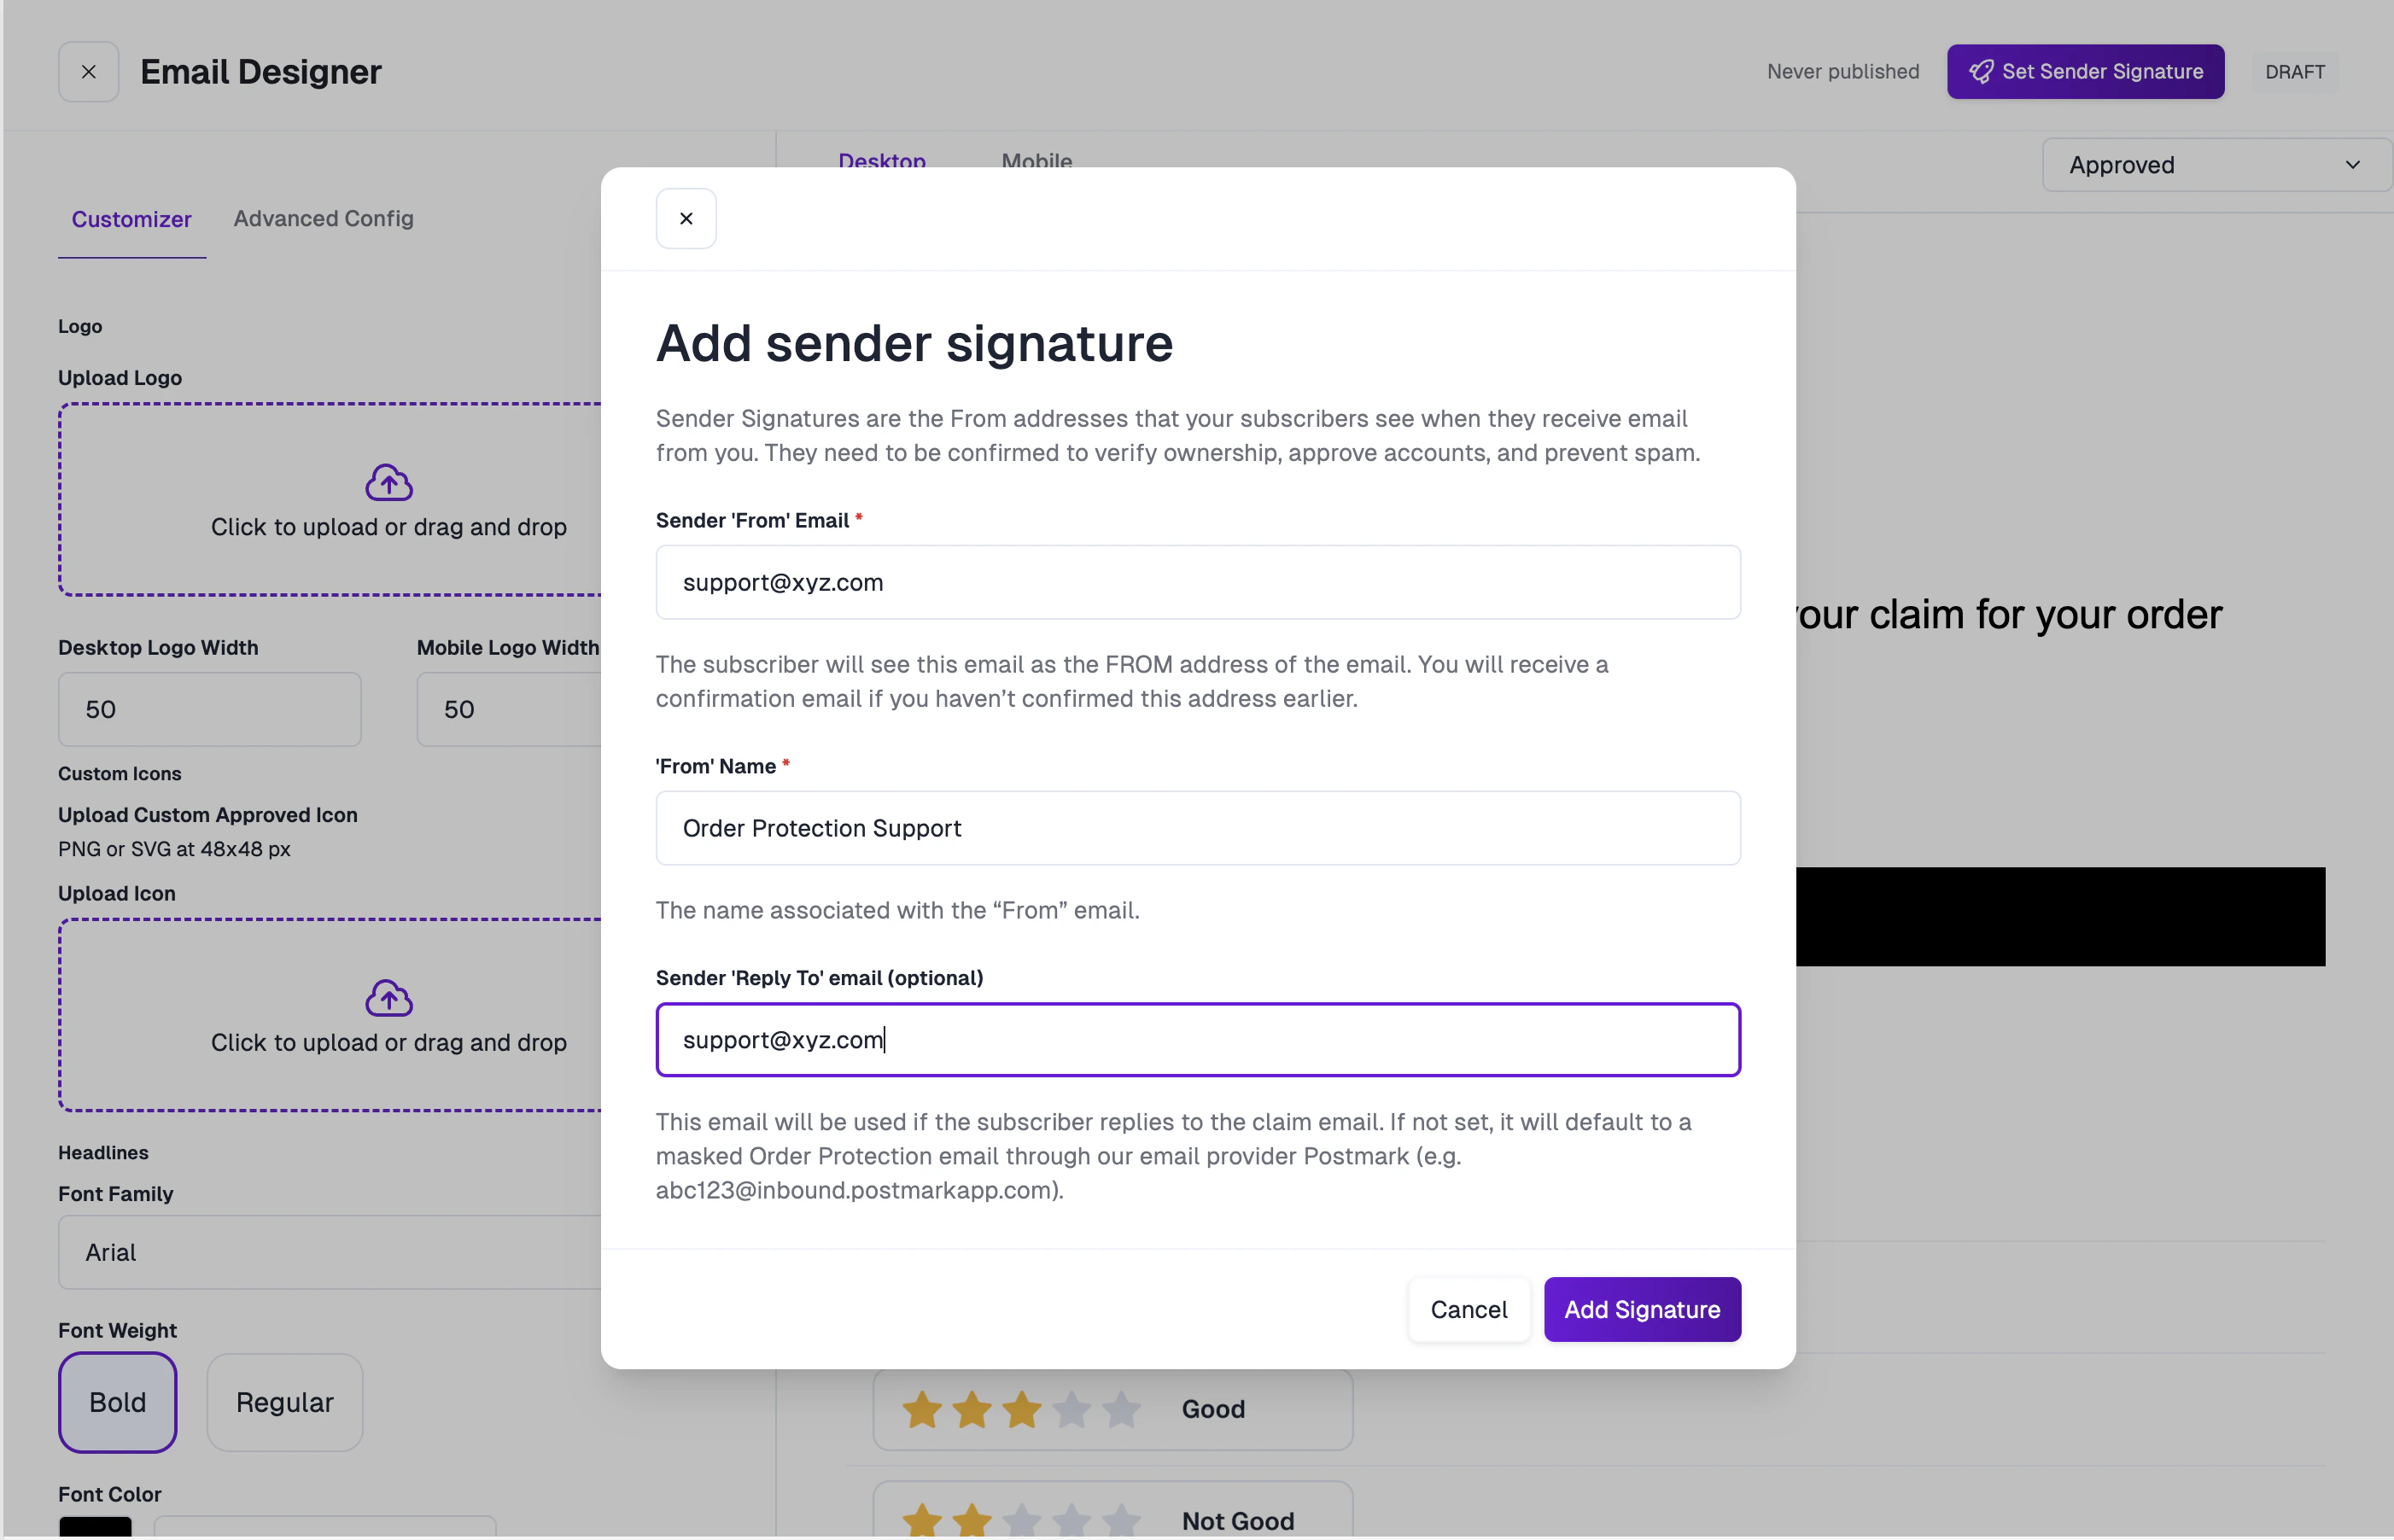
In the Email Designer editor, click the Set Sender Signature button in the top-right header.
Enter your sender details
In the modal that appears, fill in the following fields:
- Sender ‘From’ Email: The email address customers will see as the sender (e.g.,
support@yourdomain.com). You’ll receive a confirmation email if this address hasn’t been verified before. - ‘From’ Name: The display name associated with the “From” email (e.g., “Your Brand Support”).
- Sender ‘Reply To’ Email (optional): The email used if a customer replies to a claim email. If not set, replies go to a masked Order Protection address via Postmark.
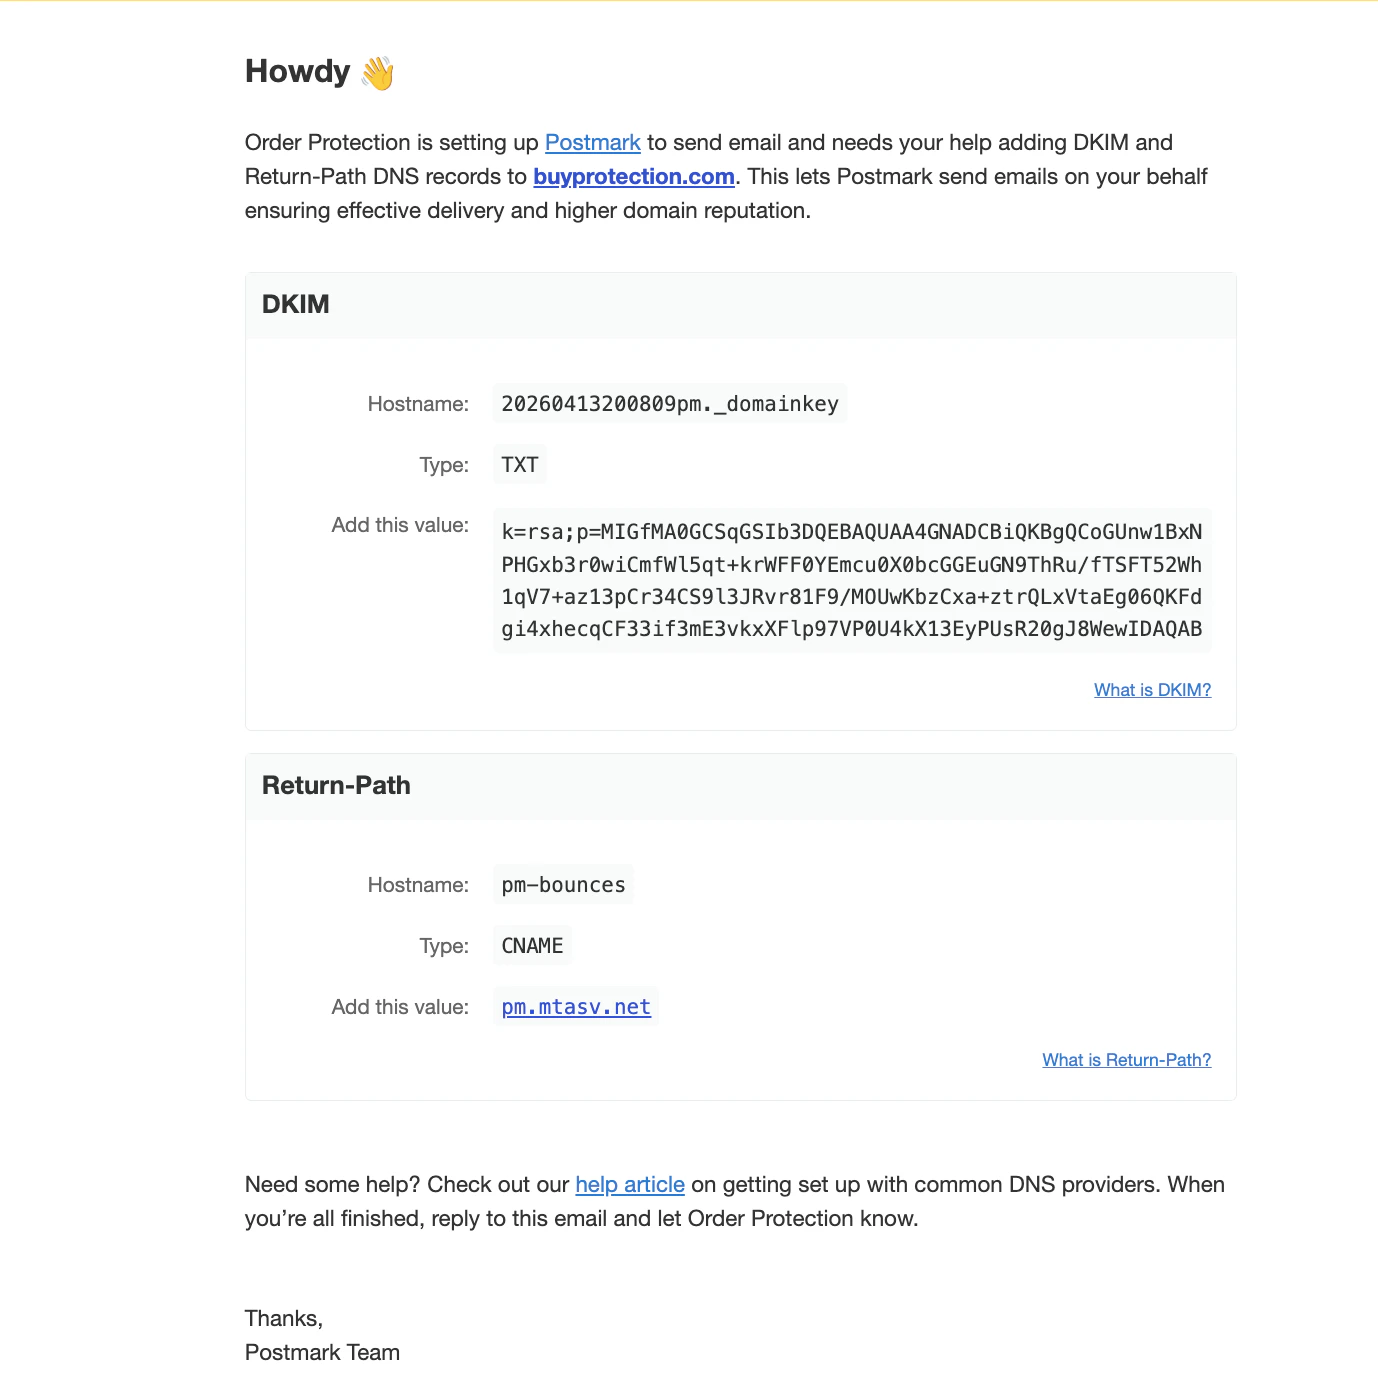
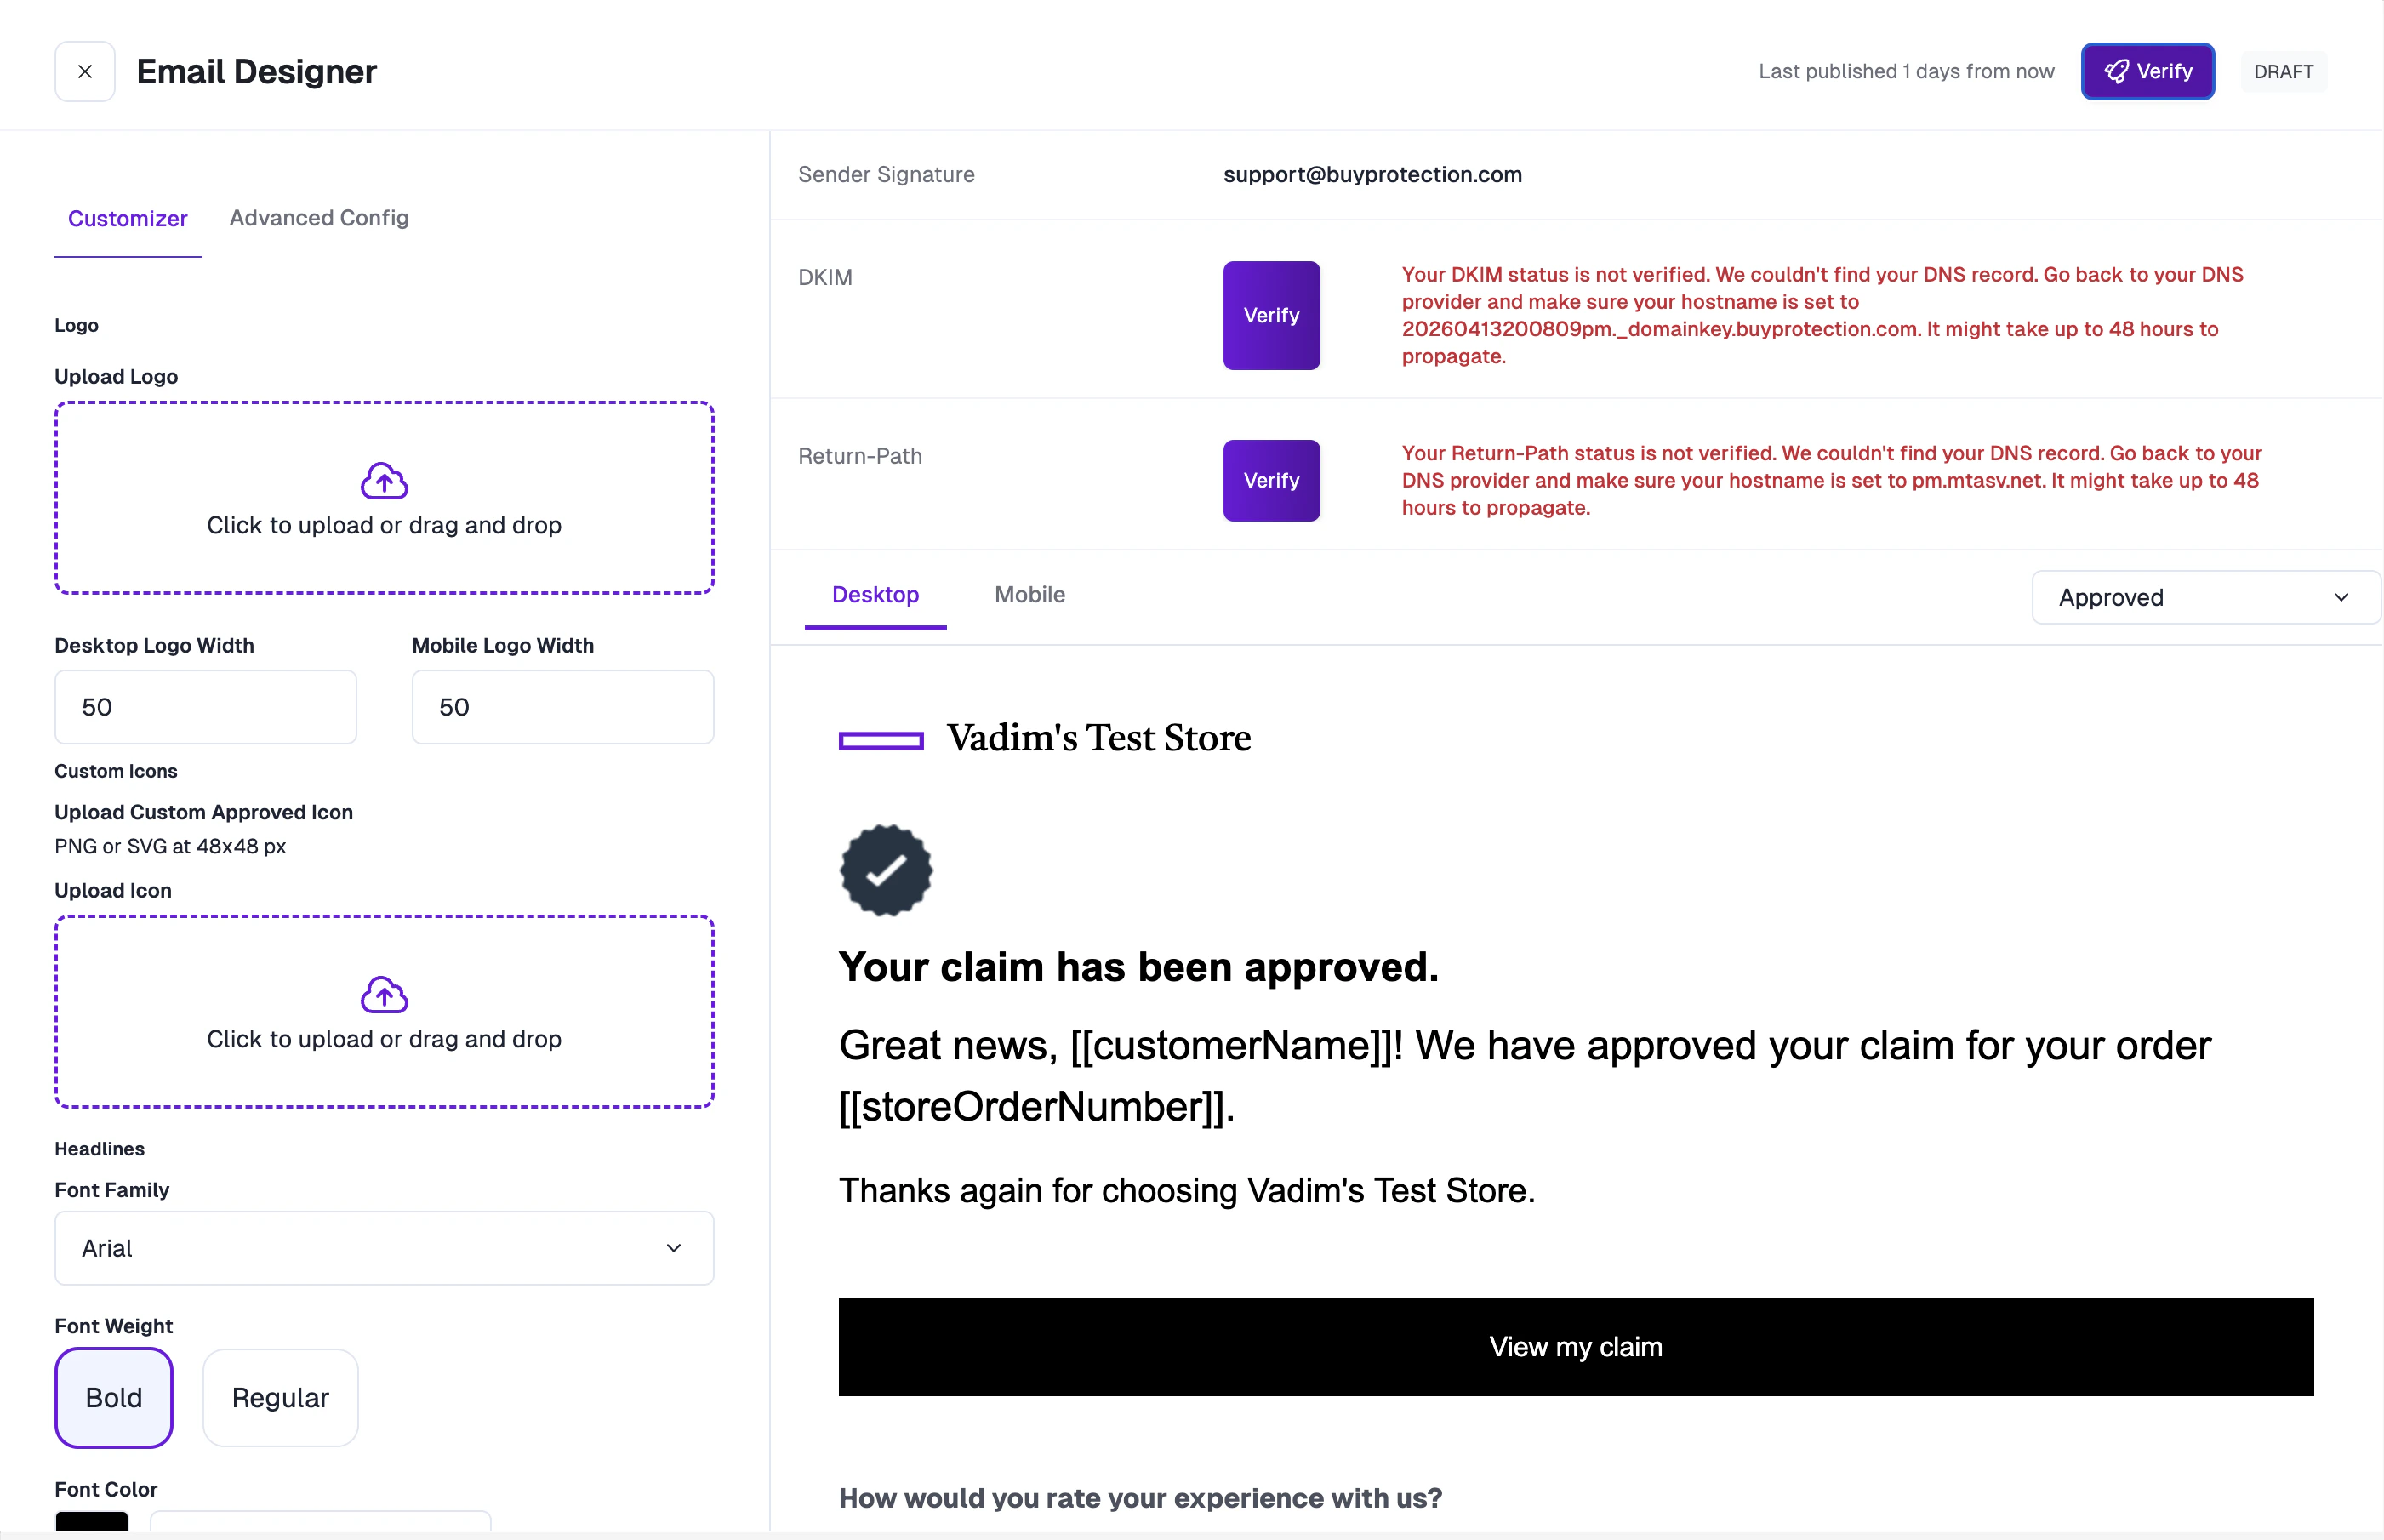
Configure DNS records
After adding your signature, you’ll receive an email from Postmark with the DNS records needed to verify your domain. Two records are required:
- DKIM — A TXT record that authenticates your emails.
- Return-Path — A CNAME record that ensures proper bounce handling.
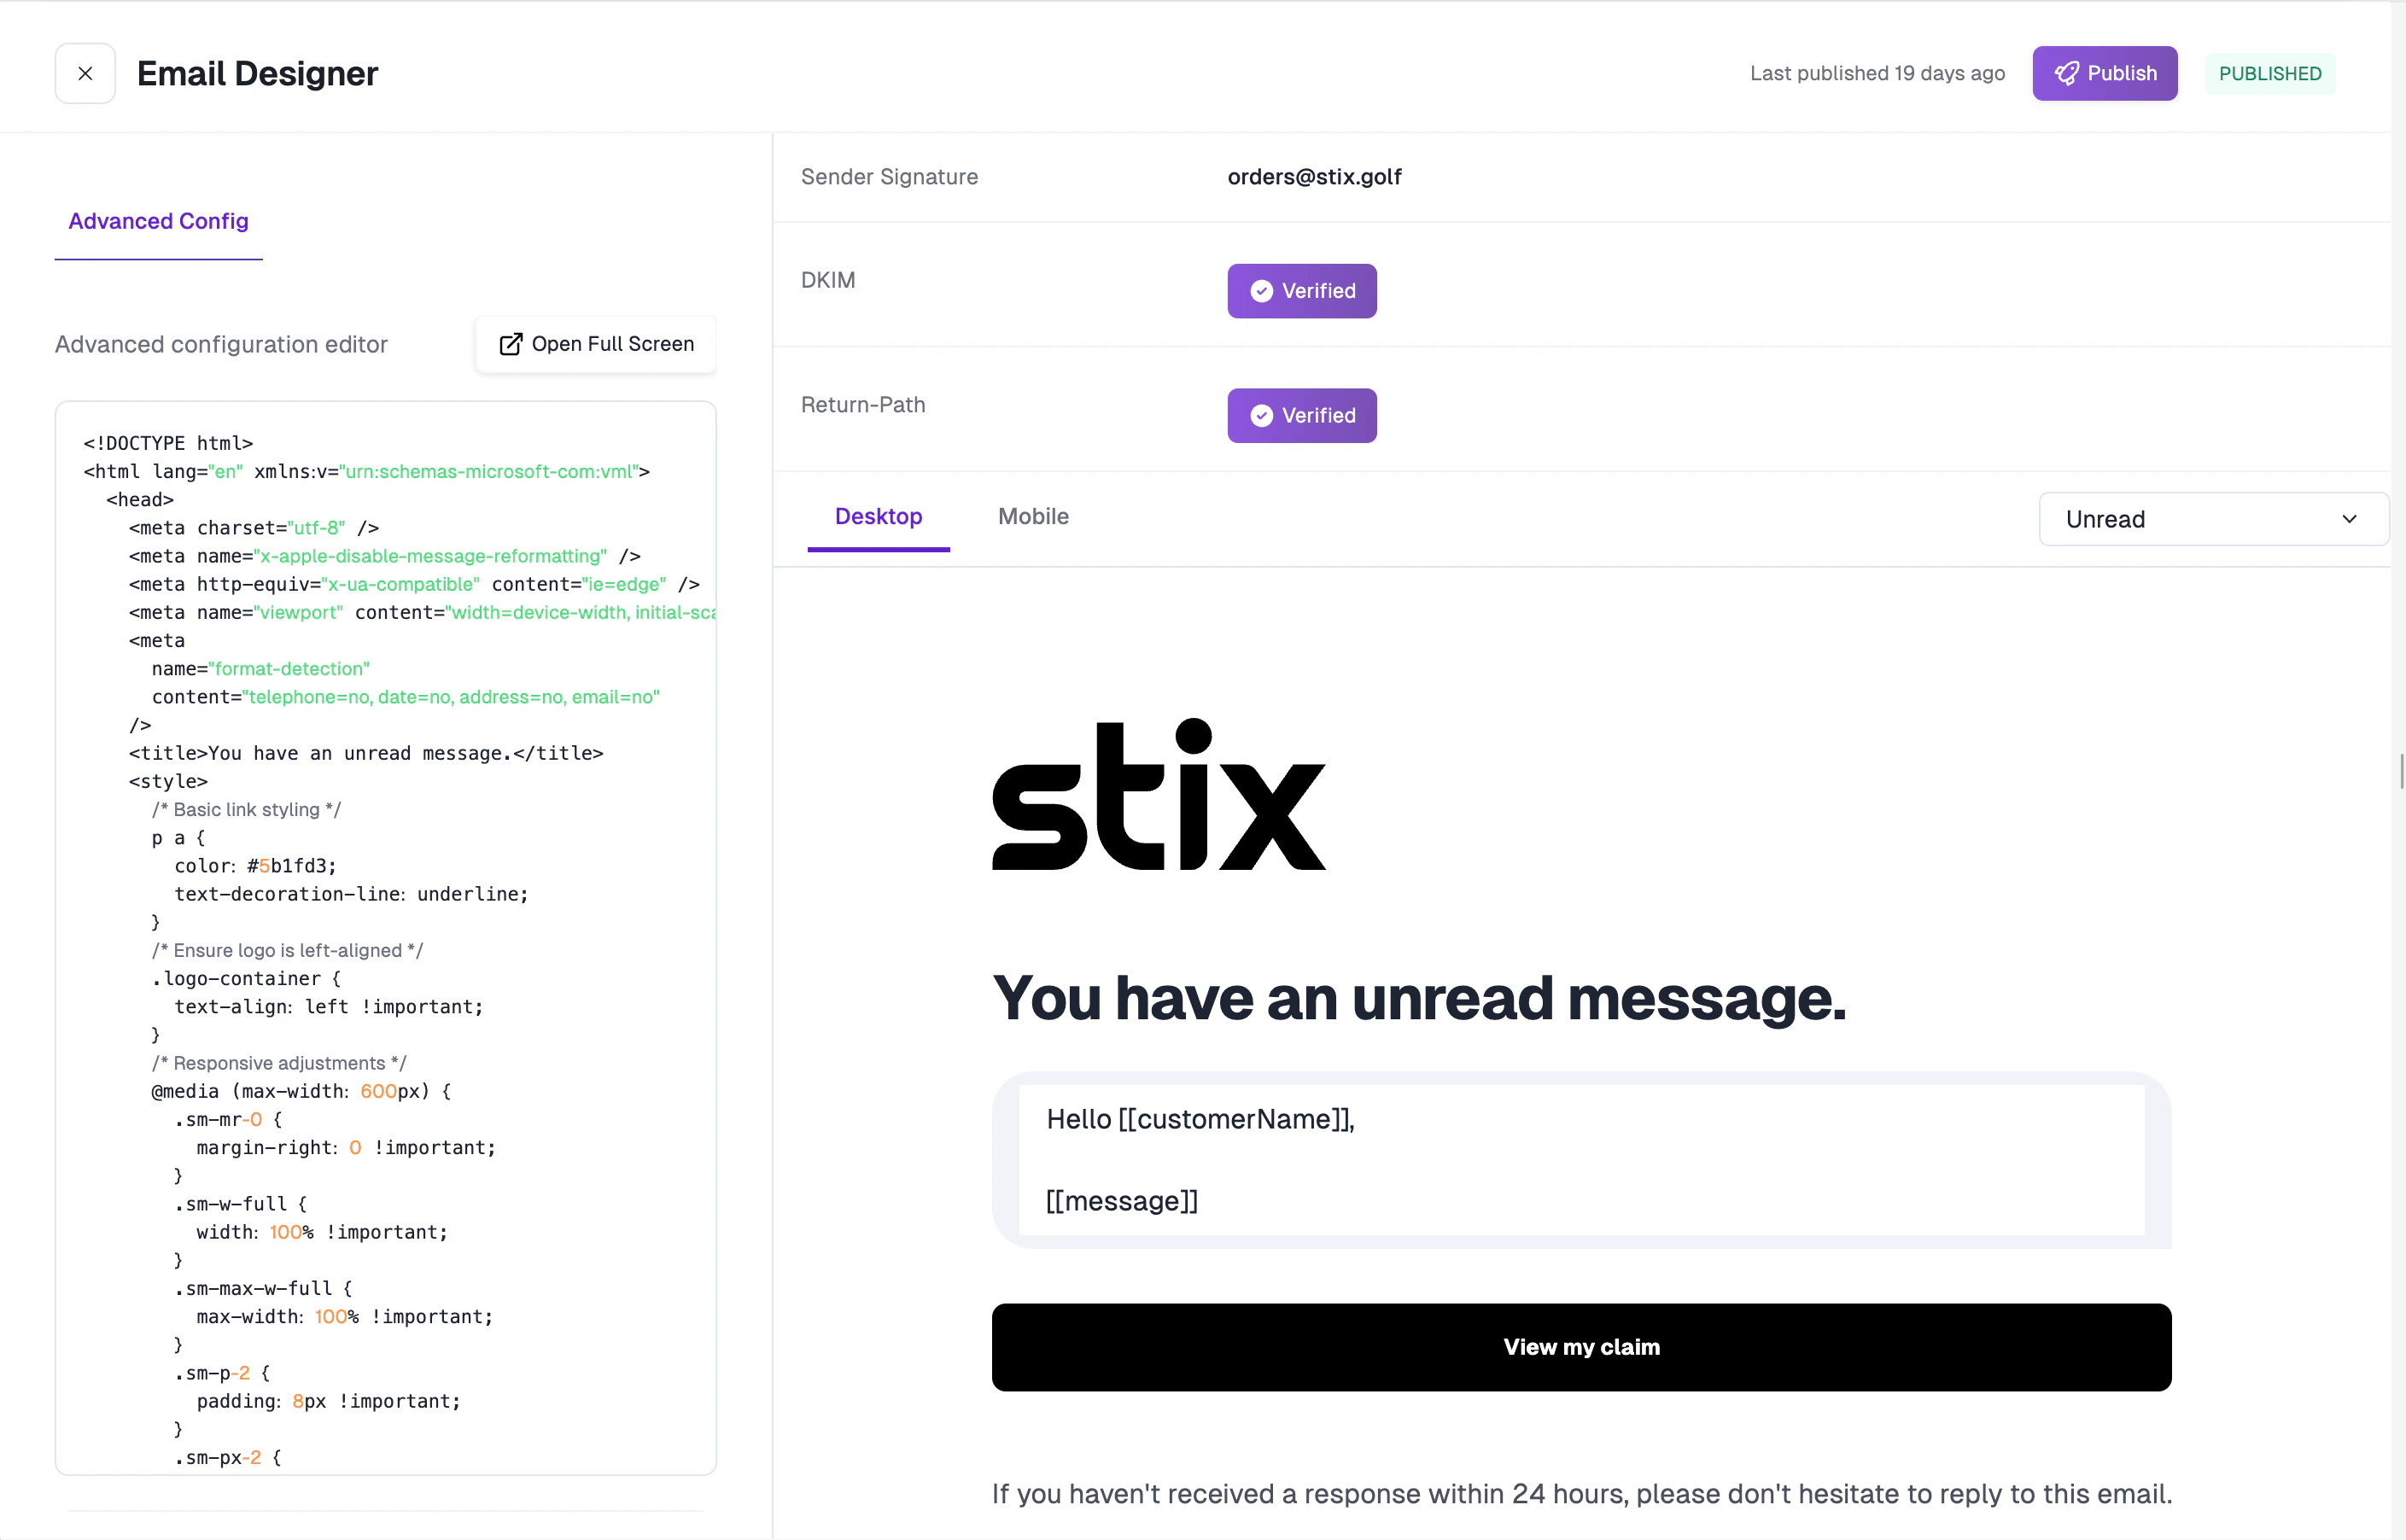
Using the Email Designer
The editor uses a split-screen layout: the customization sidebar is on the left, and a live email preview is on the right. Changes you make in the sidebar are reflected in the preview in real time.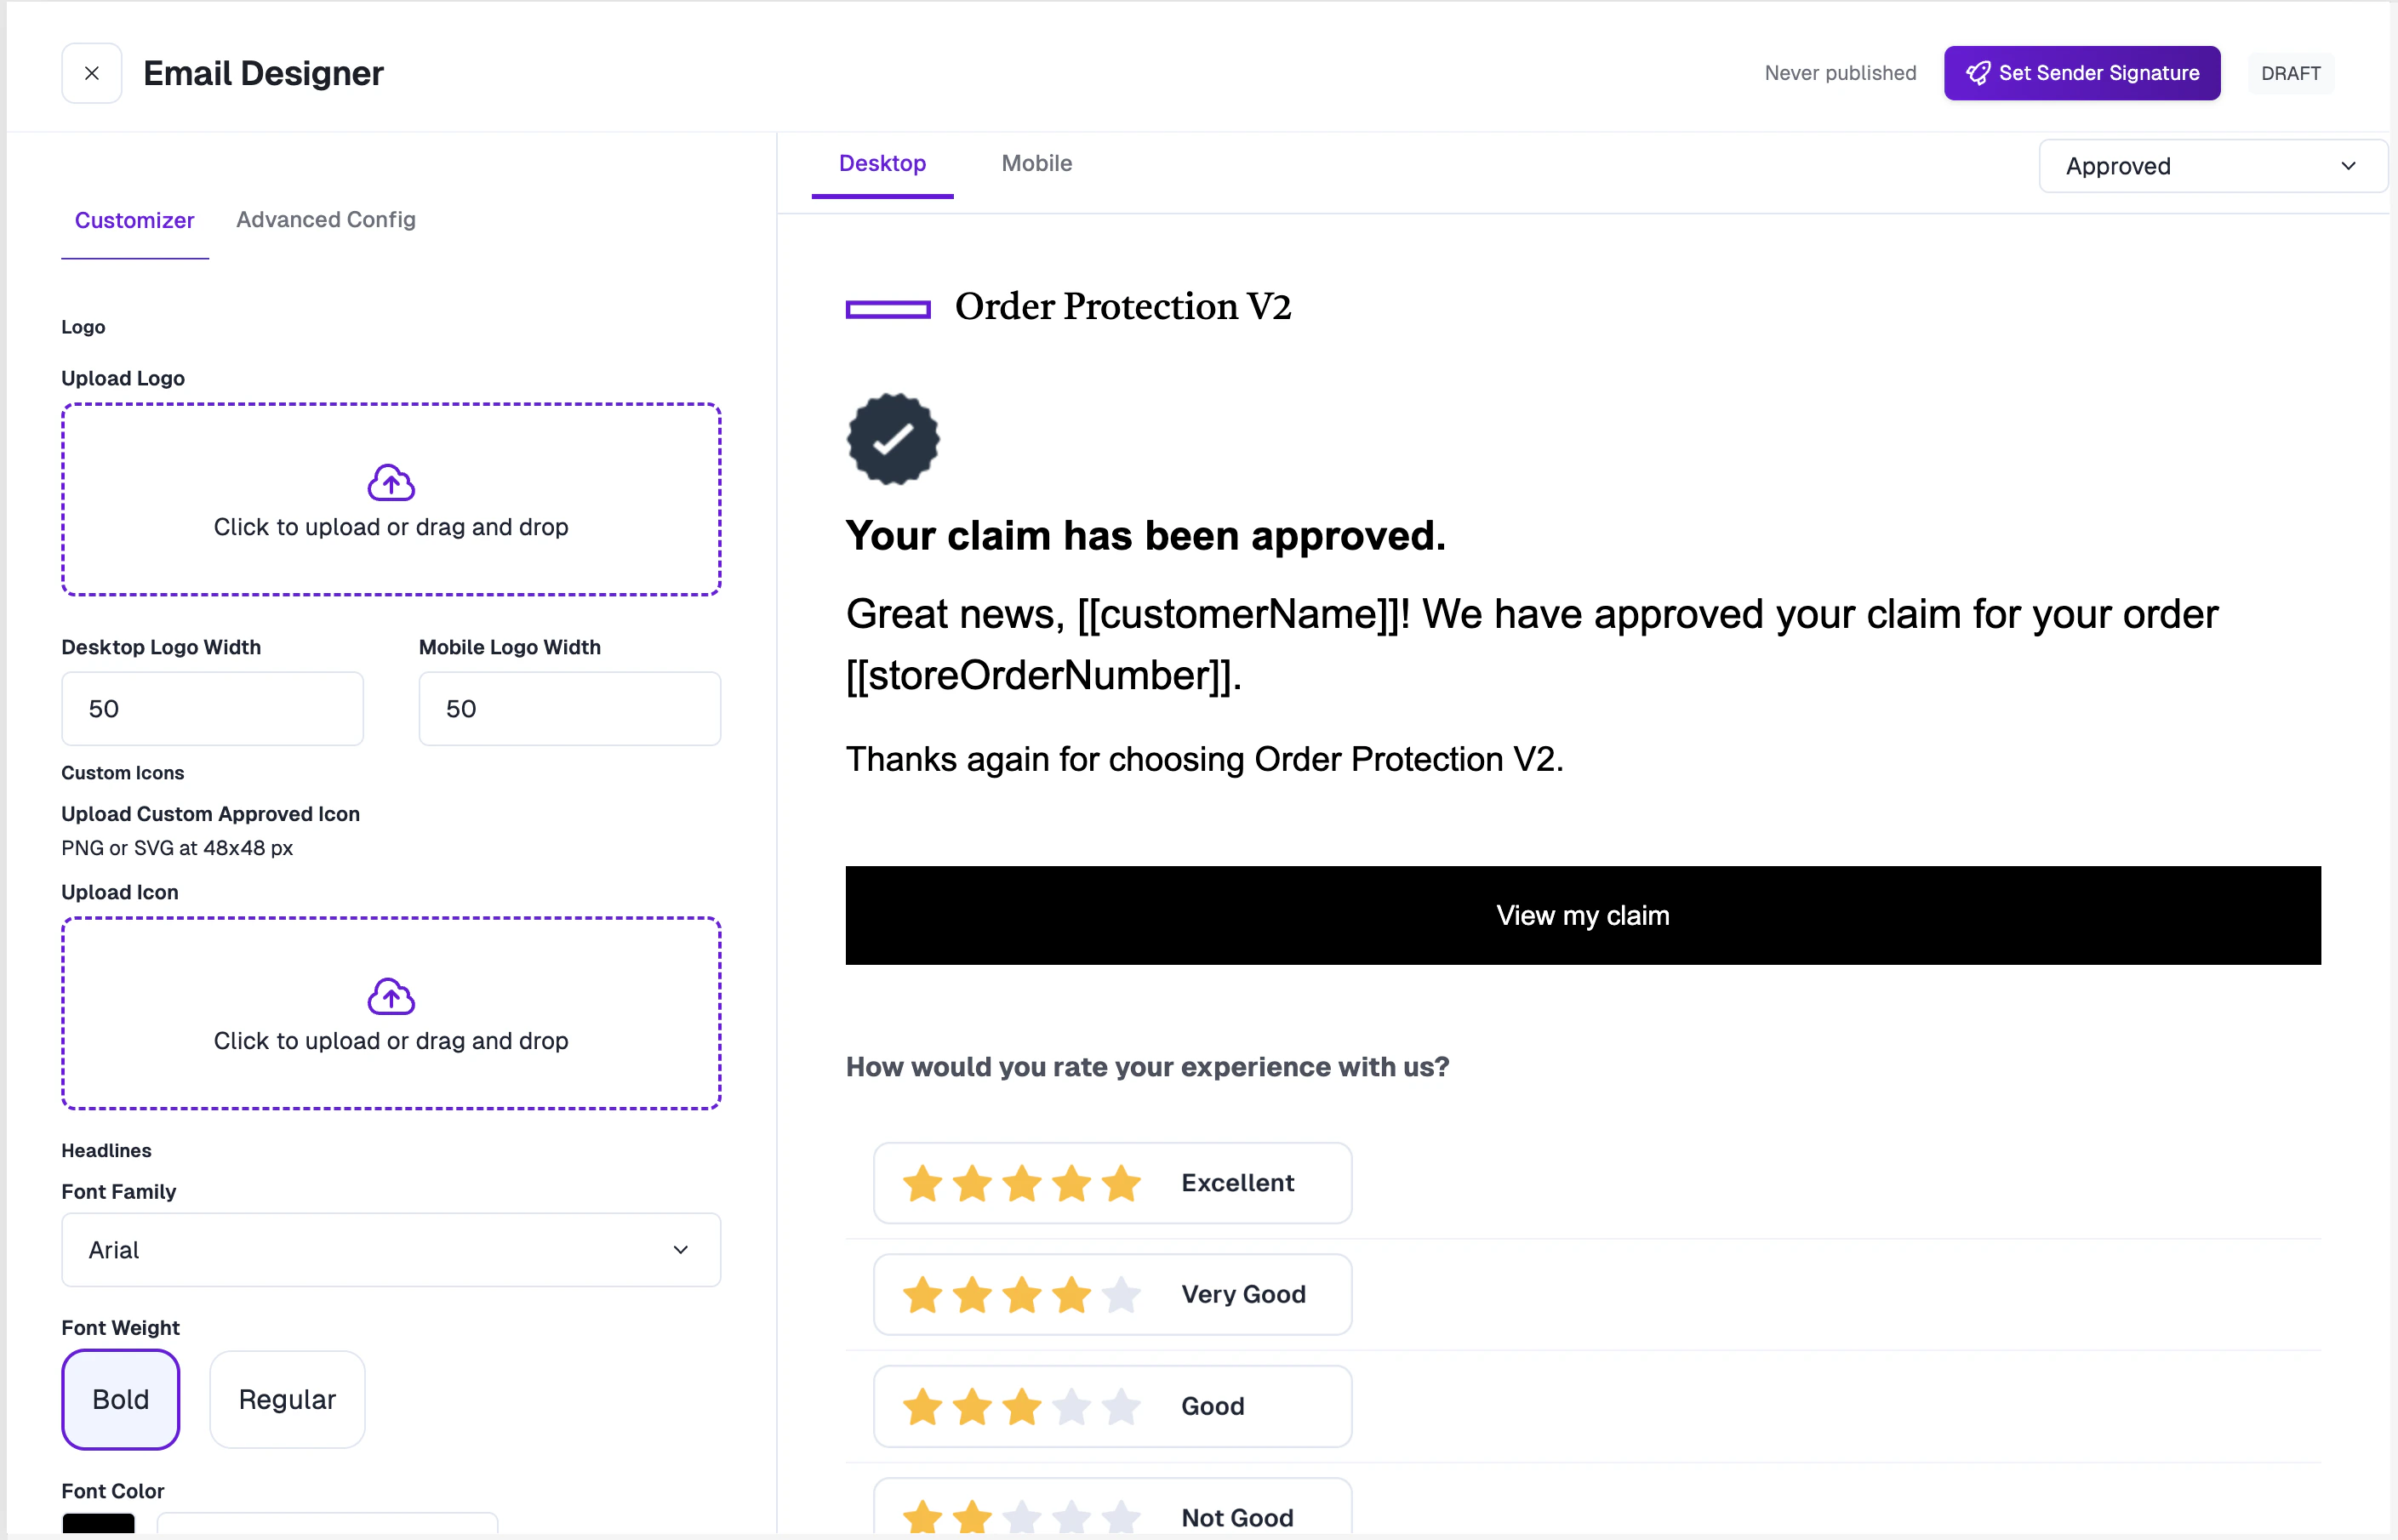
1. Upload Your Logo
Upload your brand logo to appear at the top of your emails.- Recommended: Use a high-quality PNG with a transparent background.
- Desktop Logo Width: Set the display width for desktop email clients (in pixels).
- Mobile Logo Width: Set a separate width for mobile devices to maintain clarity.
2. Custom Icons
Upload custom PNG or SVG icons (recommended size: 48x48 px) to replace the default icons used throughout the email template. For example, you can upload a custom “Approved” icon that matches your brand.3. Customize Headlines
Control the typography for all headline text in your emails:- Font Family: Select from available fonts.
- Font Weight: Bold or Regular.
- Font Color: Choose any color via the color picker.
- Font Style: None, Uppercase, or Title Case.
- Desktop: Set Font Size, Line Height, and Letter Spacing.
- Mobile: Set separate Font Size, Line Height, and Letter Spacing for mobile devices.
4. Customize Sub-text
Same options as Headlines, applied to all paragraph/body text:- Font Family, Font Weight, Font Color, Font Style
- Desktop: Font Size, Line Height, Letter Spacing
- Mobile: Font Size, Line Height, Letter Spacing
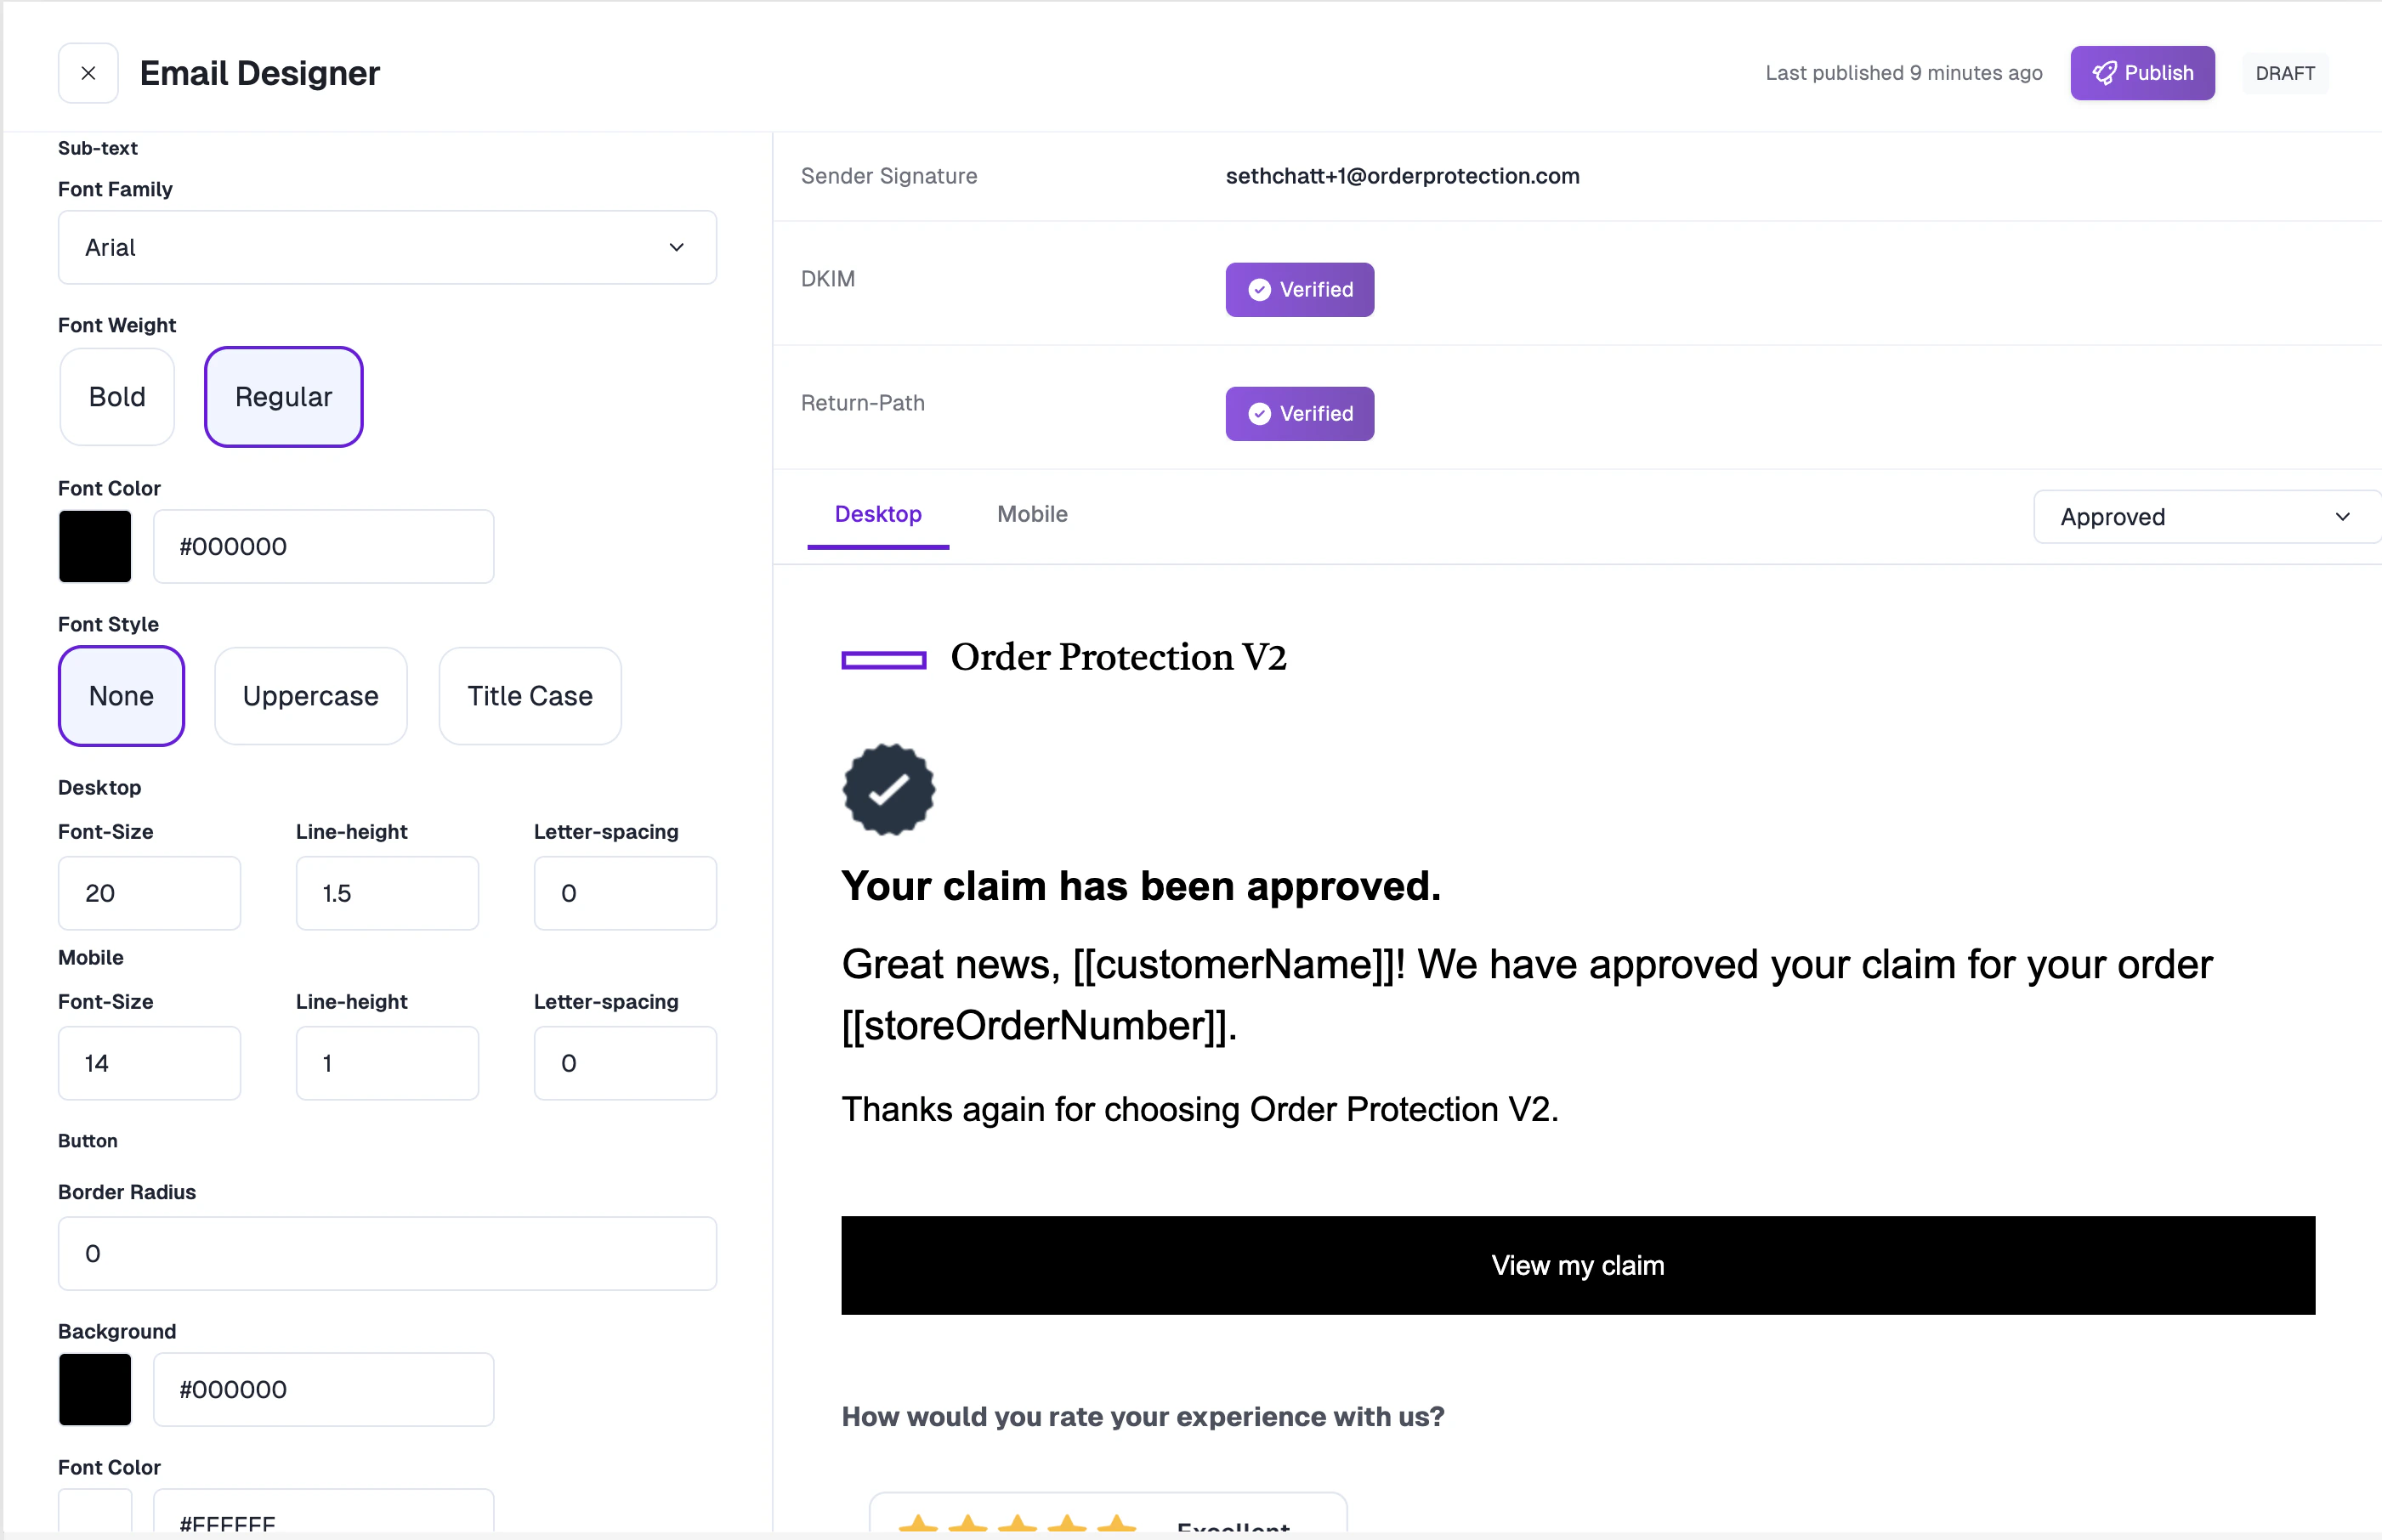
5. Button Styling
Customize the call-to-action buttons in your emails:- Border Radius: Control button corner rounding (in pixels).
- Background Color: Choose a button background color.
- Font Color: Set the button text color.
6. Footer Content
Add custom footer content to the bottom of your emails. This field supports HTML formatting for links, disclaimers, or additional brand messaging.7. Advanced Configuration
Switch to the Advanced Config tab for a code editor where you can provide a fully custom HTML template that overrides the generated email layout.