Below is a brief guide on managing Team Members within your OrderProtection.com account. This includes inviting new members, understanding different roles, and viewing/editing member profiles.
How to Invite a New Team Member
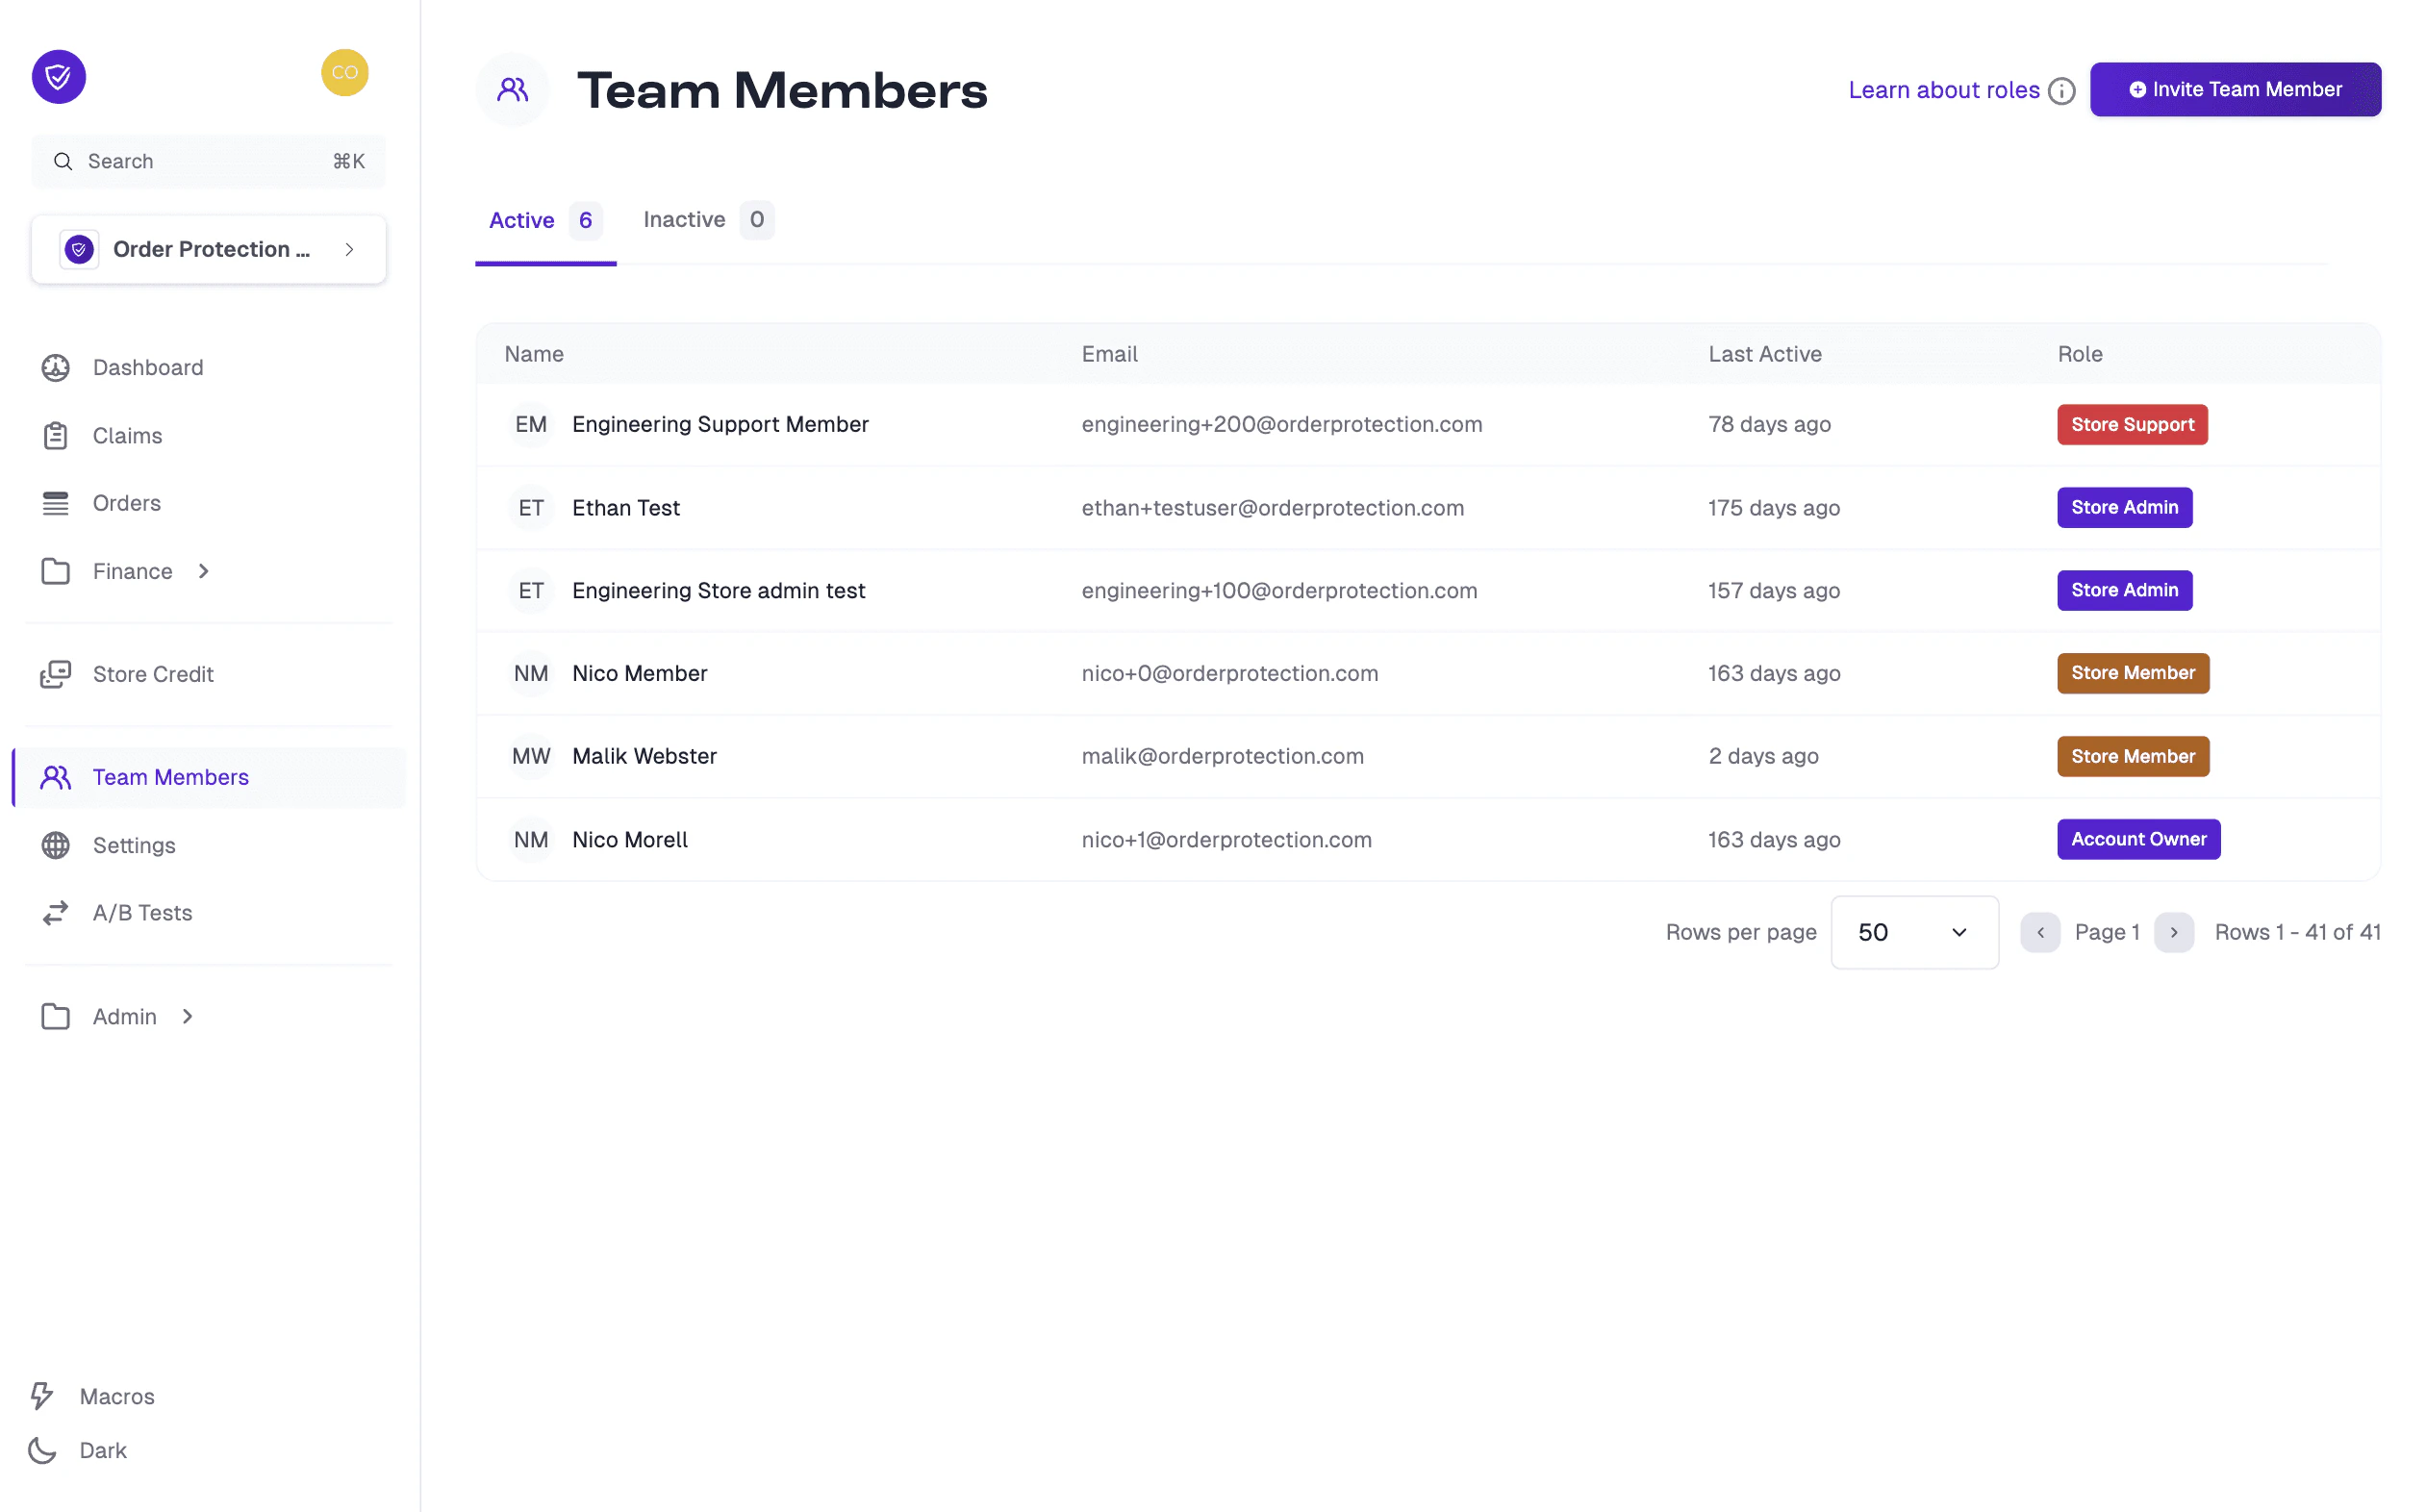
Navigate to Team Members
Go to Team Members in the left-hand menu.
Click Invite
Click the Invite Team Member button (usually at the top-right corner).
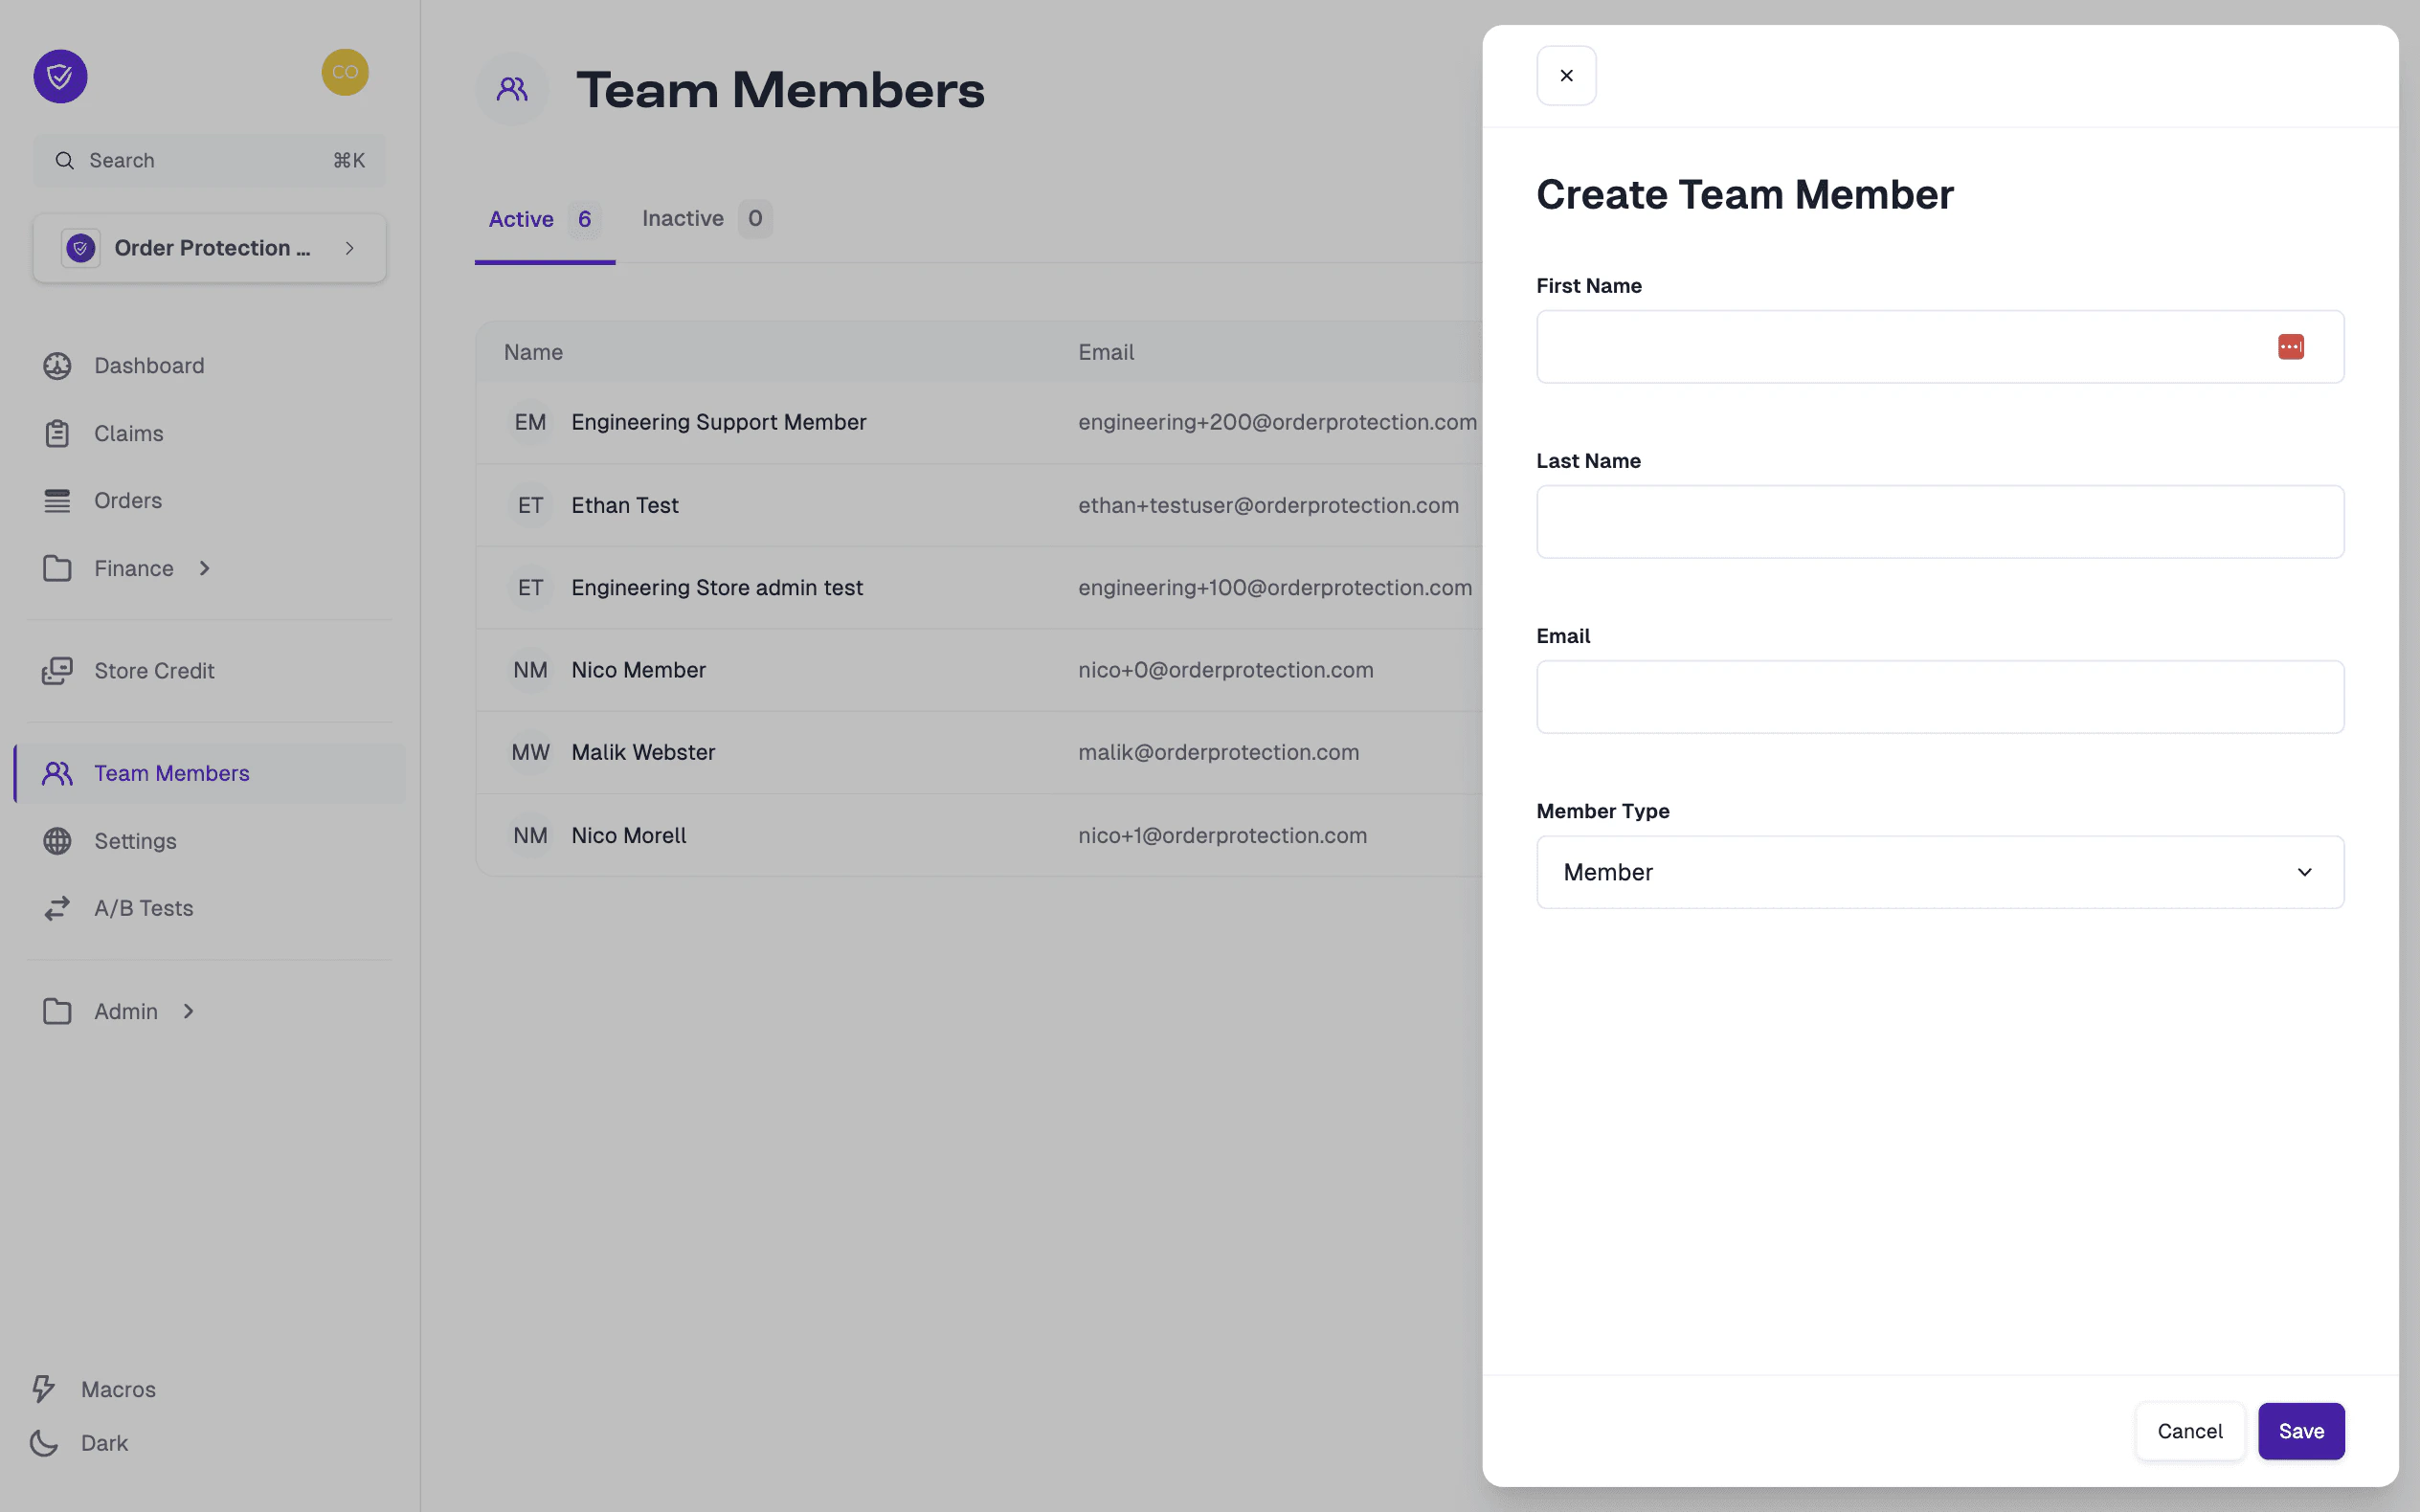
Enter details
Enter the first name, last name, and email address of the new user.
Select the role
Select the Member Type (e.g., Admin, Member, Support).
Save
Click Save. The new team member will receive an email invitation with instructions to set up their account.
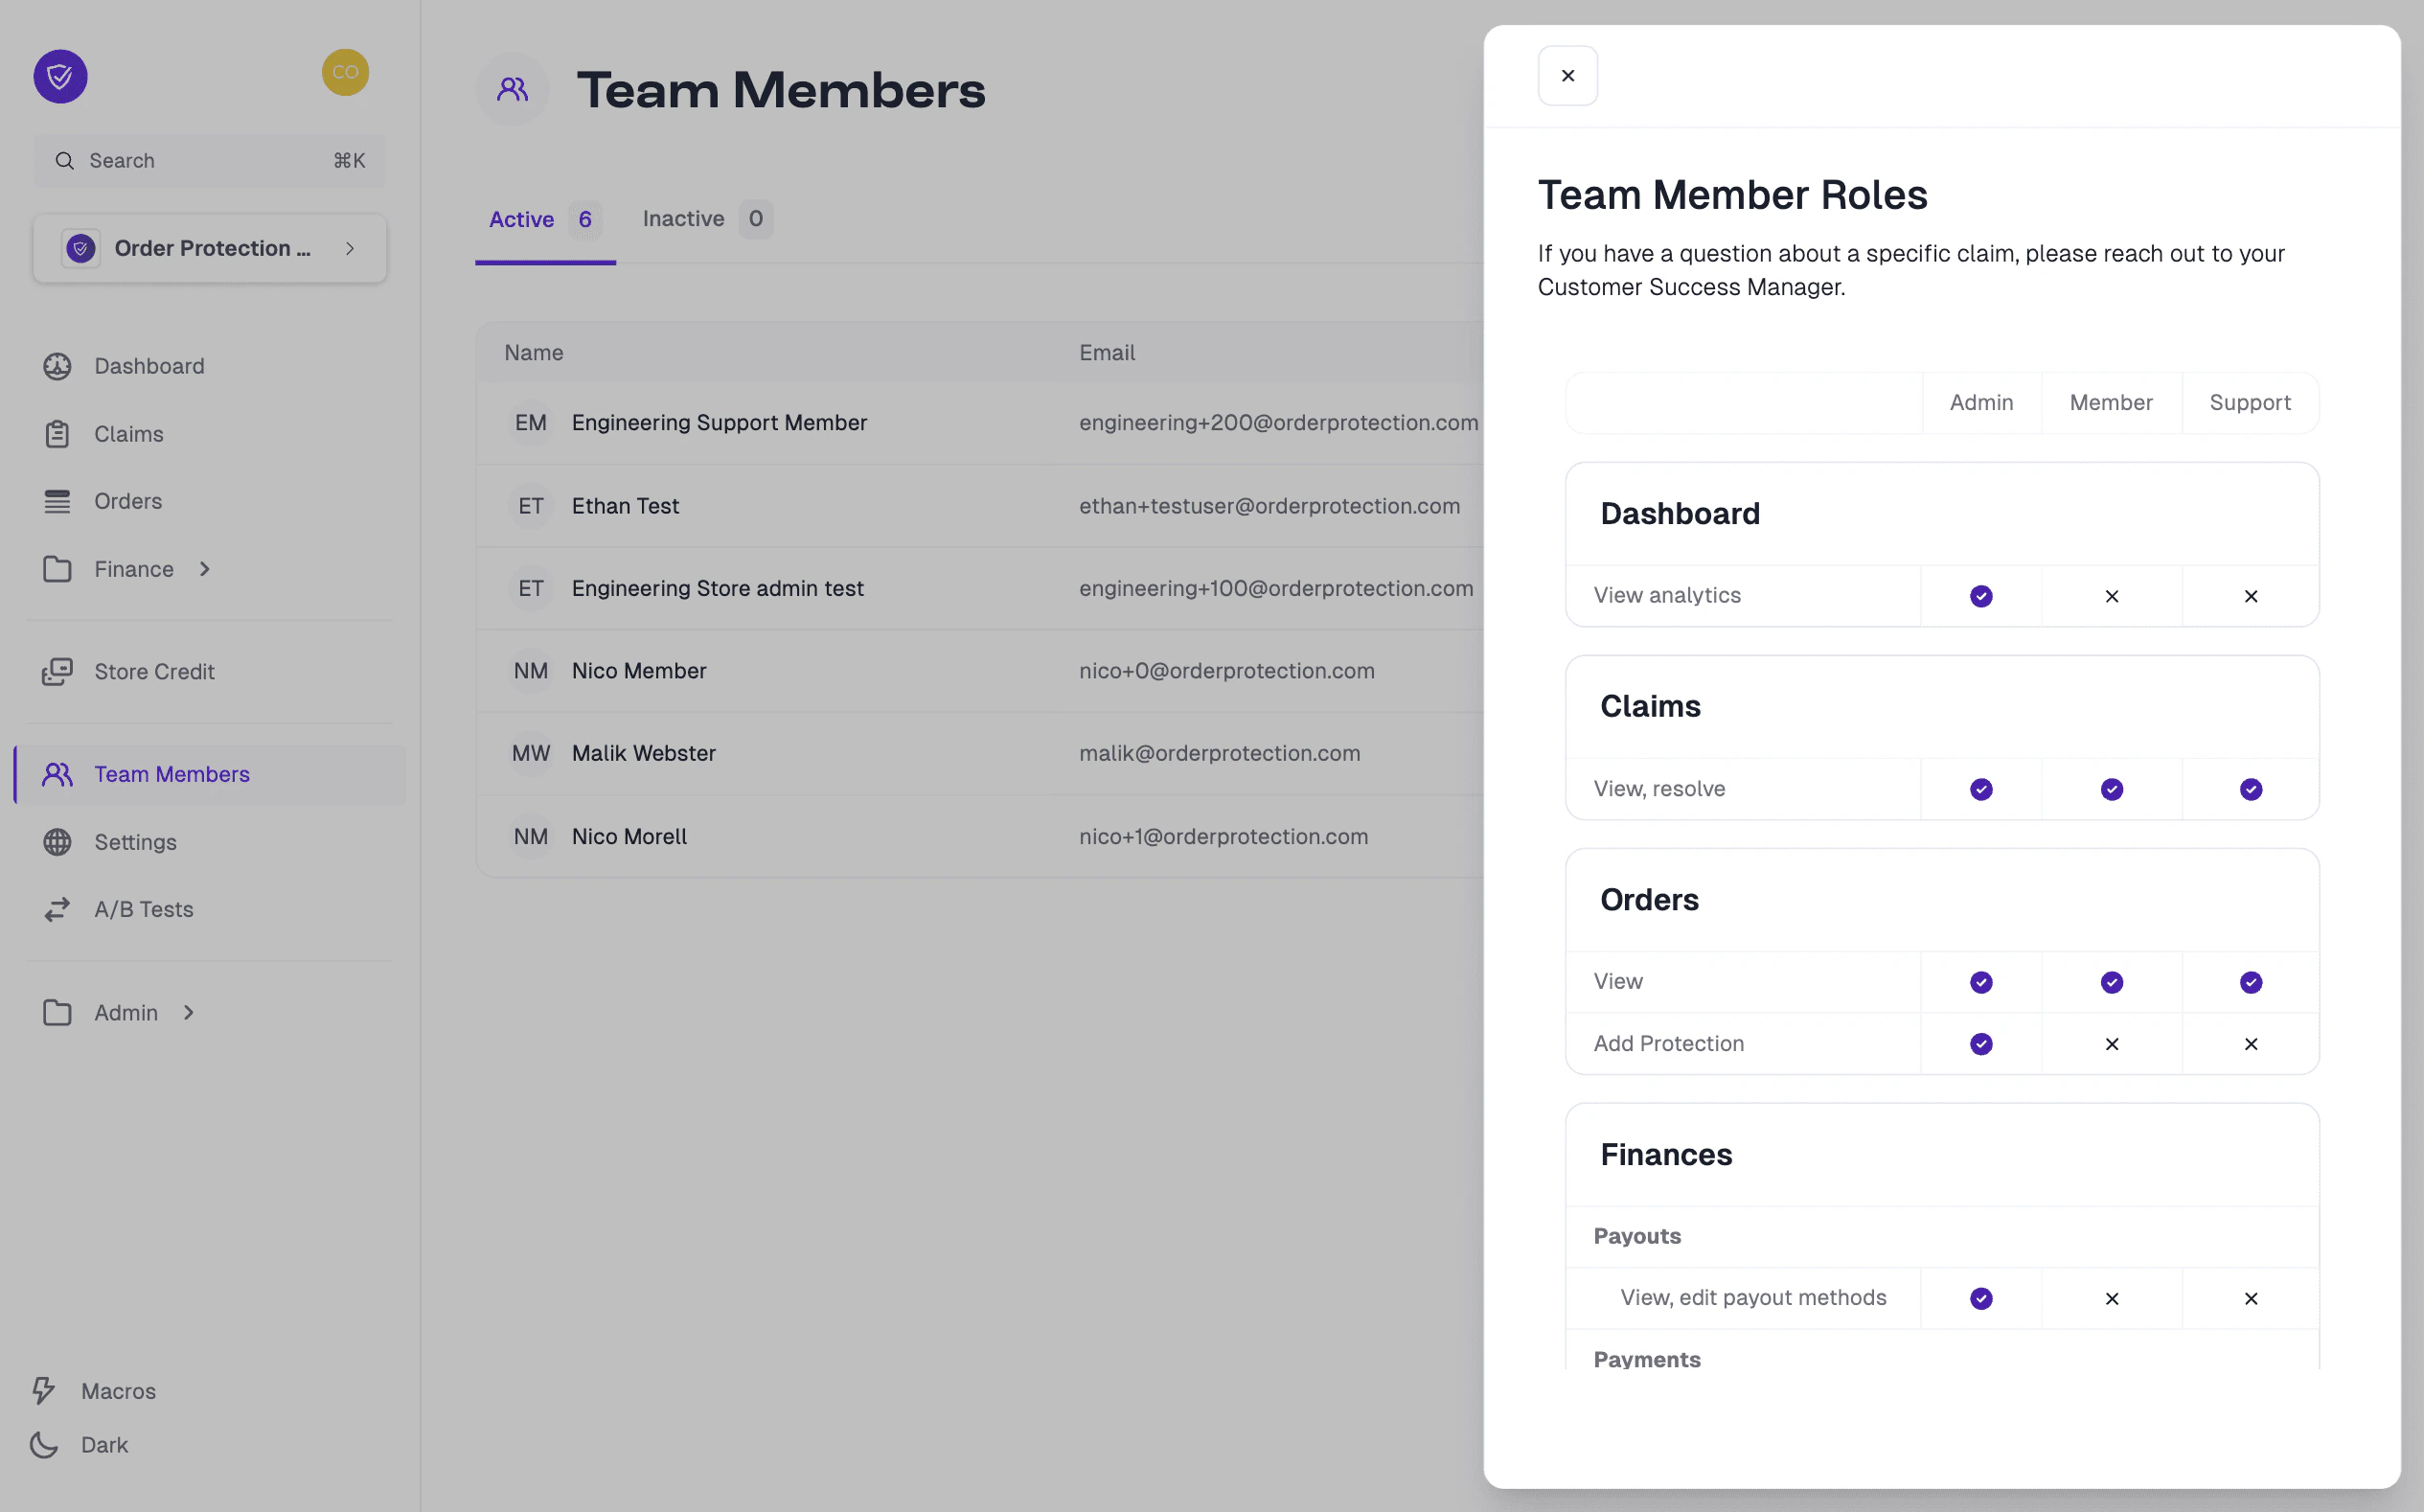
Learn About Roles
When inviting or editing a team member, you’ll notice multiple Store Role options. Each role has different levels of access within your OrderProtection.com account:
| Role | Description |
|---|
| Admin | Highest level of access — can view, add, edit, and remove most items (claims, team members, payout methods, etc.). |
| Member | Standard permissions — can typically view and resolve claims but may have limited access to settings or financial data. |
| Support | Focused on customer-service-related tasks — can view or resolve claims but may have restricted access to other sections. |
If you’re unsure which role fits best, hover over or click on the role description in the Team Members interface to see a breakdown of the permissions, or reach out to your Customer Success Manager (CSM) for clarification.
Viewing and Editing Team Member Profiles
Find the user
In the Team Members page, find the user you wish to manage.
Open their profile
Click on their row/name to open their profile.
Make changes
From here, you can:
- Edit basic information (first name, last name, email).
- Update their Store Role.
- Review their recent activity (if available).
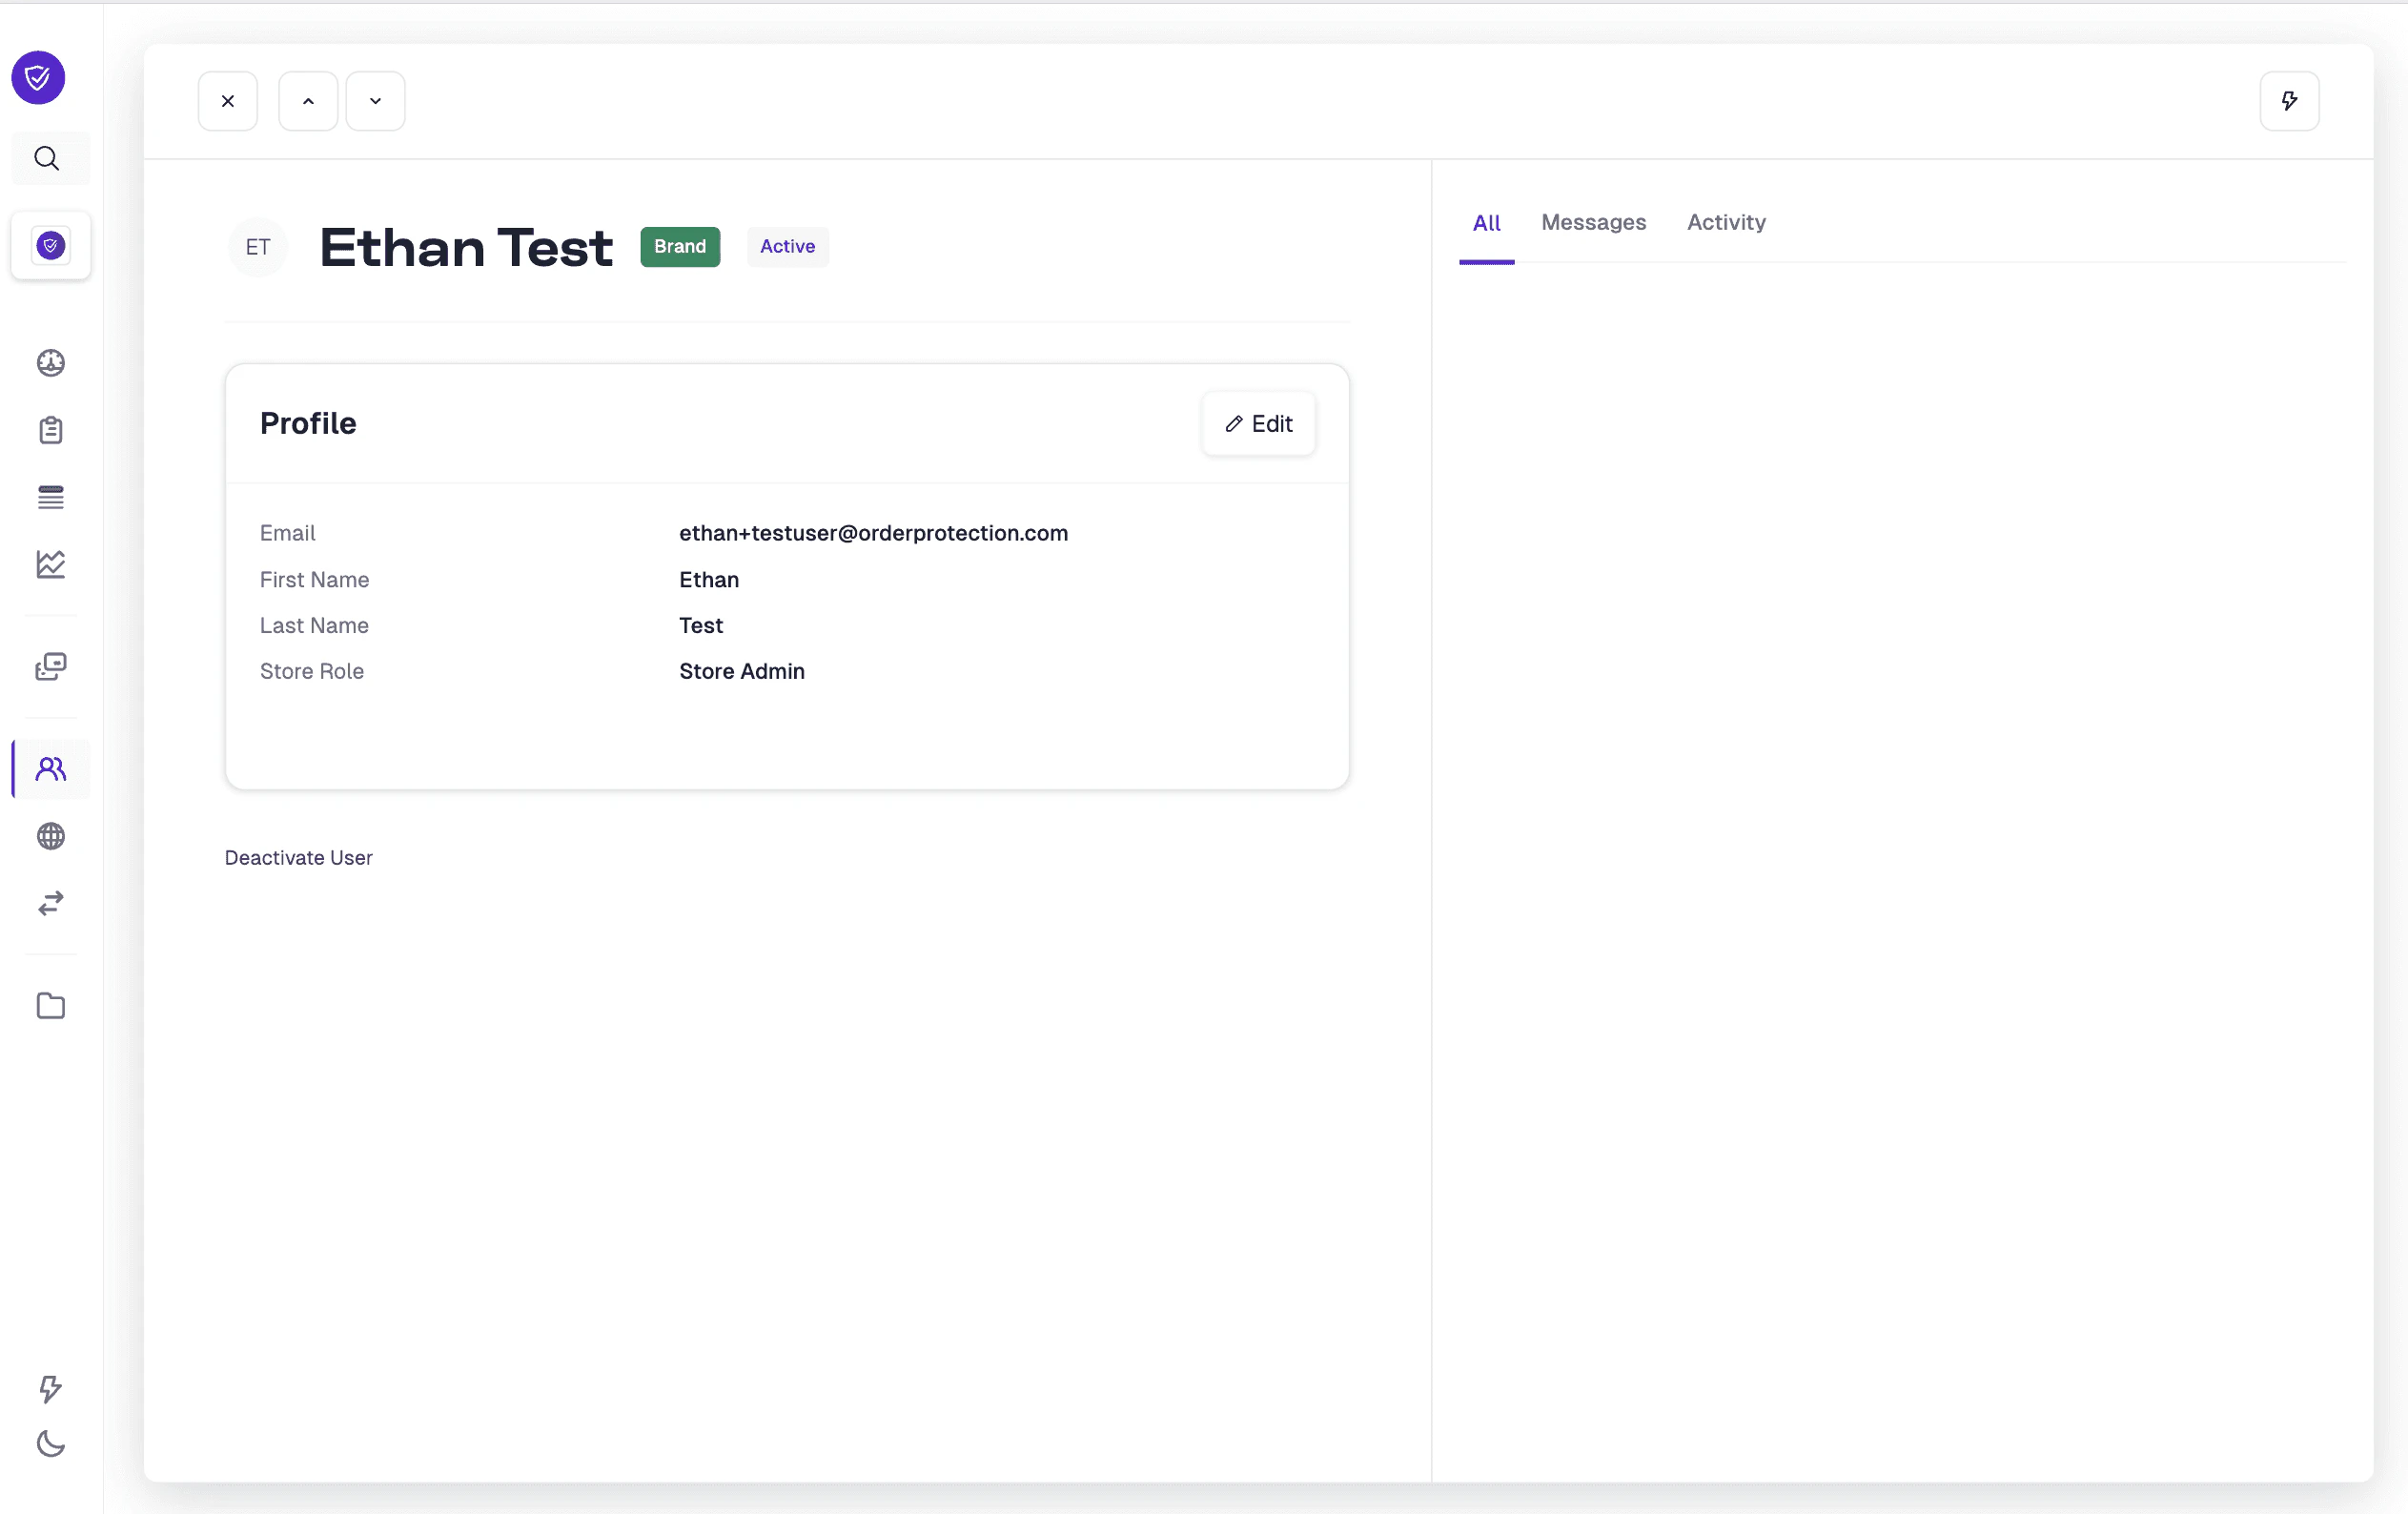
Deactivating a Team Member
Open the member's profile
In the Team Members list, click on the member’s name to access their profile.
Deactivate
Look for a Deactivate User or similar button (usually at the bottom of the profile panel). Confirm your action if prompted.