

Cart and checkout widget configurations are pre-determined in partnership with the Order Protection development team. Your team will work together with OP to set up the initial widget configuration for your store.
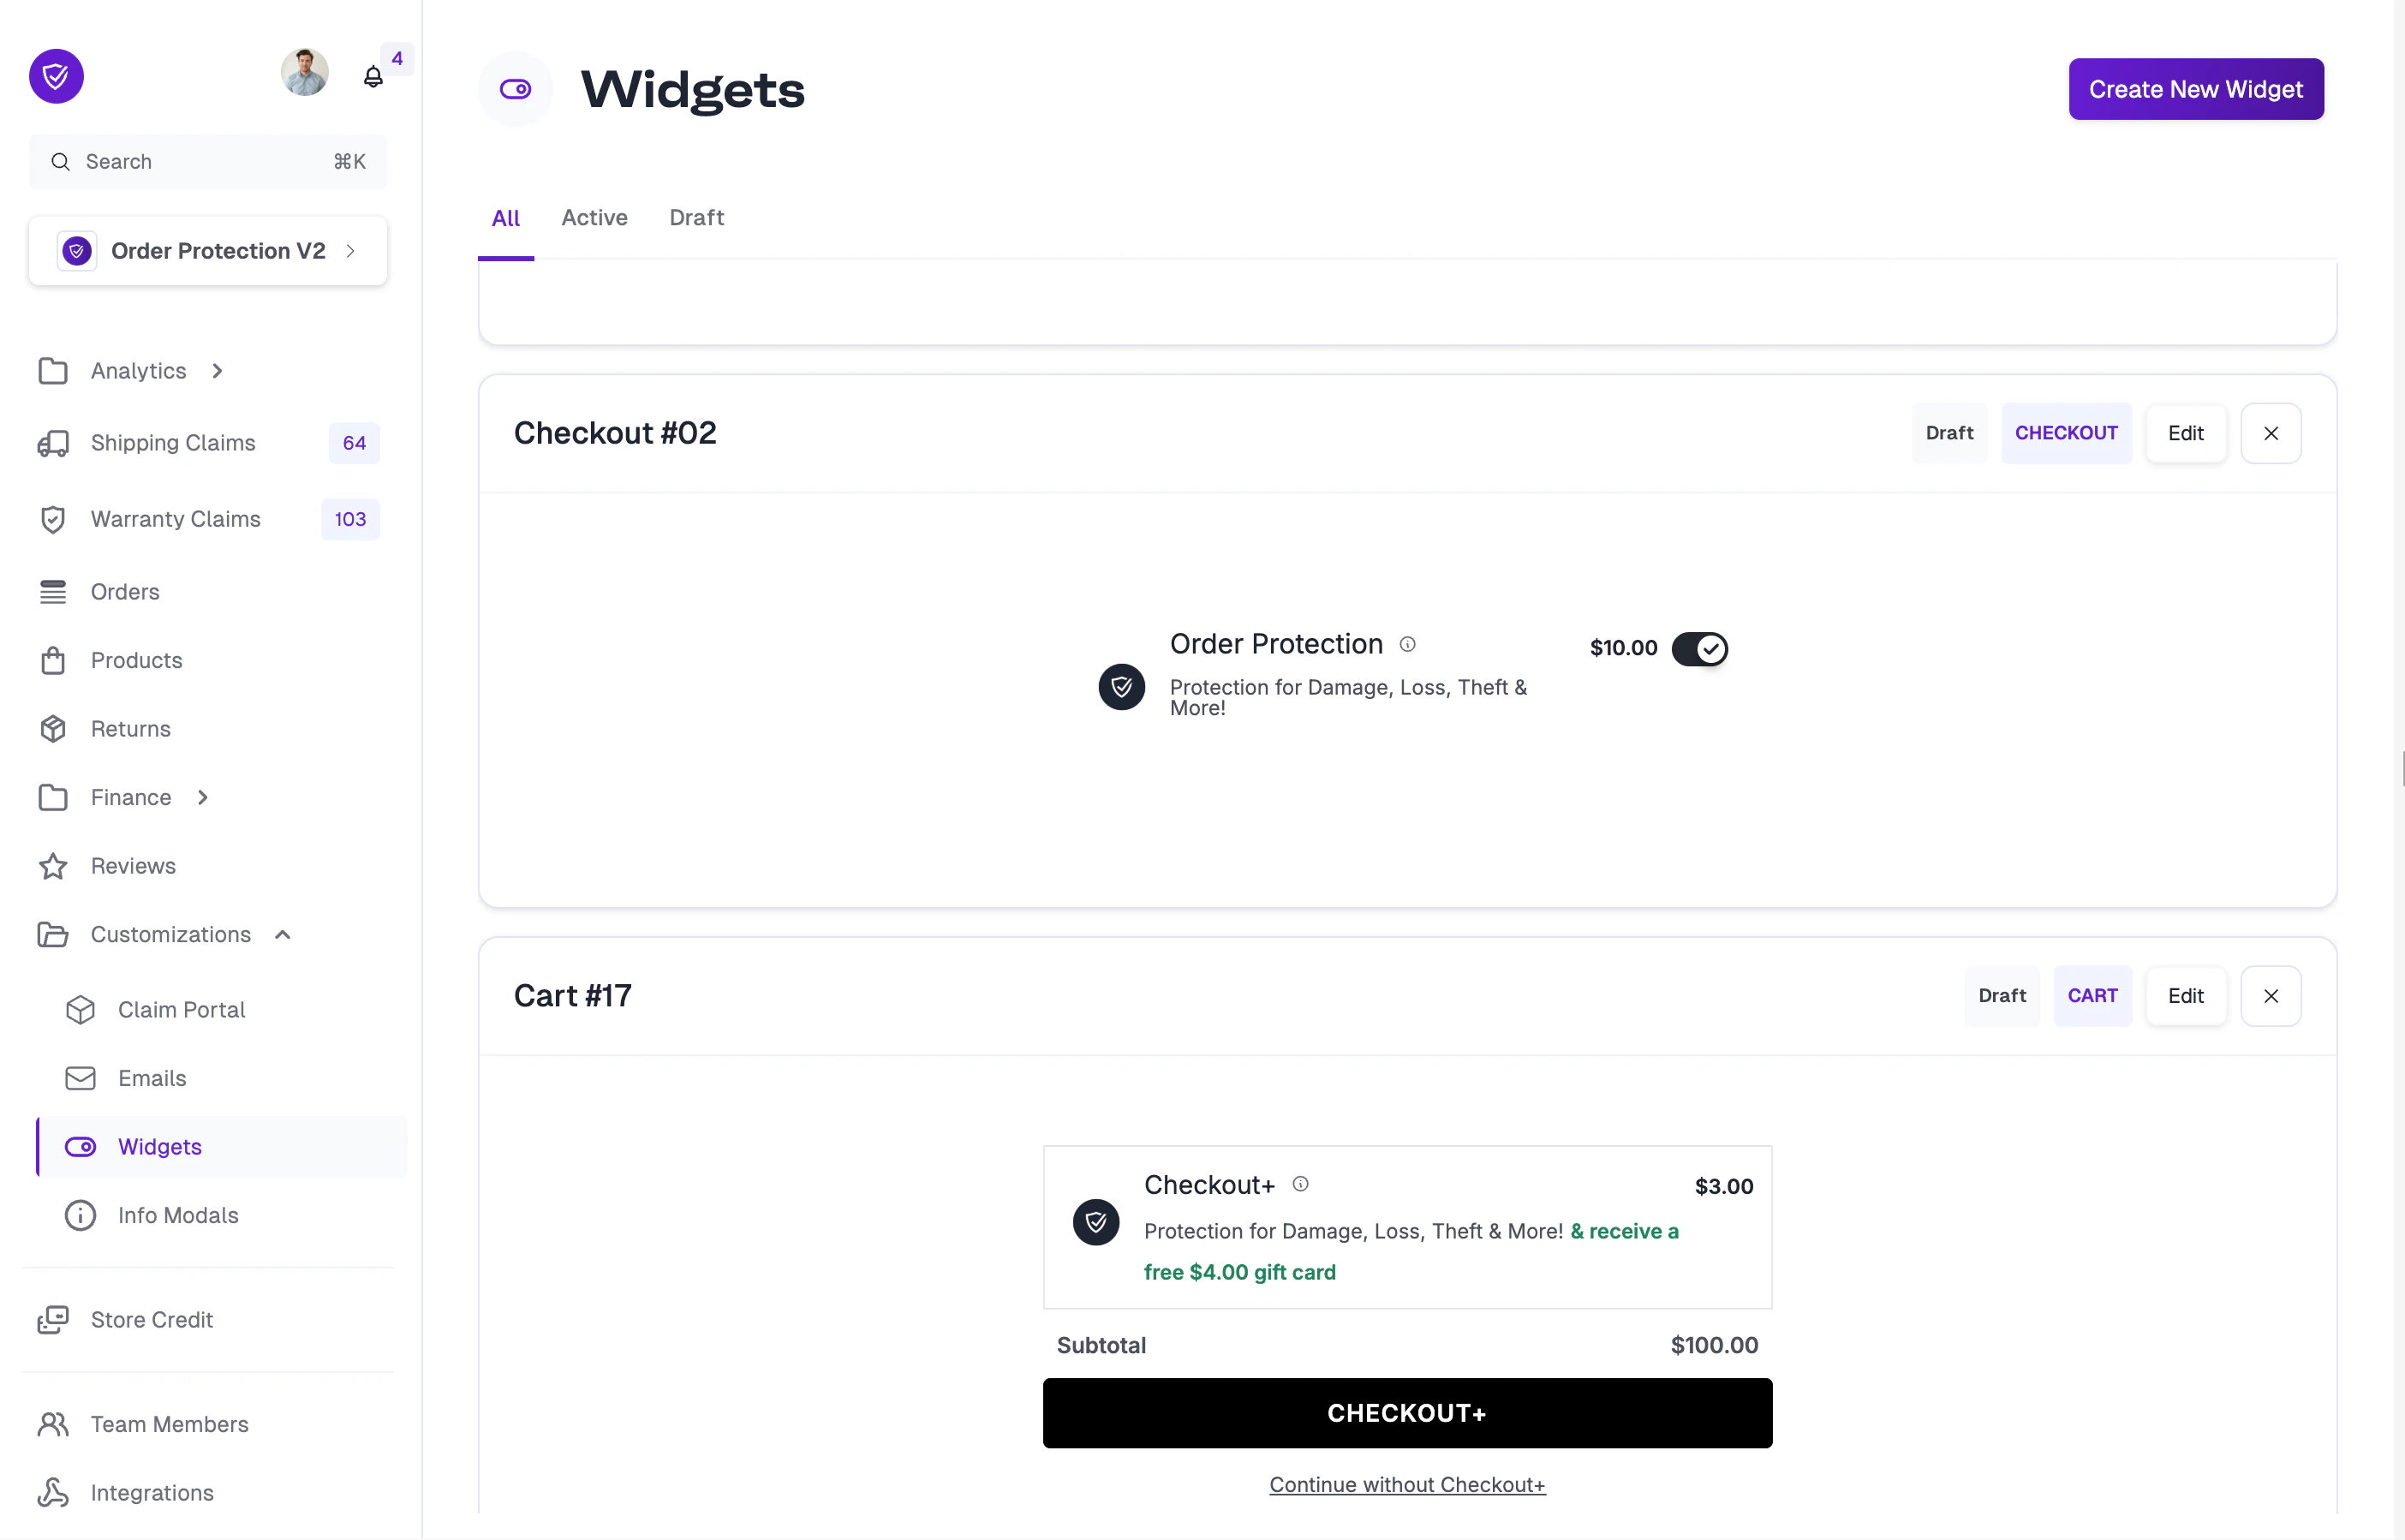
Widget Types
OrderProtection.com supports two primary widget types:
You can manage all of your widgets from the Customizations > Widgets tab. Use the All, Active, and Draft tabs to filter widgets by status.
Editing a Widget
Click Edit on any widget card to open the editor. The editor uses a split-screen layout: the Customizer sidebar on the left and a live widget preview on the right.Checkout Widget Configuration
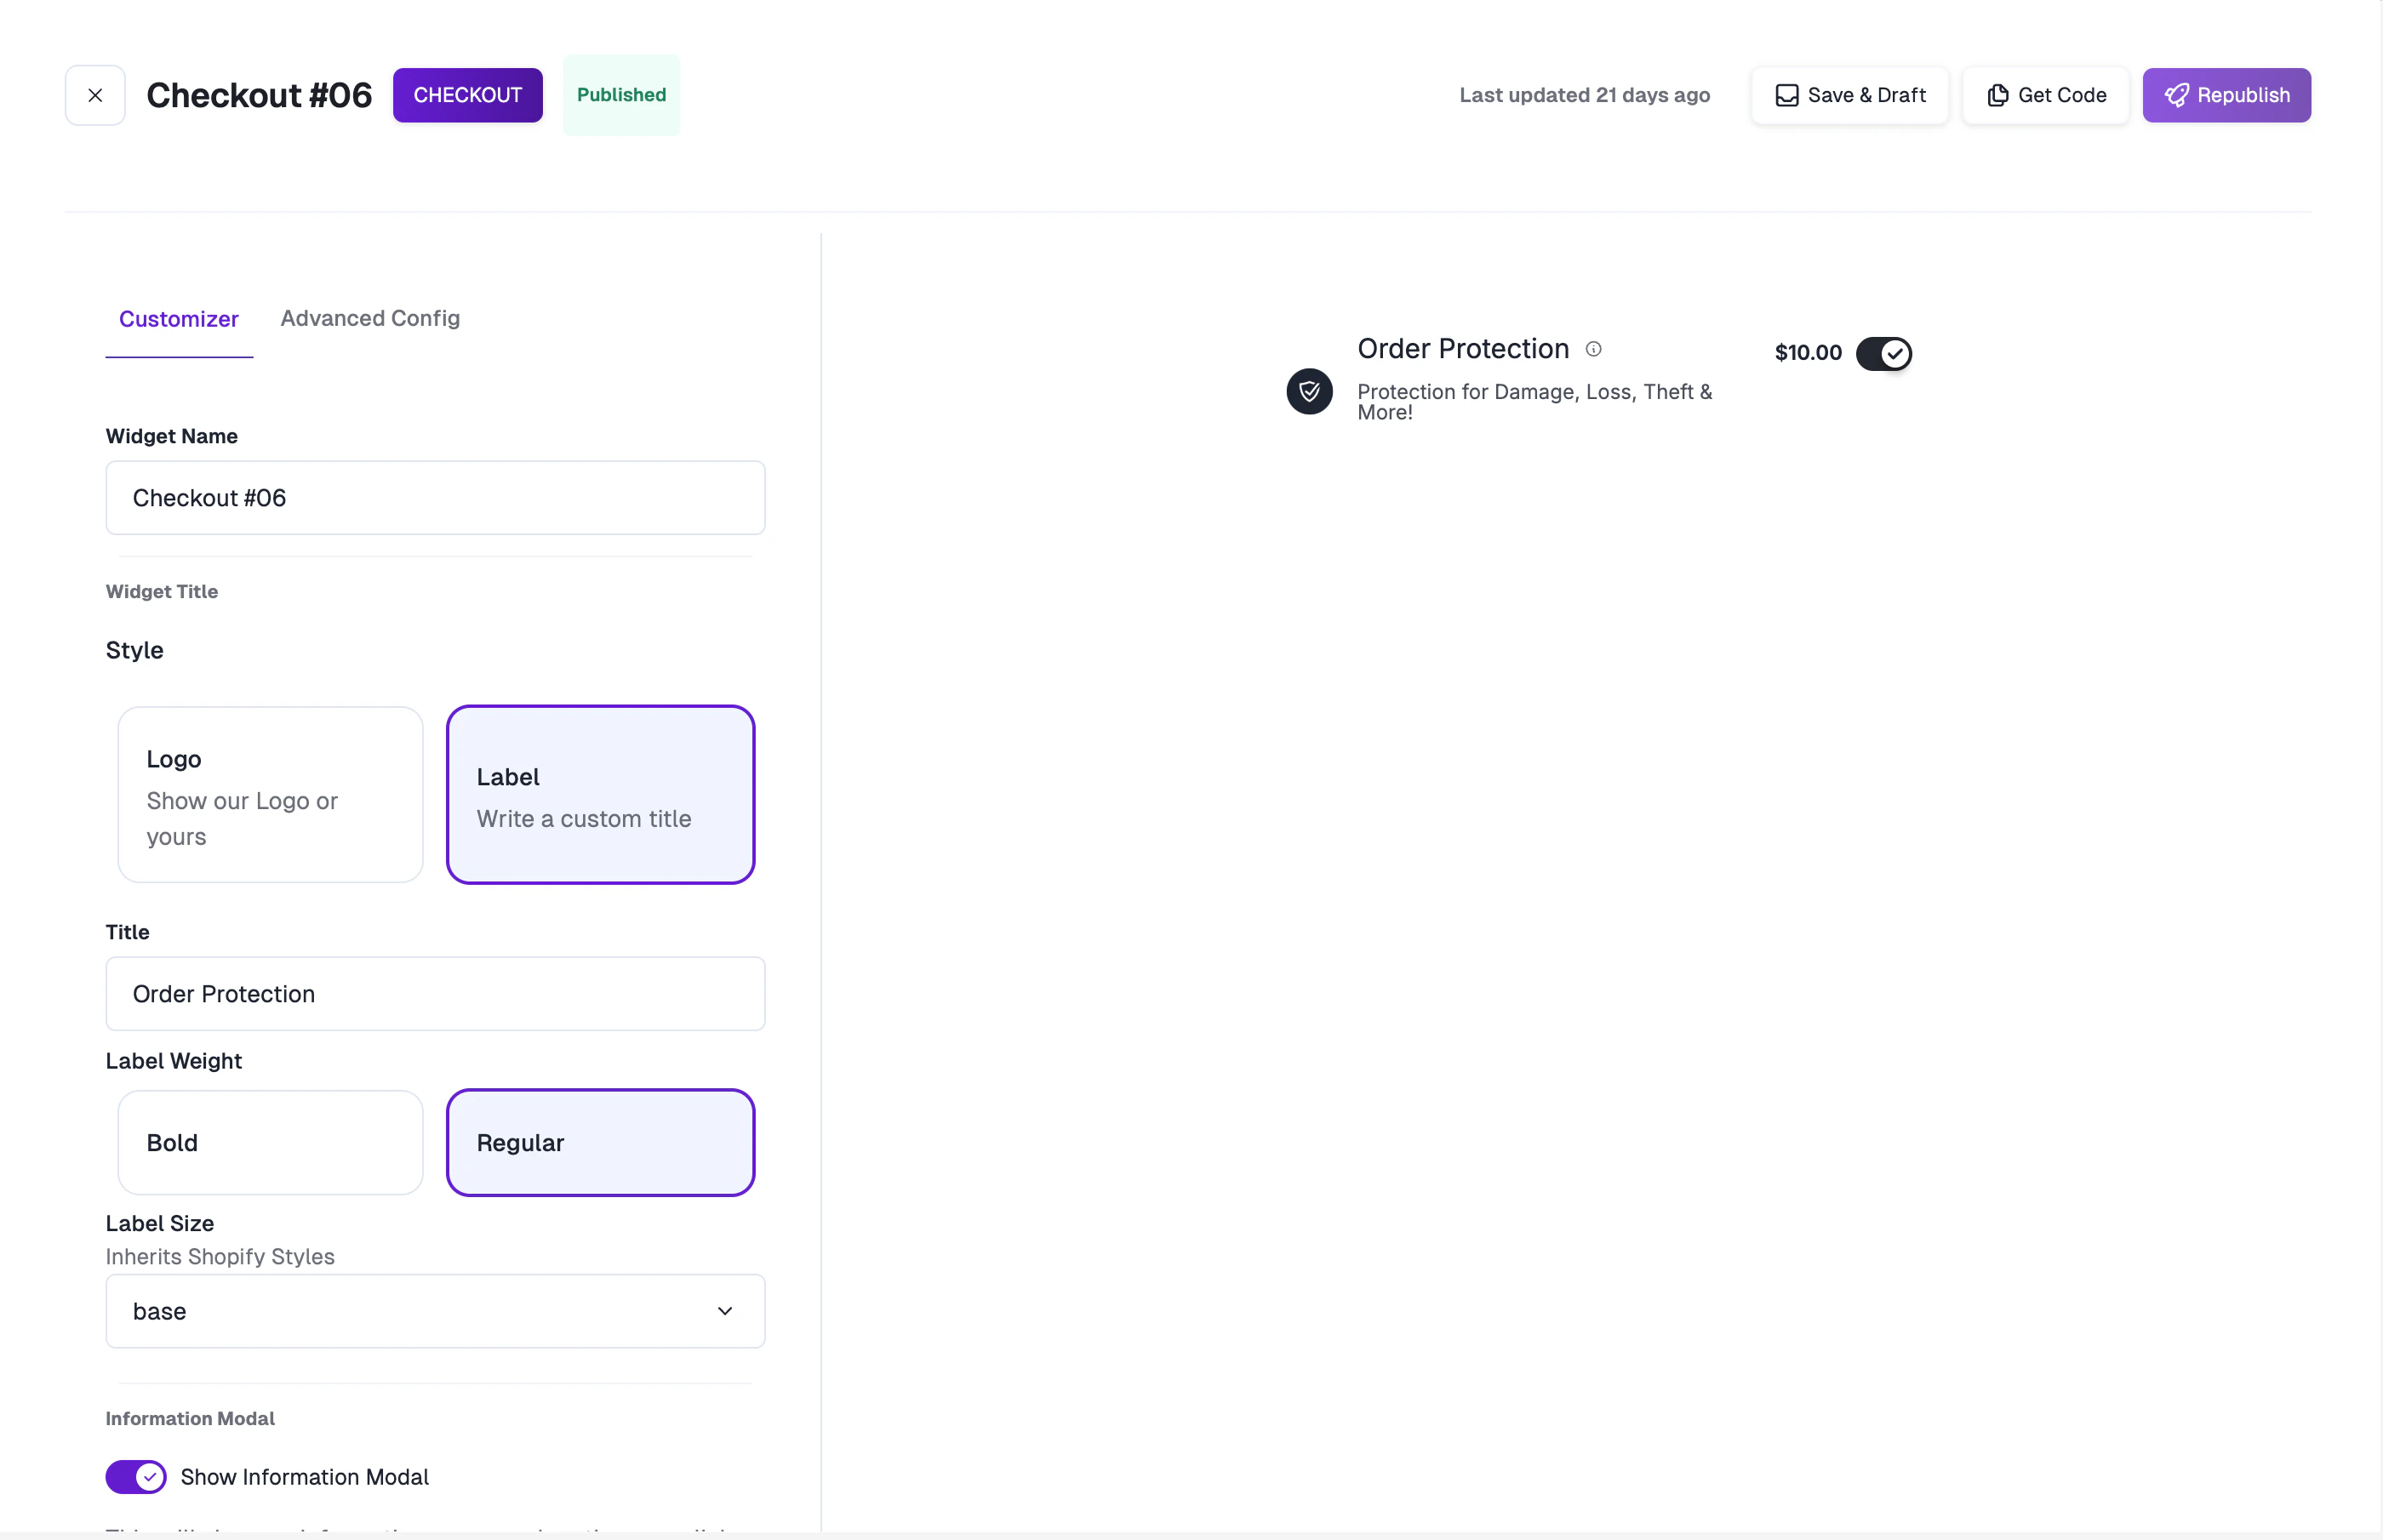
- Widget Name: A descriptive name for internal identification (e.g., “Checkout #06”).
- Widget Title Style: Choose between:
- Logo — Display your store’s logo or the Order Protection logo.
- Label — Use a custom text title with typography controls:
- Title text
- Label Weight (Bold / Regular)
- Label Size (inherits Shopify styles)
- Information Modal: Toggle to show a “What’s this?” link that opens an informational overlay. See Info Modals to configure these.
Admin Settings (checkout widgets)
Below the Customizer options, checkout widgets have an Admin Settings section that controls where and when the widget is allowed to appear. Most of these should be left at their defaults — the geography settings are the ones that matter if you ship internationally.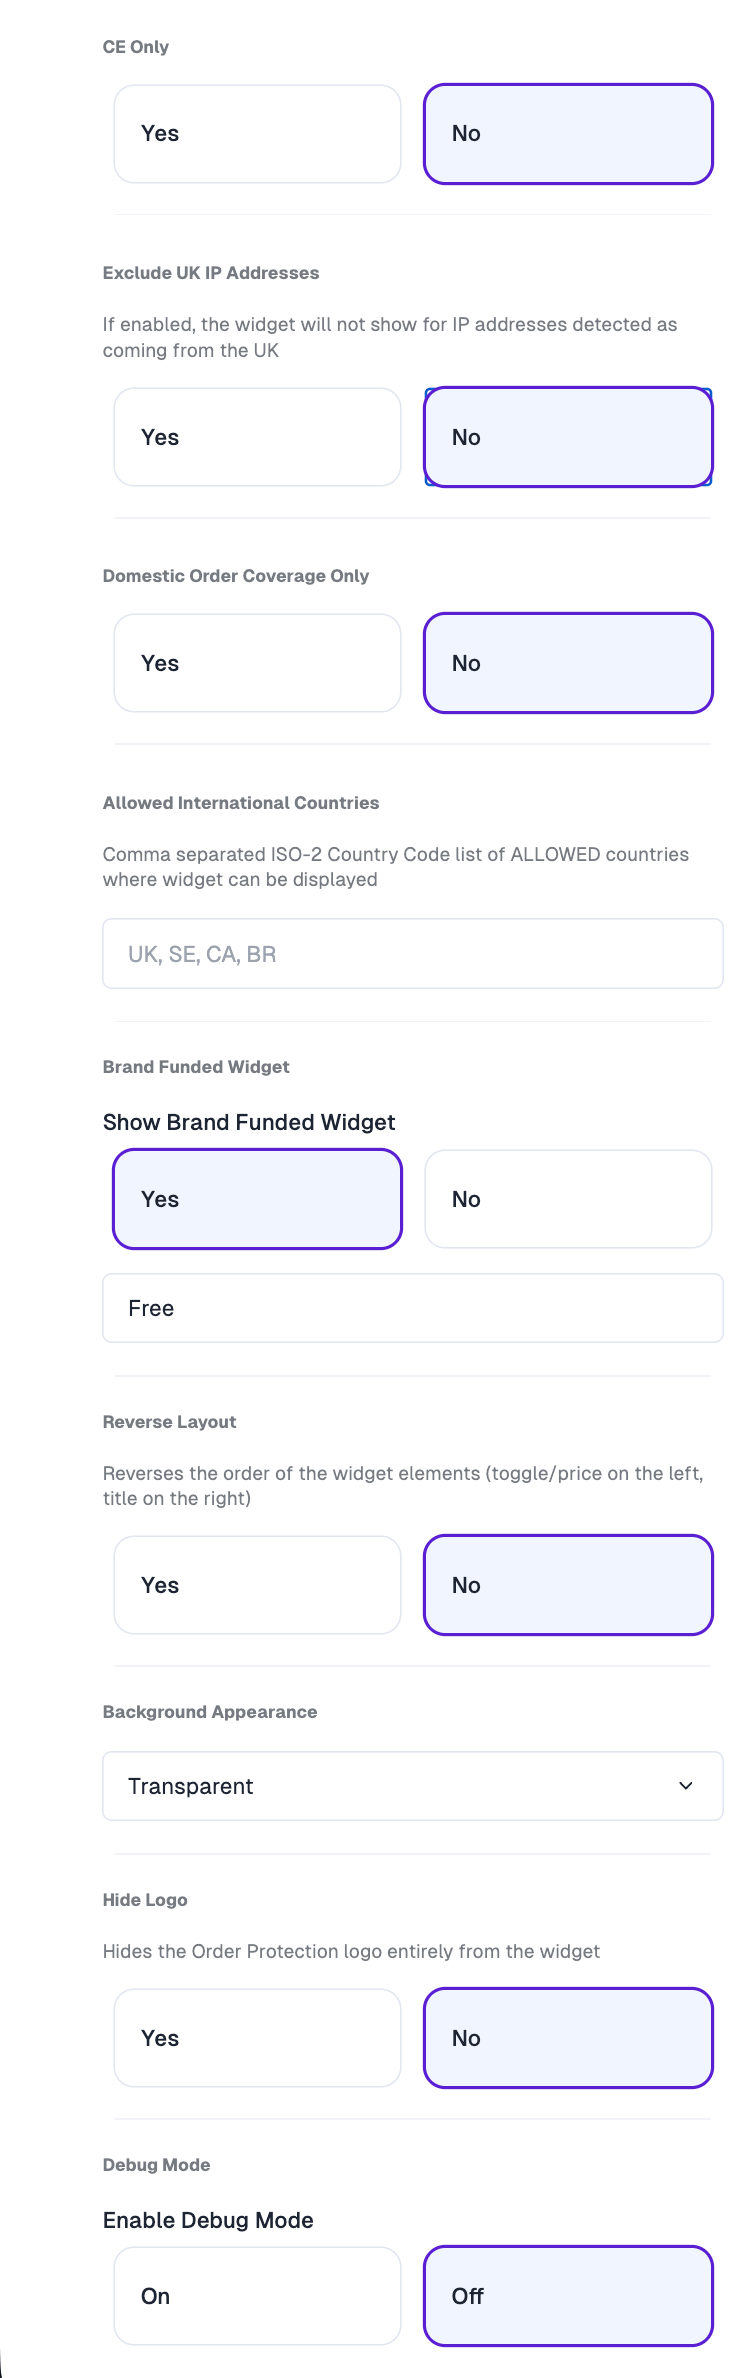
Where the widget can appear
Three settings work together to control geography, and the order they’re evaluated in matters.Allowed International Countries only takes effect when Domestic Order Coverage Only is set to Yes. With Domestic Order Coverage Only set to No, every country is already allowed and the list is ignored entirely. Think of the pairing as “US only, plus these” — not as a filter applied to worldwide selling.
Selling to the UK
Leave Exclude UK IP Addresses set to No. Setting it to Yes blocks UK customers outright, and it’s applied before the allowed-countries list — so addingGB to Allowed International Countries will not override it.
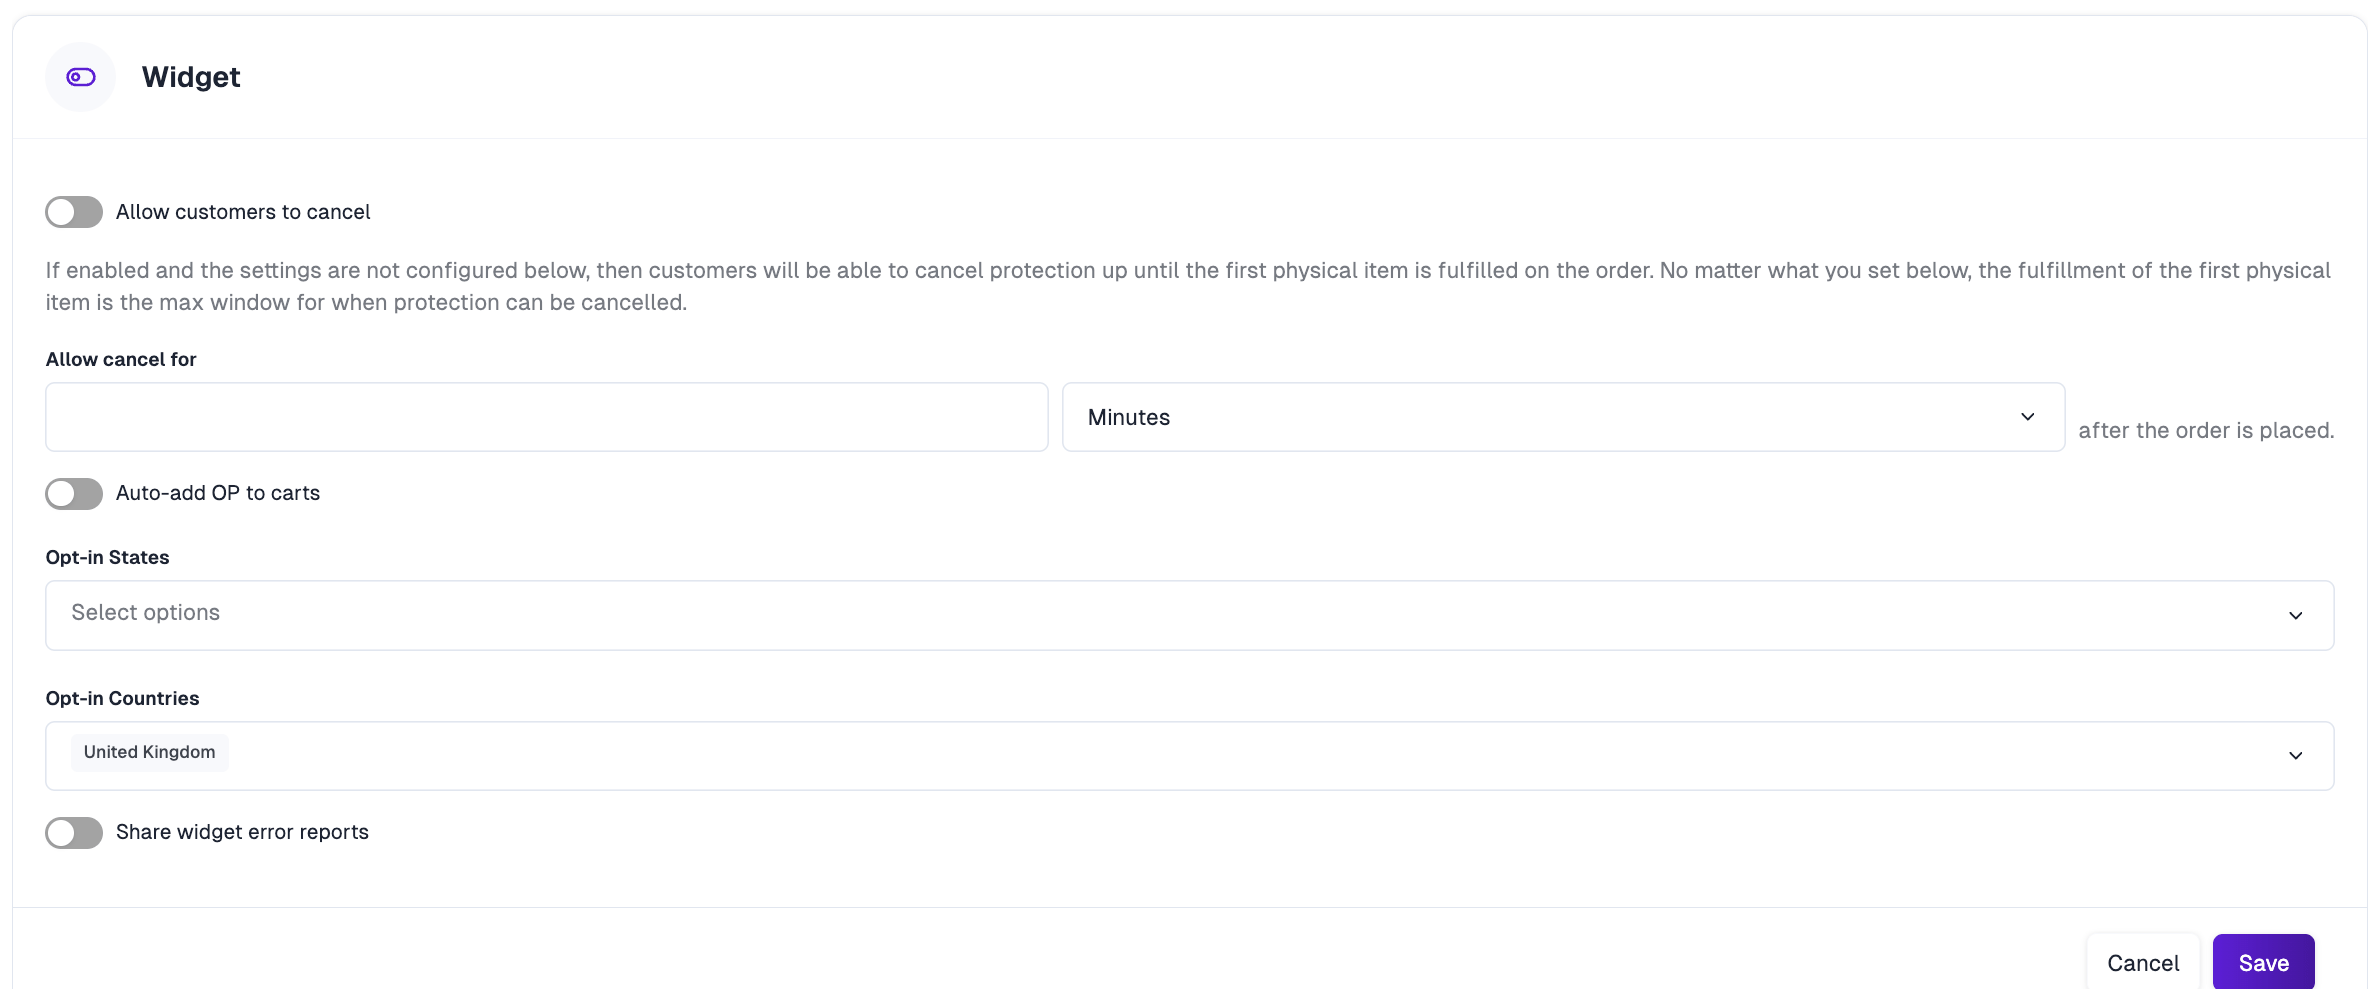
Instead, control the UK from Settings → Policies, in the Widget block, using Opt-in Countries. The UK is included there by default, which presents Order Protection to UK customers as an opt-in choice rather than auto-adding it.
Display and behavior
Checkout eligibility
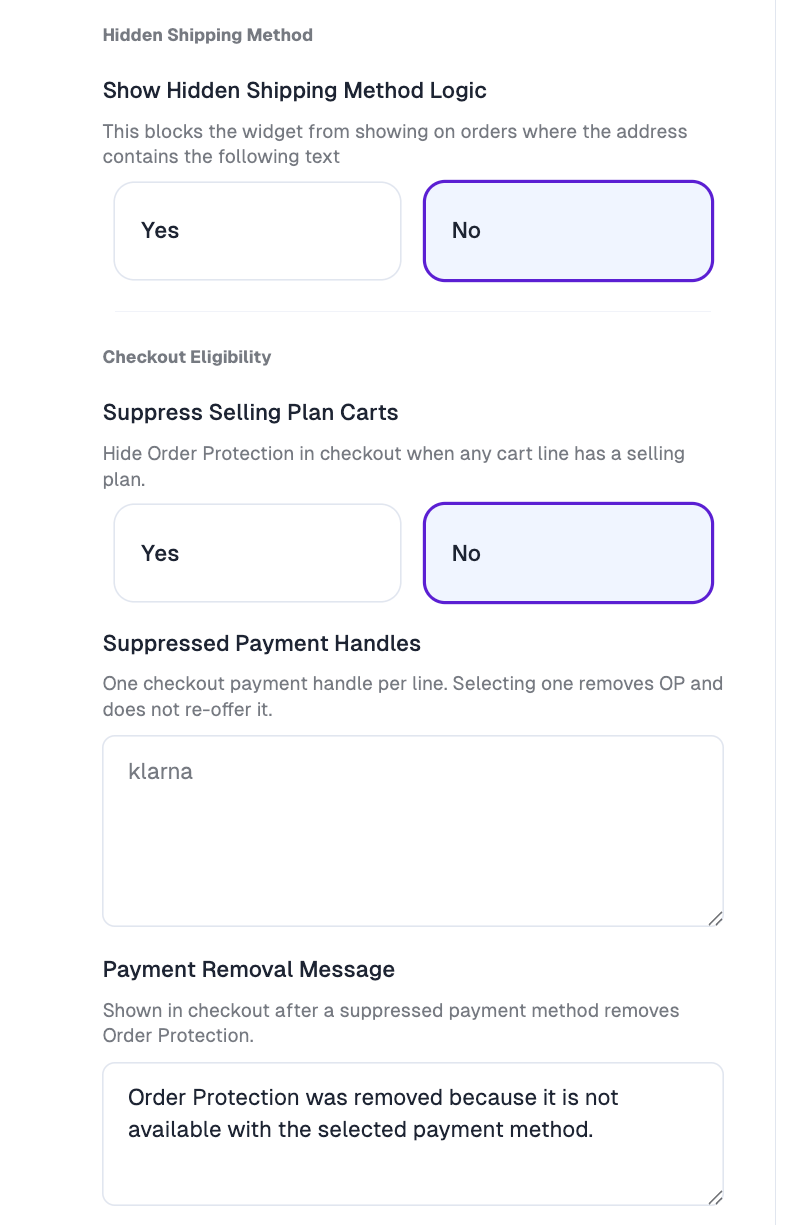
Payment handles aren’t a fixed list — the exact value can differ per store. To find the right one, turn Enable Debug Mode on, run a test checkout, select the payment method, and read the handle from the browser console. Then turn debug mode back off.
Cart Widget Configuration
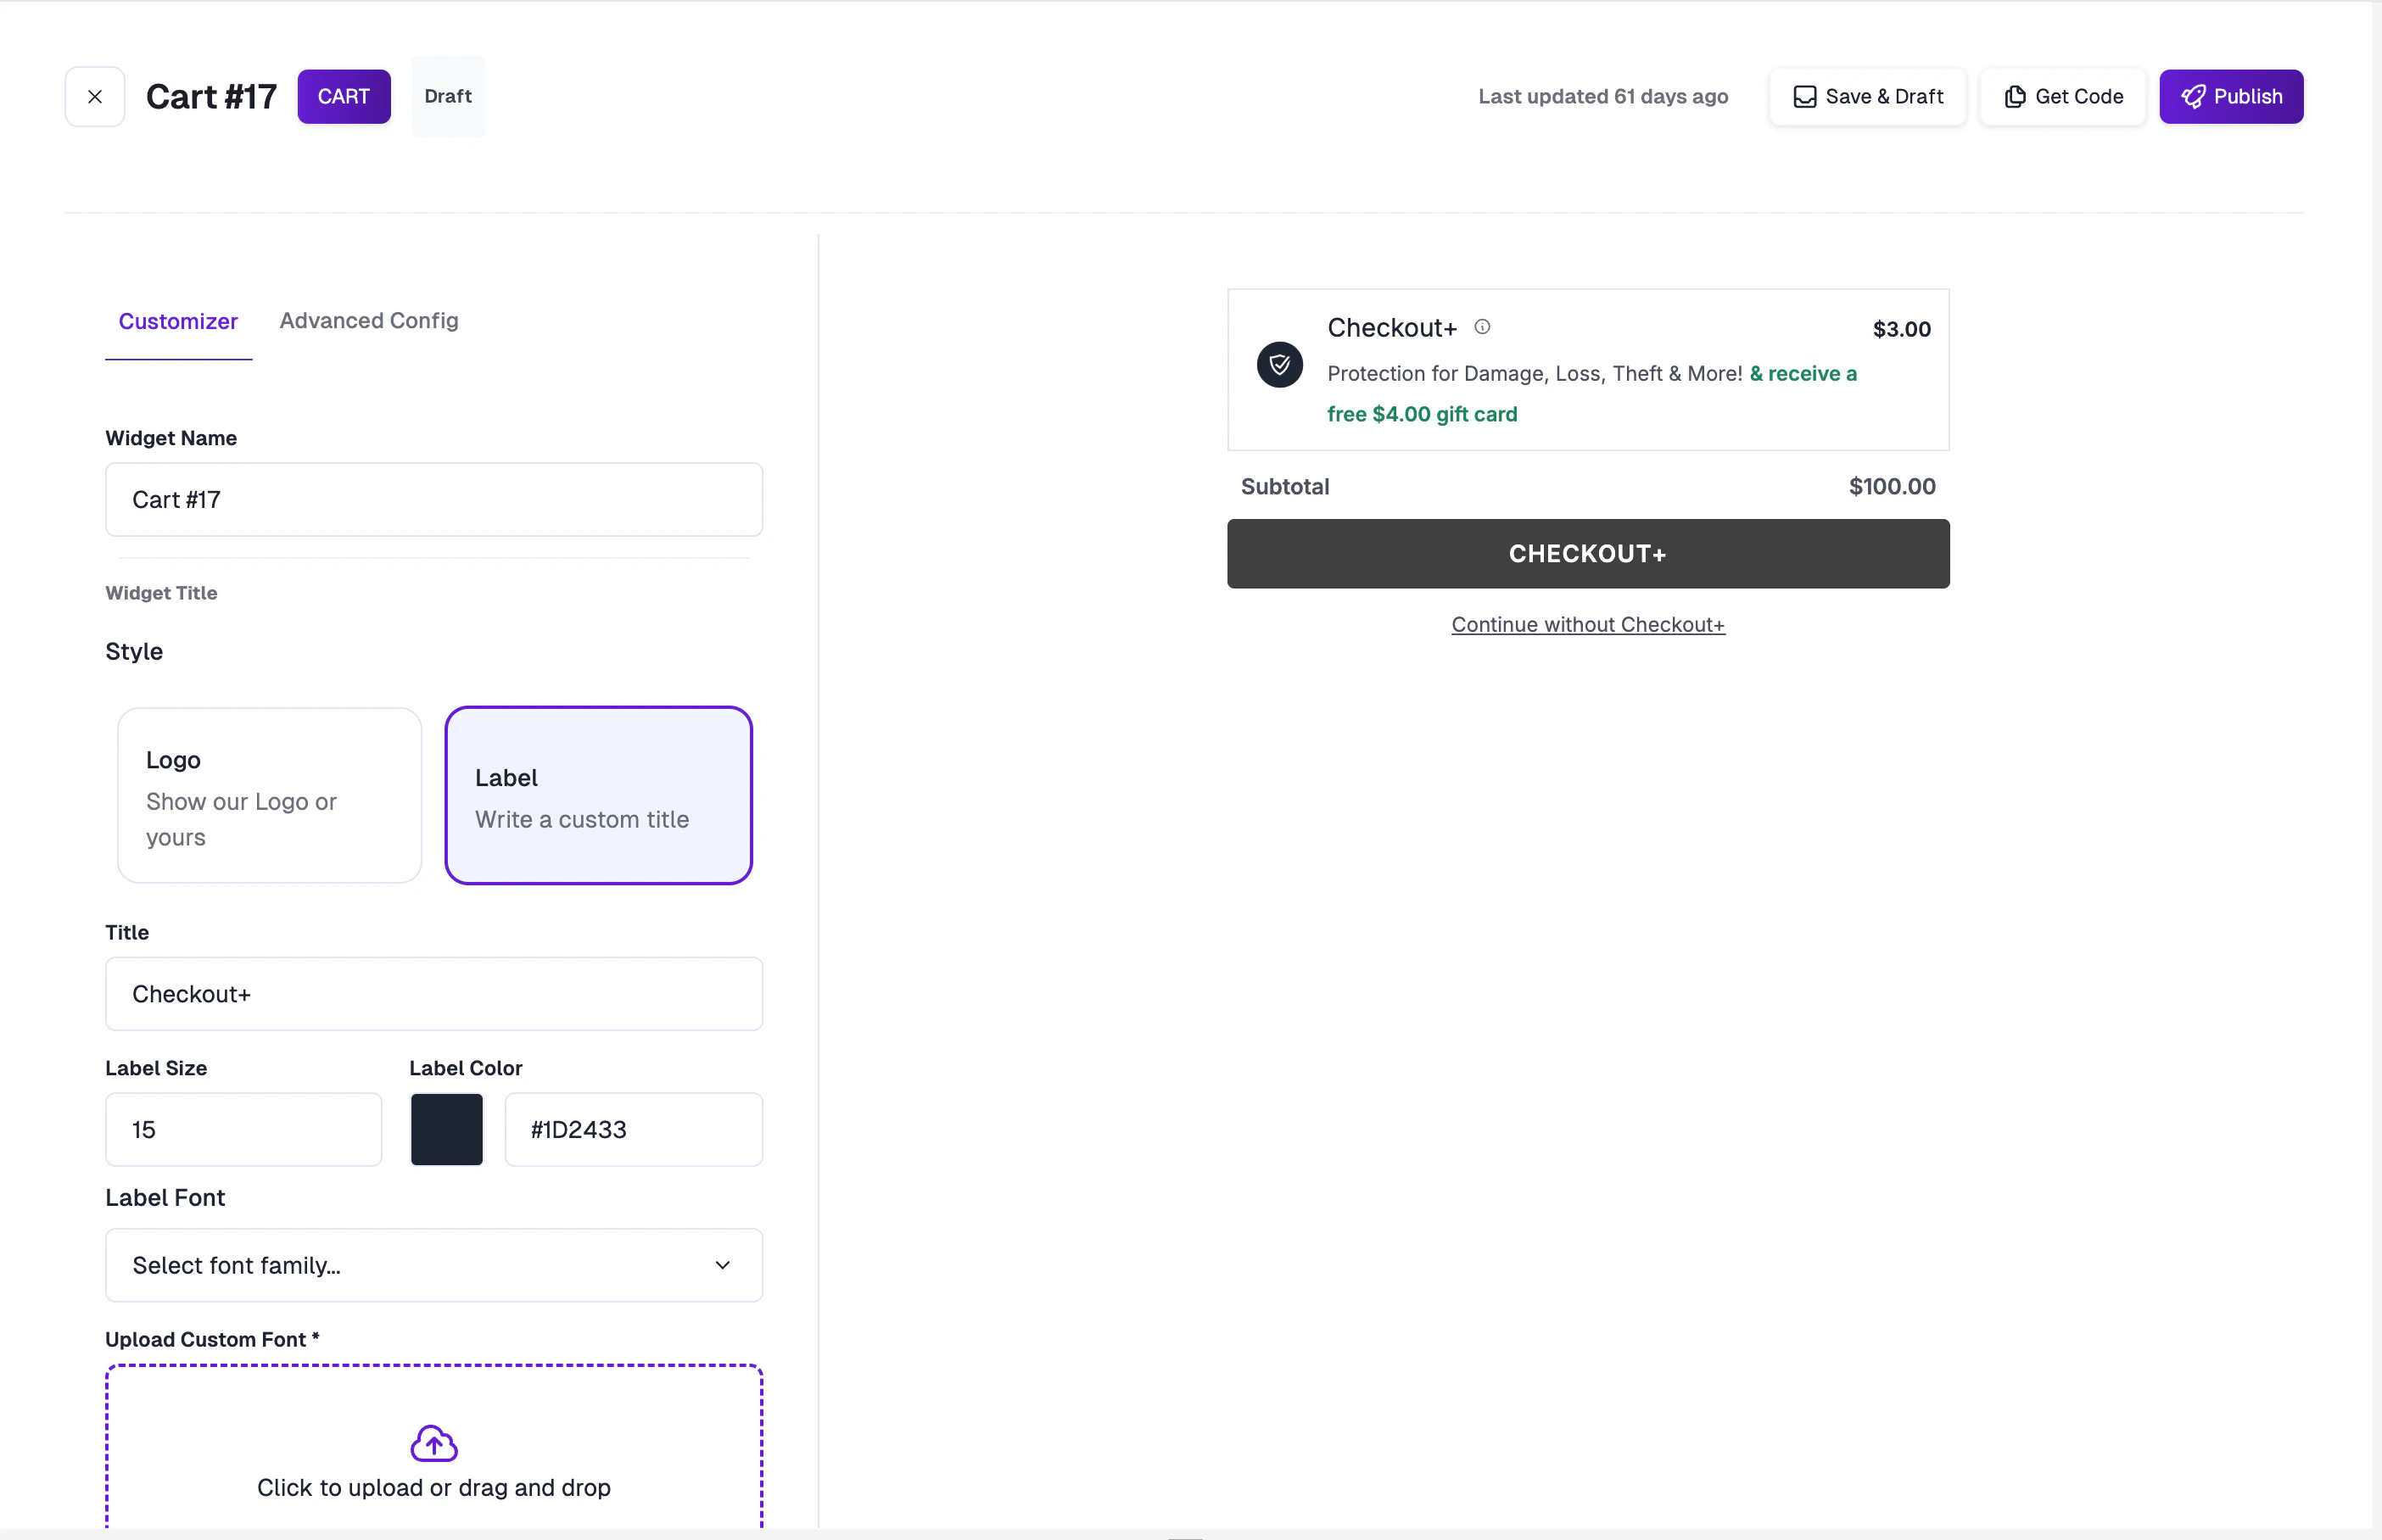
- Label Size: Set the font size in pixels.
- Label Color: Choose a custom color via the color picker.
- Label Font: Select from available fonts or upload a custom WOFF font file.
Advanced Configuration
For cart widgets only, the Advanced Config tab provides a JSON editor for direct manipulation of the full widget configuration. Import your config by pasting it into the editor, or click Open Full Screen for an expanded editing view.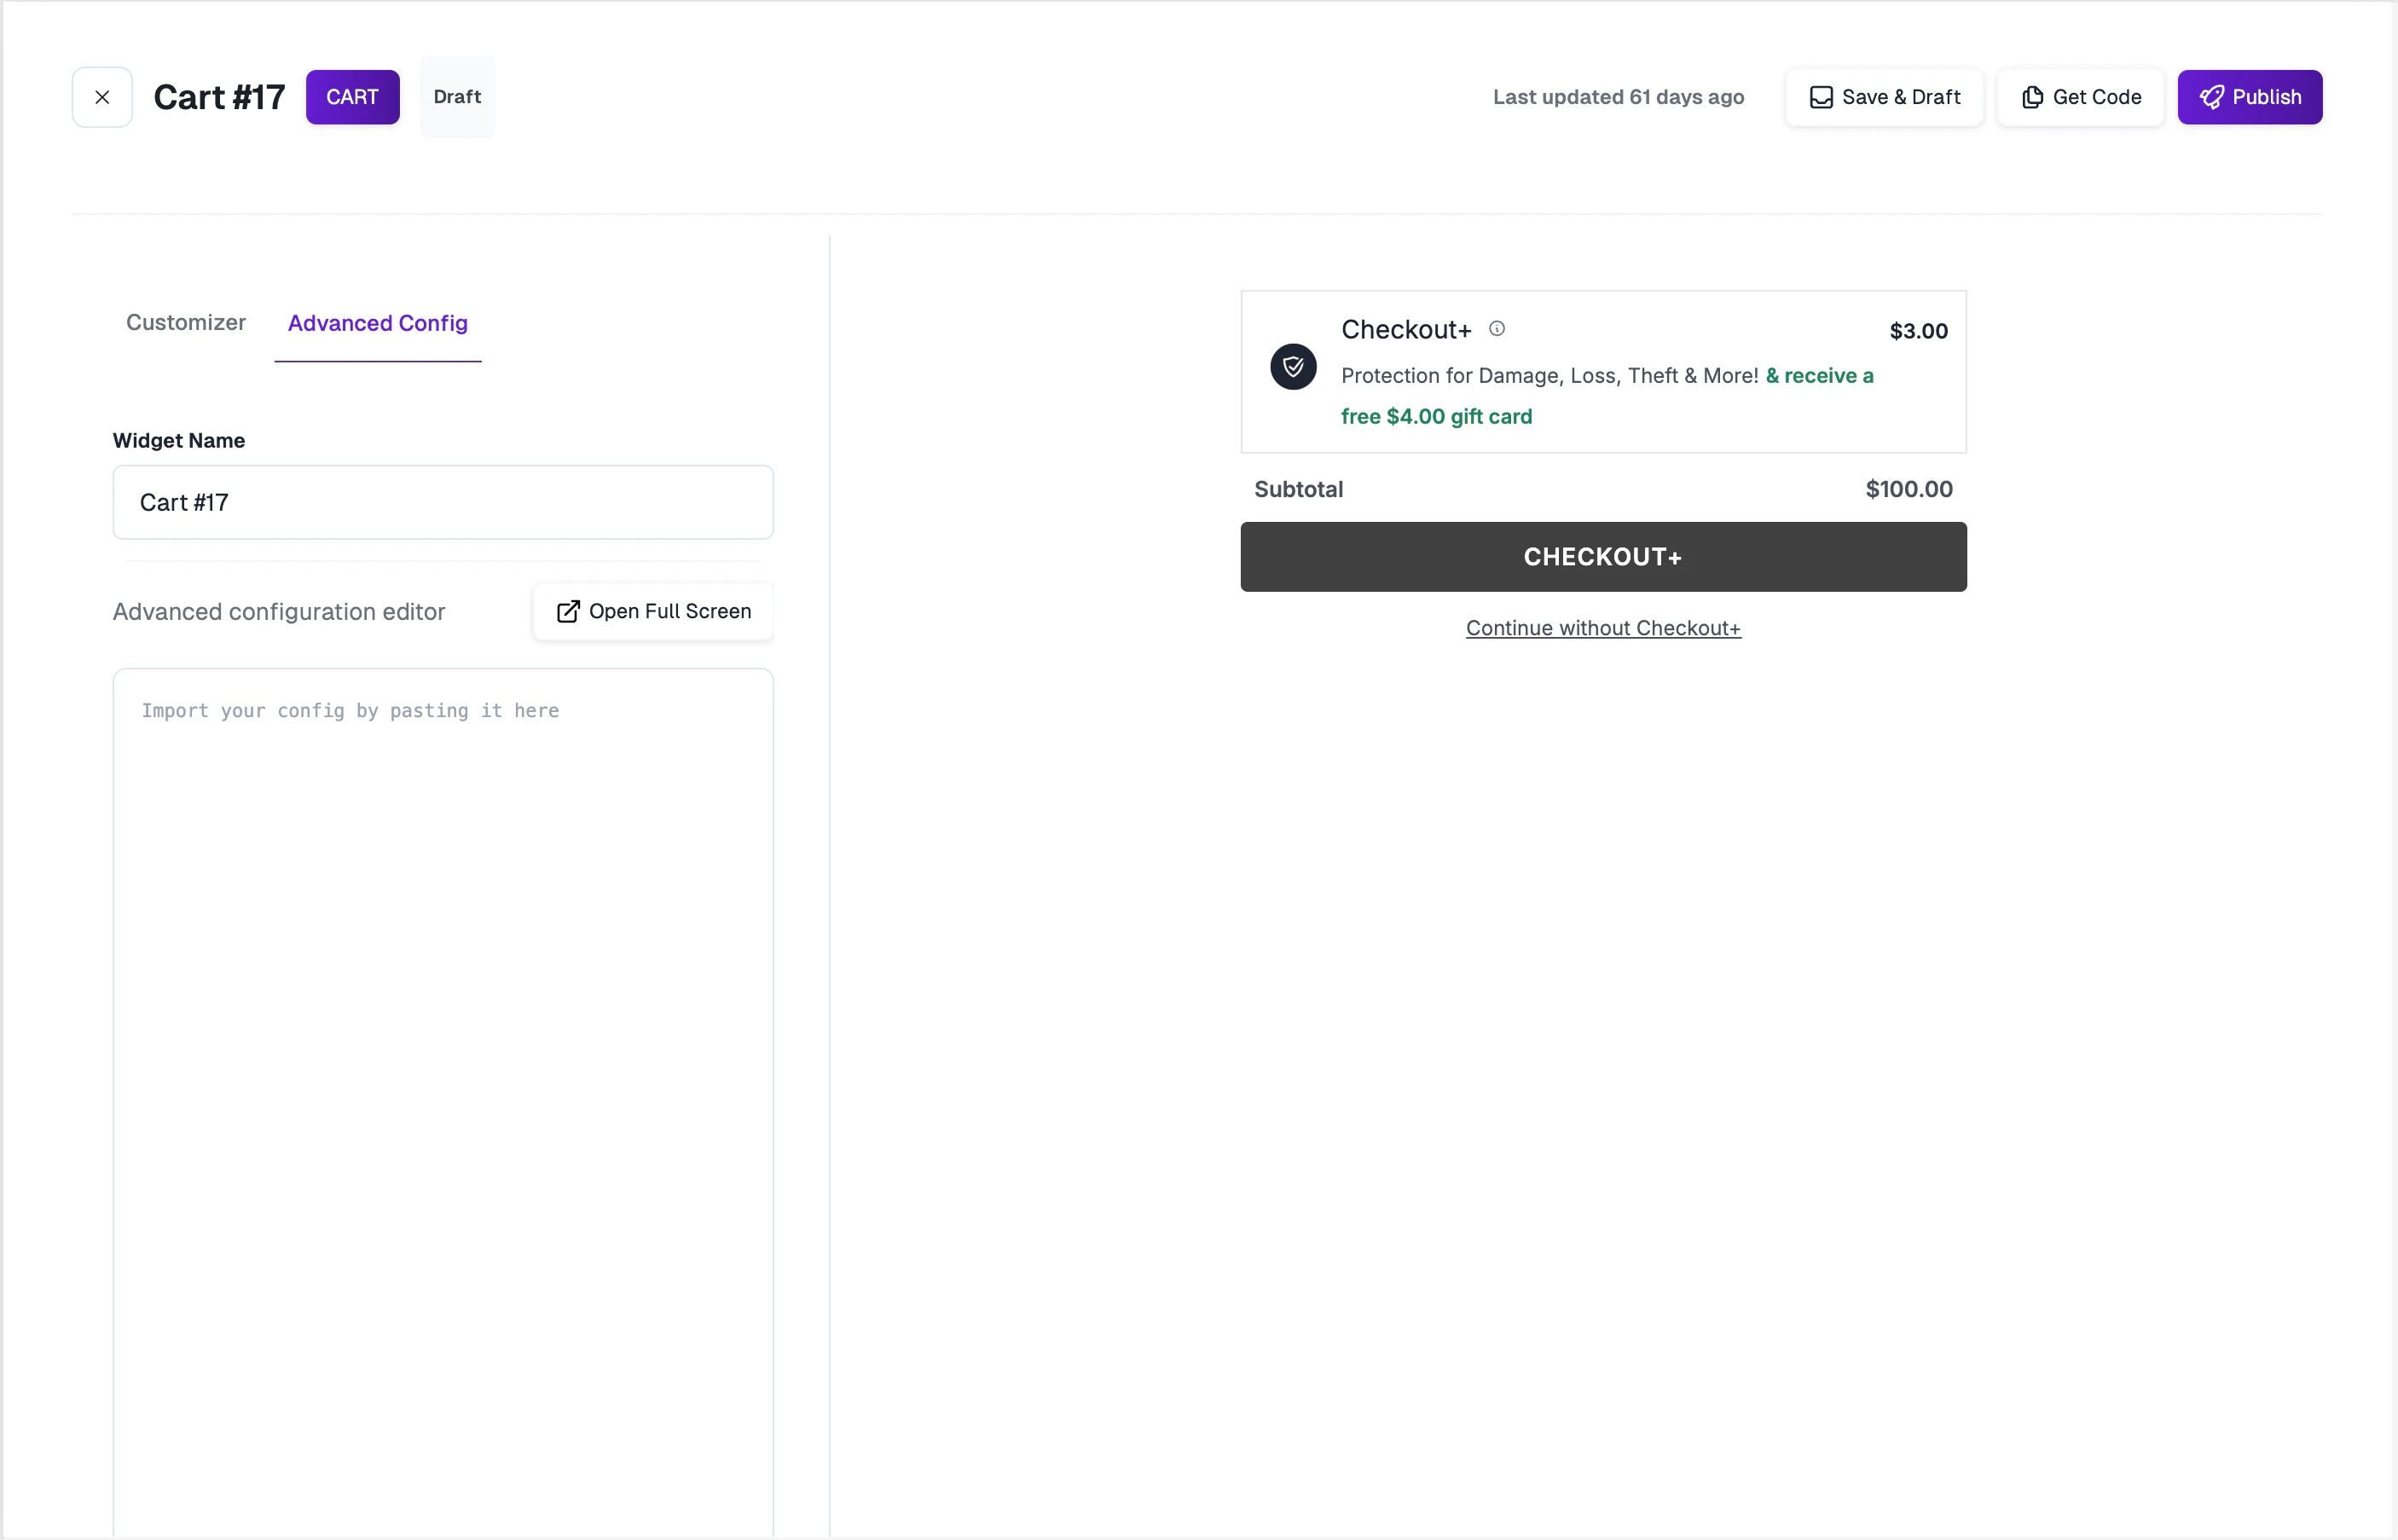
Getting the Widget Code
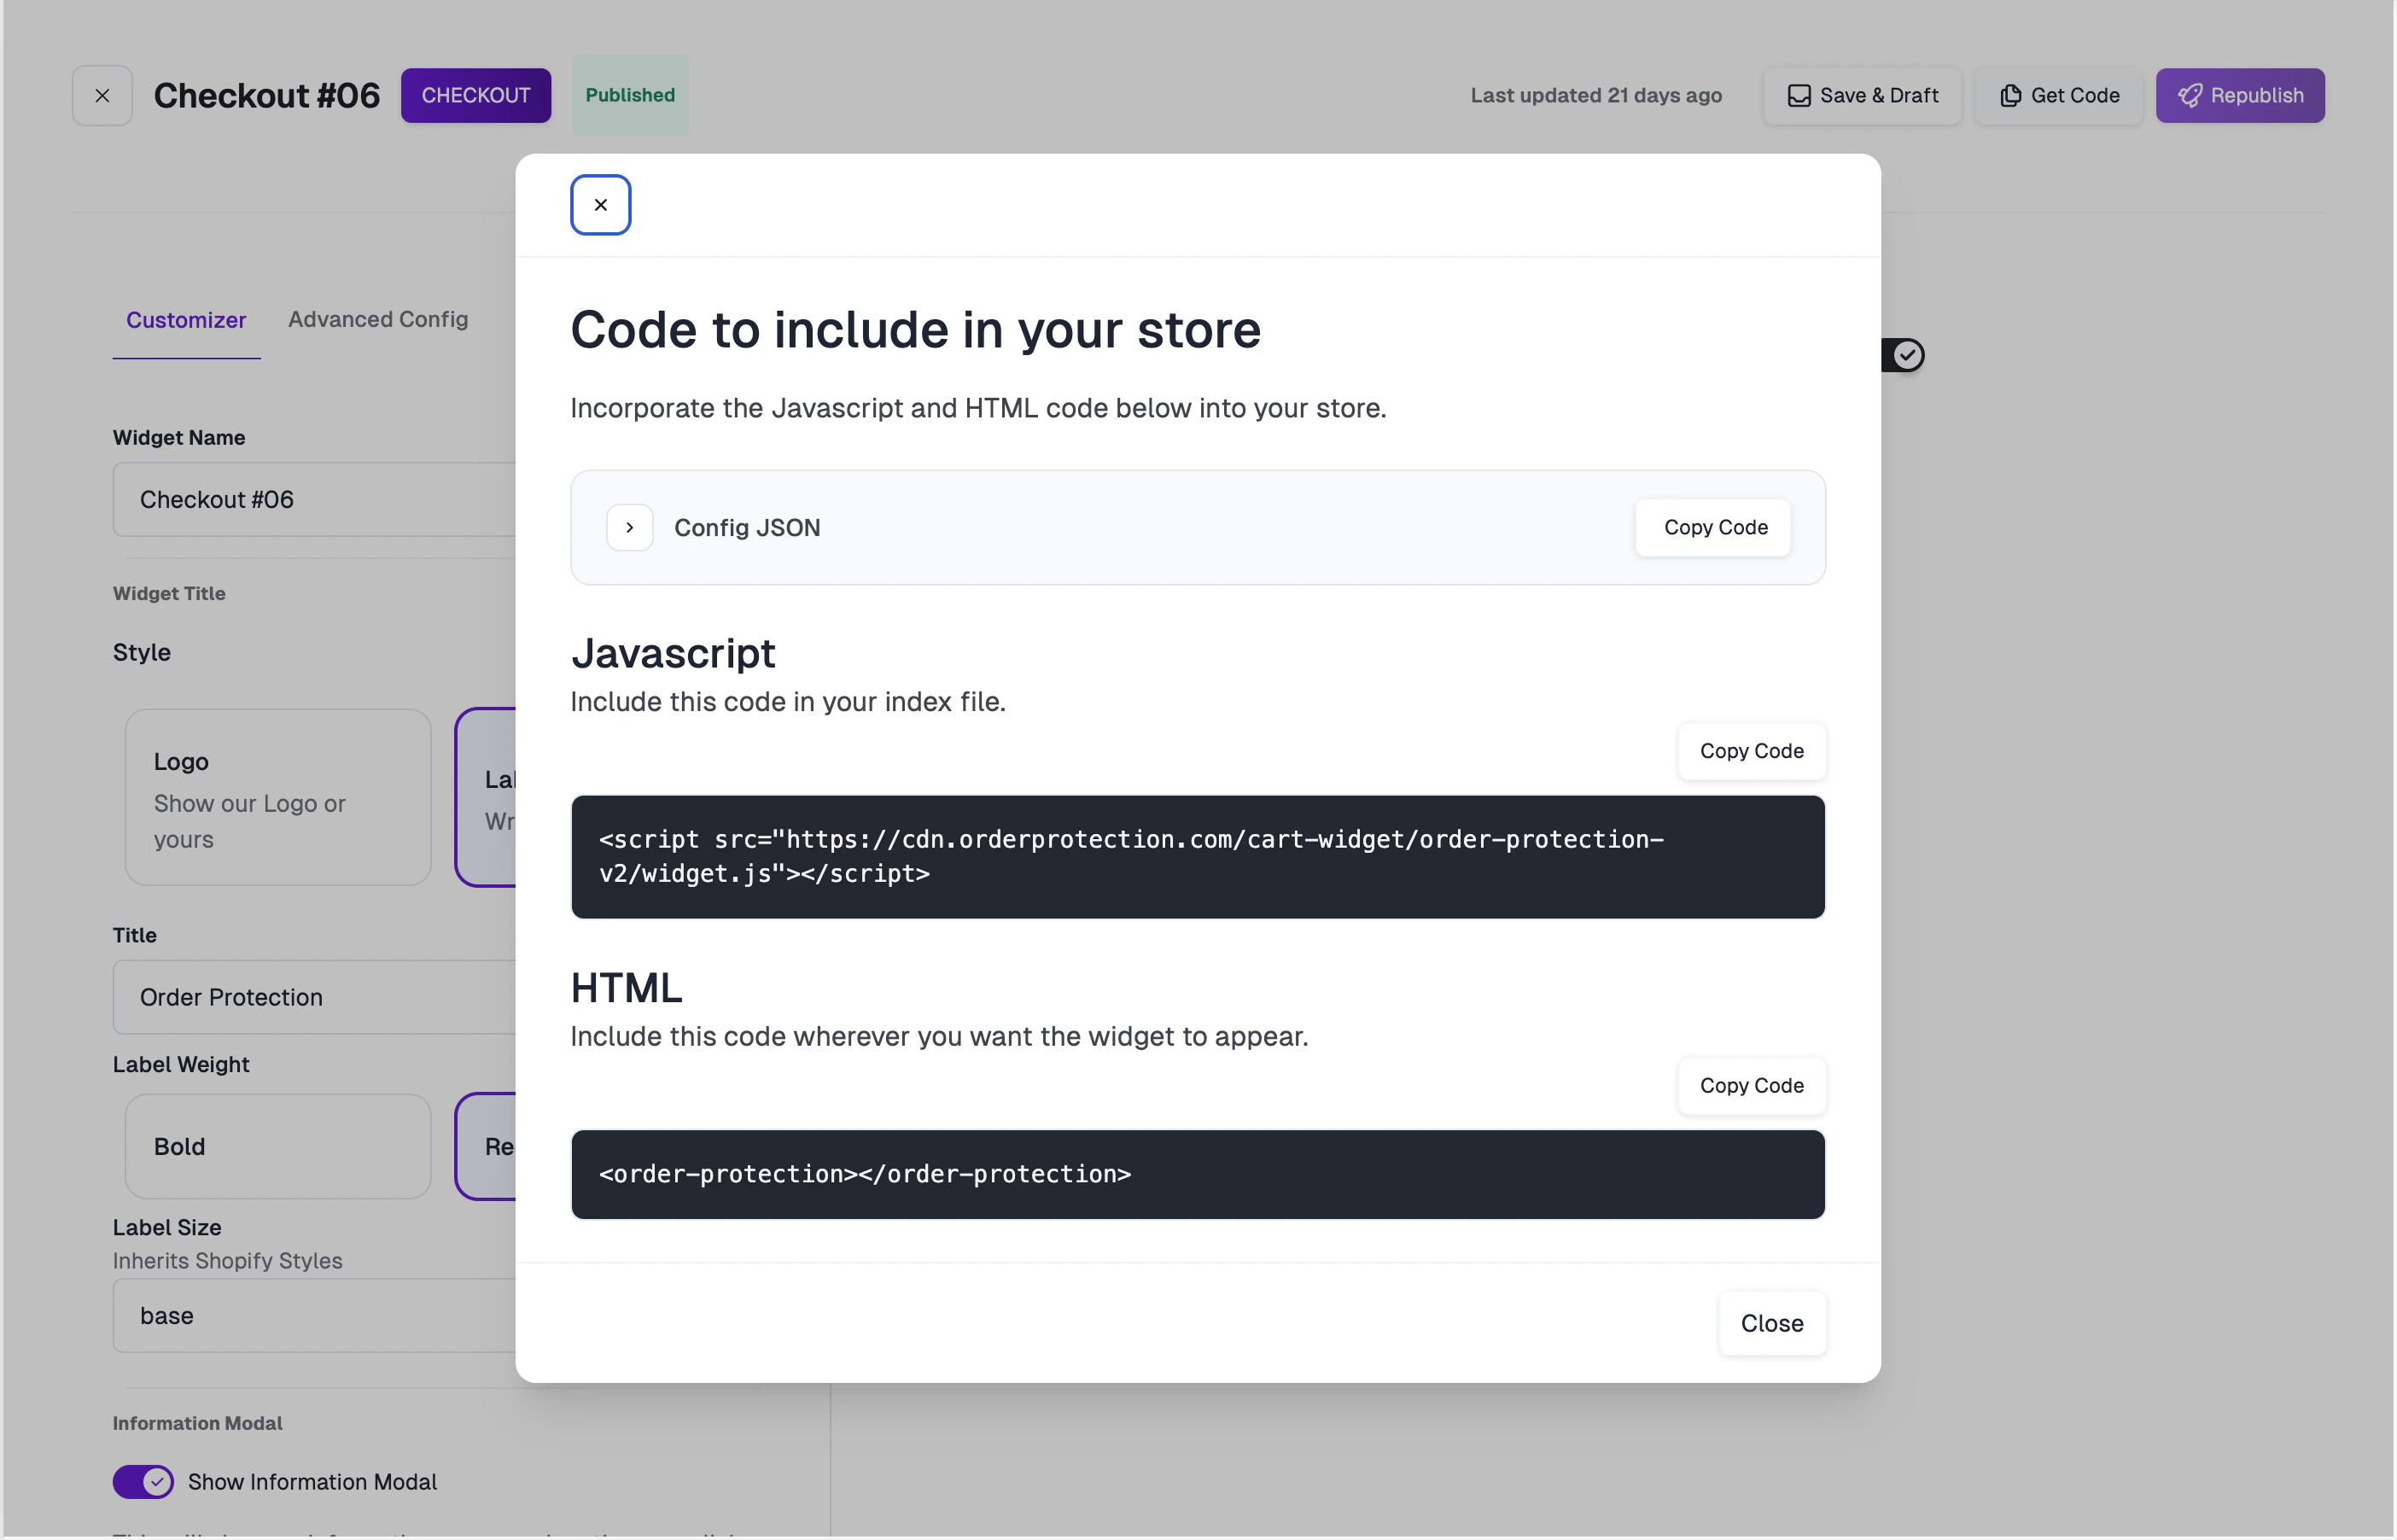
After publishing your widget, click Get Code to view the embed code for your store. The modal provides:- Config JSON — Your widget’s configuration object.
- JavaScript — A
<script>tag to include in your site’s index file. - HTML — The
<order-protection>web component tag to place wherever you want the widget to appear.
Publishing and Drafts
You can manage multiple widgets (e.g., different designs for cart vs. checkout) and switch between Active and Draft statuses at any time.