Why use Product Taxonomy
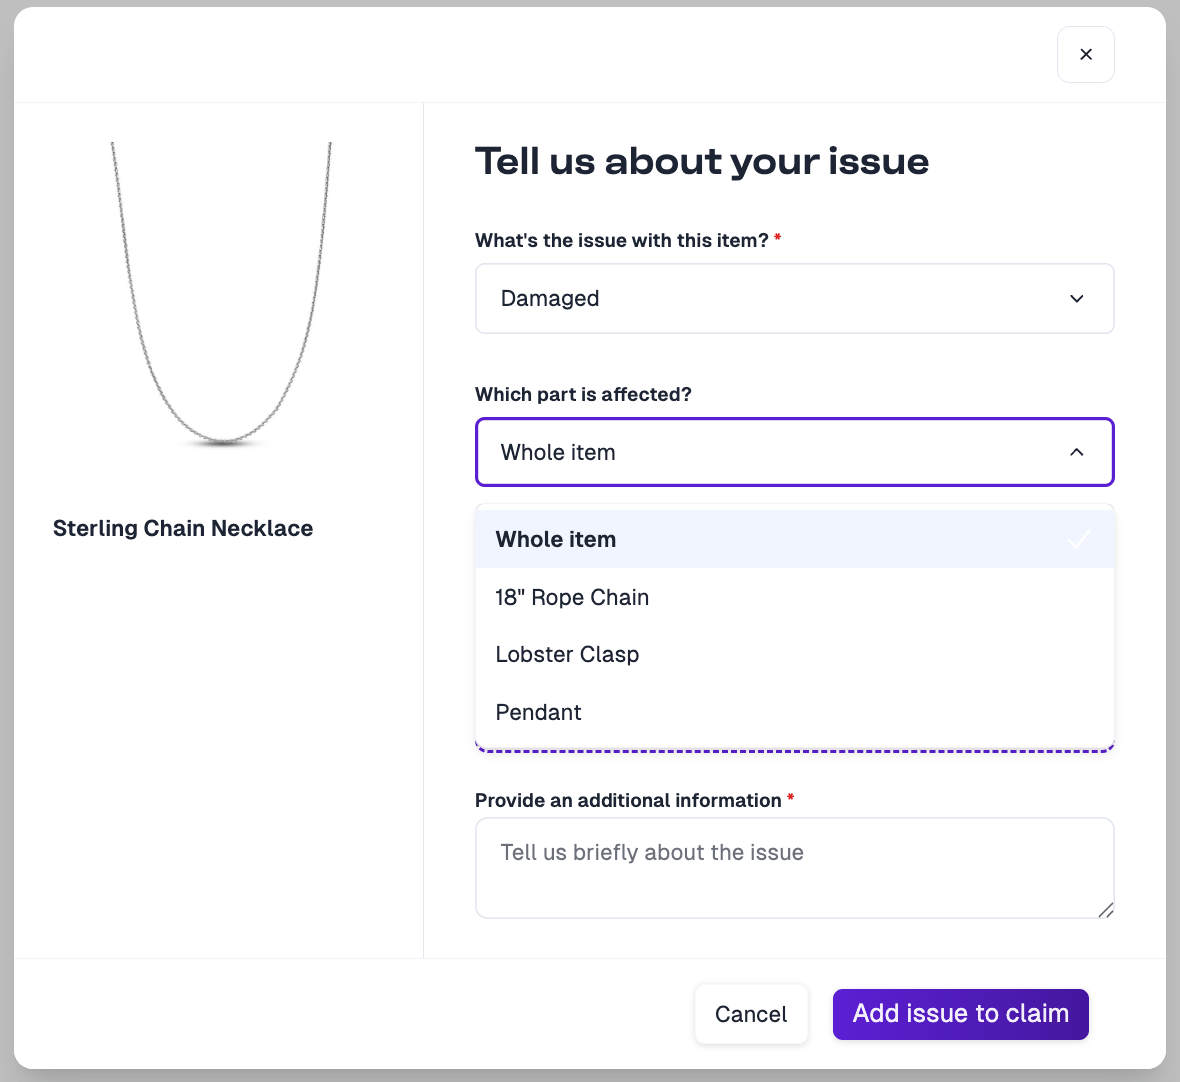
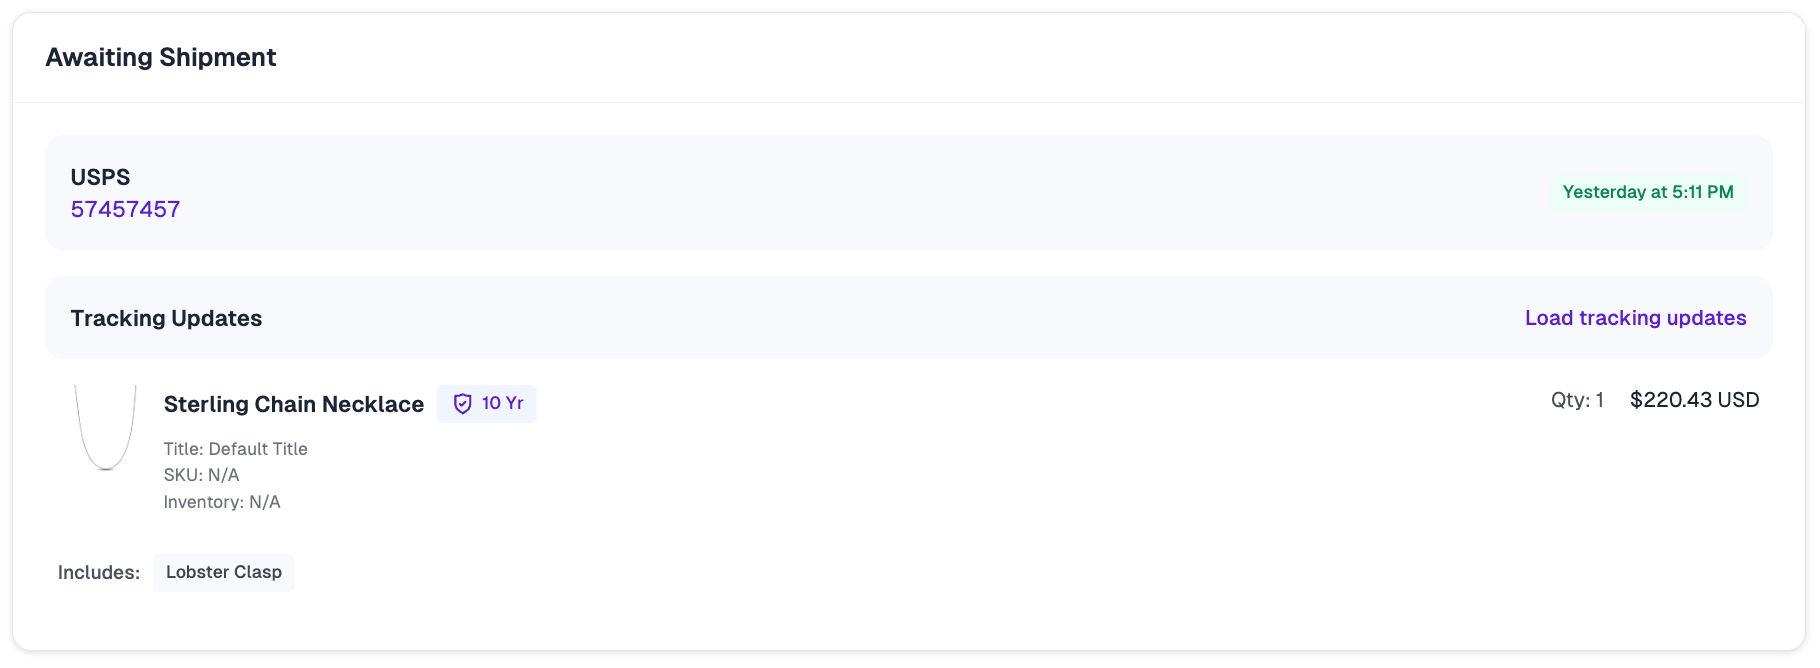
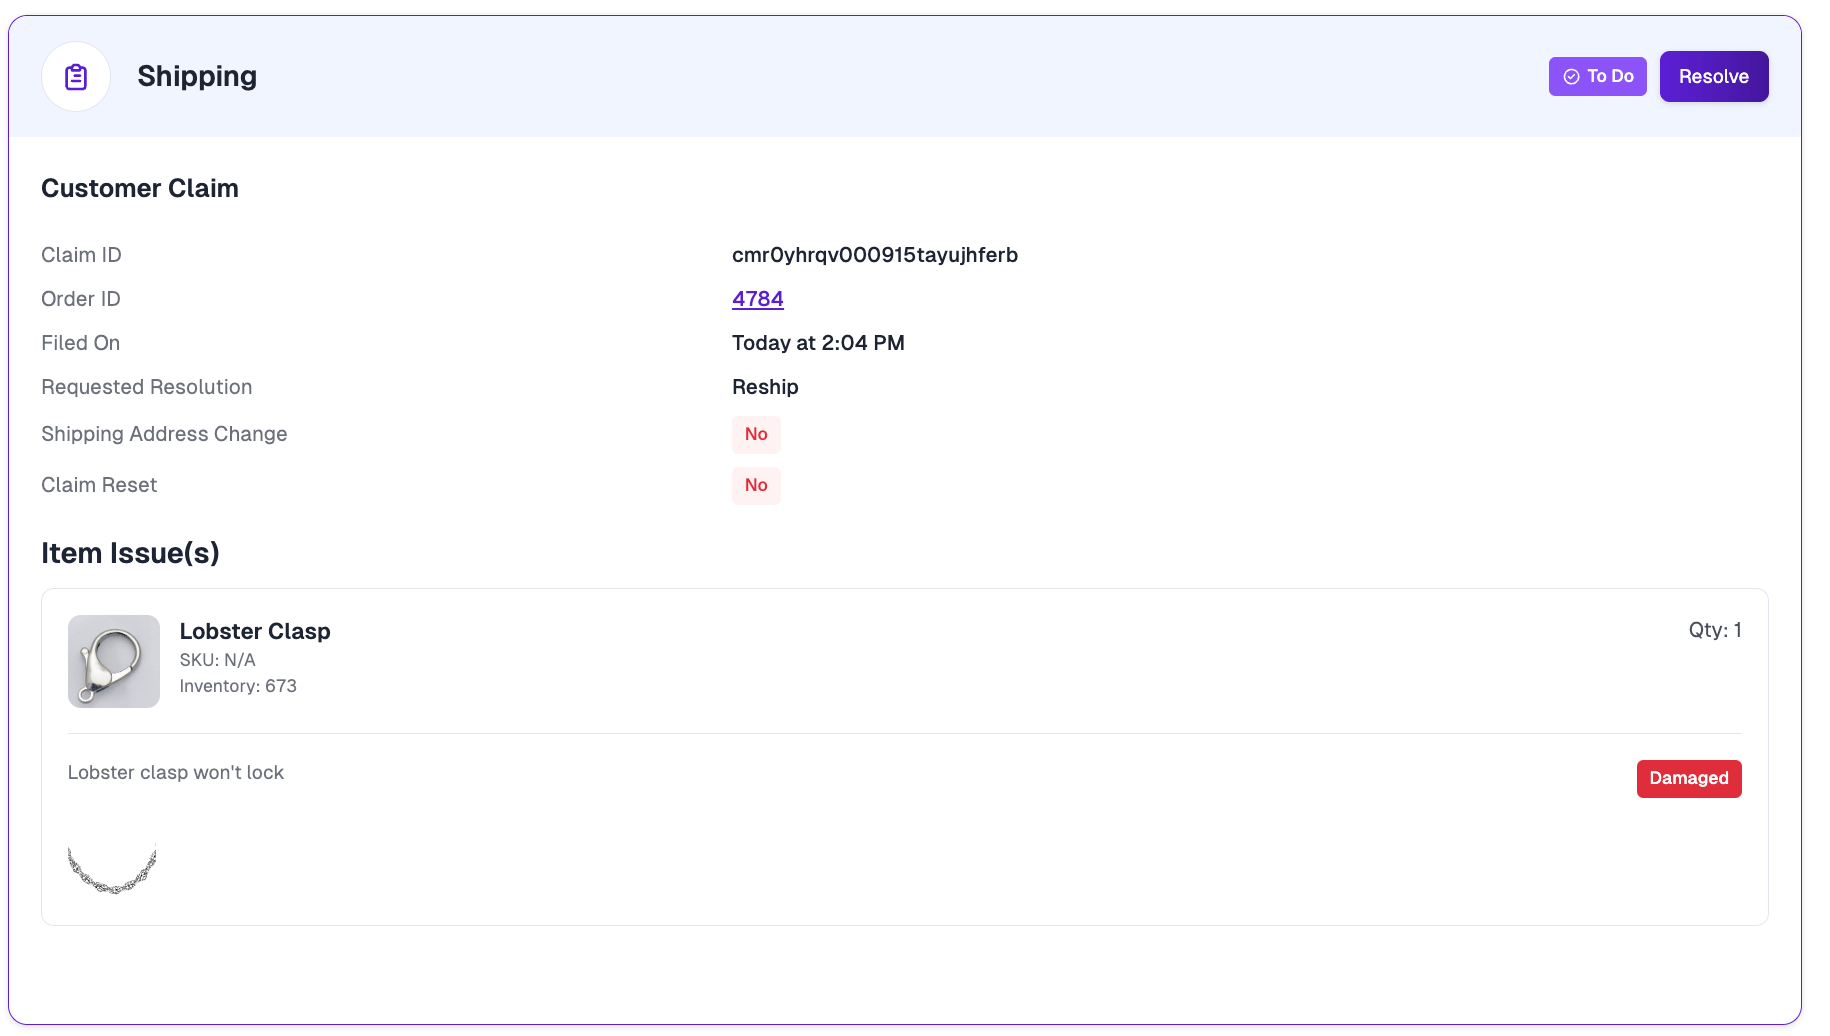
By default, a claim is filed against a product as a whole. Taxonomy adds structure so customers can be more specific about what went wrong:- Components — Parts that make up a single product. For example, a bed frame might have a headboard, side rails, and hardware kit as components. If only the headboard arrives damaged, the customer can file a claim against just that part.
- Bundles — Separate products sold together as a set or kit. For example, a skincare bundle might contain a cleanser, toner, and moisturizer. If only the toner leaks in transit, the customer can file a claim against just that item.
Where to find it

How to upload your taxonomy
Download the template
Click Download Template on the Product Taxonomy card. This generates a
product_taxonomy.csv file pre-populated with all of your existing top-level products, so you have the correct product IDs to work from.Edit the relationship columns
Open the CSV in your spreadsheet tool of choice. For each product that is a component or a bundle item, fill in the
parent_source_product_id and relationship_type columns to point it at its parent product. (See CSV structure below.)CSV structure
Each row in the CSV represents one product. A product becomes a component or bundle item by pointing it at a parent product using the last two columns.| Column | Required | Description |
|---|---|---|
source_product_id | Yes | The unique product ID for this row’s product (matches the ID in your store/platform). |
sku | No | The product’s SKU. |
name | Yes | The product’s display name. |
price | Yes | The product’s price. |
status | Yes | The product’s status (e.g., ACTIVE, ARCHIVED, DRAFT). |
product_image | No | URL to the product’s image. |
parent_source_product_id | No | The source_product_id of the parent product this item rolls up to. Leave blank for a top-level/parent product. |
relationship_type | No | Either COMPONENT or BUNDLE. Must be blank for a top-level/parent product. |
How rows are interpreted
- Parent / top-level rows — Leave
parent_source_product_idandrelationship_typeblank. These rows simply describe a product and act as the parent that components or bundle items attach to. - Relationship rows — A row with a
relationship_typeofCOMPONENTorBUNDLEmust also include a validparent_source_product_id. This is what links the child product to its parent.
If a
source_product_id or parent_source_product_id in your CSV doesn’t yet exist in your catalog, it is created automatically as a new product using the name, sku, price, status, and product_image values from the row.Example
| source_product_id | name | parent_source_product_id | relationship_type |
|---|---|---|---|
1001 | Modern Bed Frame | ||
1002 | Headboard | 1001 | COMPONENT |
1003 | Side Rails | 1001 | COMPONENT |
2001 | Skincare Bundle | ||
2002 | Gentle Cleanser | 2001 | BUNDLE |
2003 | Hydrating Toner | 2001 | BUNDLE |
Sample CSV
Download a filled-in
product_taxonomy.csv showing both a component relationship (Sterling Chain Necklace) and a bundle relationship (Skincare Bundle) to use as a starting point.Rules & limitations
- One level of nesting only. A product can be a parent or a child, but not both. A component or bundle item cannot itself have its own components.
- A child has one parent. Each product can be linked to a single parent product.
- Uploads replace each parent’s relationships. When you upload a CSV, the components/bundle items listed for a given parent replace that parent’s existing links. To make a change, re-download the current template, edit it, and re-upload.
- Blanking out rows does not remove links. Removing all of a parent’s relationship rows from the CSV will not clear its existing components or bundle items. To remove a relationship entirely, contact your Customer Success Manager.
- CSV format only. The upload accepts
.csvfiles up to the platform’s file-size limit. Invalid rows (e.g., arelationship_typeother thanCOMPONENTorBUNDLE, or a relationship row missing its parent) are skipped and reported back in the upload summary.
The customer experience
Once your taxonomy is uploaded, customers filing a claim will see a Which part is affected? dropdown when describing their issue. It defaults to Whole item, with each mapped component or bundle item listed as an option. This lets the customer pinpoint exactly which part has the issue.The Which part is affected? selector appears when the issue type is Damaged or Defective. Missing is also available for bundle items — a bundle can arrive with one of its items missing — but not for components, since a component is part of a single product and can’t go missing on its own. For all other issue types, the claim is filed against the whole item.