> ## Documentation Index
> Fetch the complete documentation index at: https://docs.orderprotection.com/llms.txt
> Use this file to discover all available pages before exploring further.
# Adding a custom domain
> Learn how to add a custom domain for your customer claims portal.
This setting must be enabled for your store. If you don't see this option and
would like to enable it please reach out to our implementation team via Slack
or at [onboarding@orderprotection.com](mailto:onboarding@orderprotection.com)
You must be an Account Owner/Admin or Store Owner/Admin to edit these
settings.
From your Order Protection [dashboard](https://app.orderprotection.com),
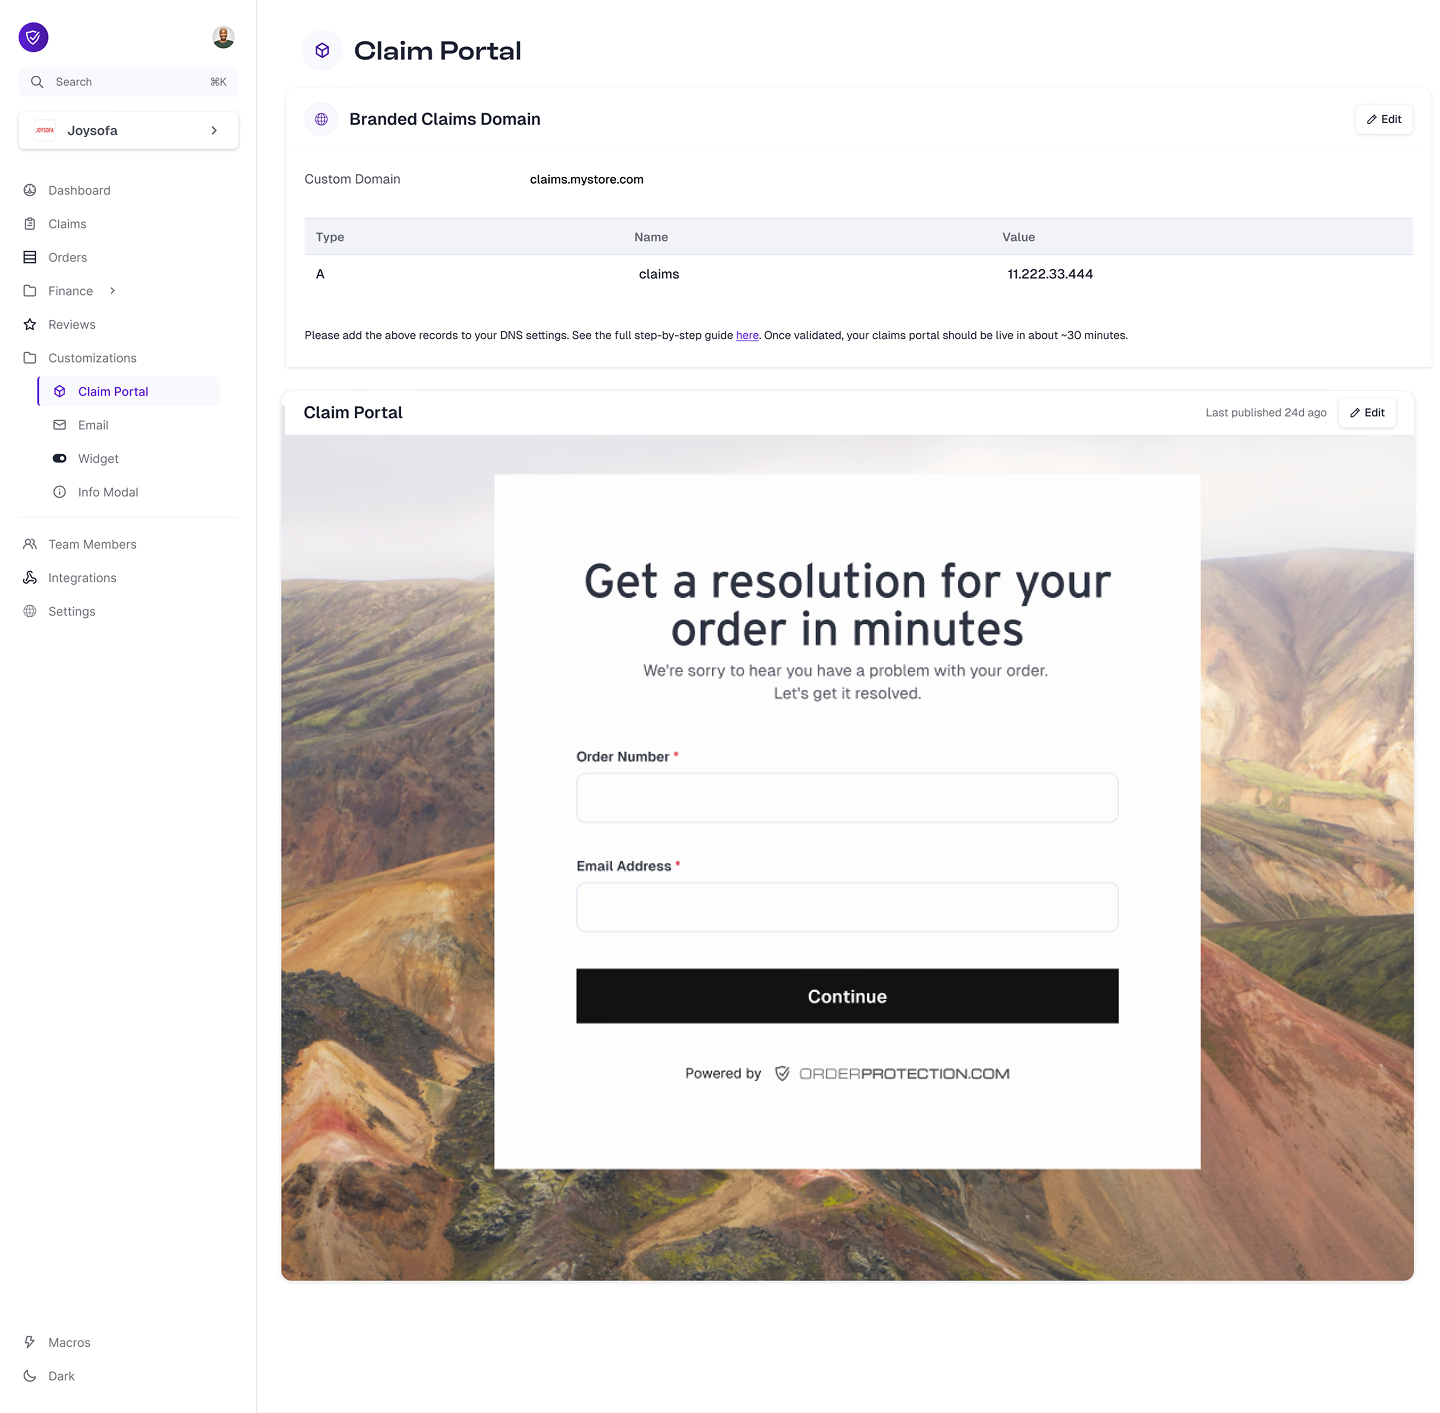
navigate to the `Customizations` tab. This is visible in your sidebar navigation. Select the `Claim Portal` sub-tab.
In the first block called `Custom Domain`, select **edit**. You need to add the following records to your DNS records:
| Type | Name | Value |
| ---- | ------ | ------------- |
| A | claims | 34.117.95.104 |
The `NAME` of the record may vary depending on the domain you selected. Please reference the dashboard for the exact name.
If you need help understanding how to create this record. Please watch the following video:
You'll have to wait for the DNS records to propagate. This can take up to 24 hours.
Once your claim domain URL has been added and your domain has been verified and propogated, you can start editing your custom portal. You can do this before the domain propogates and save it as a draft, but you won't be able to publish and see the changes live.
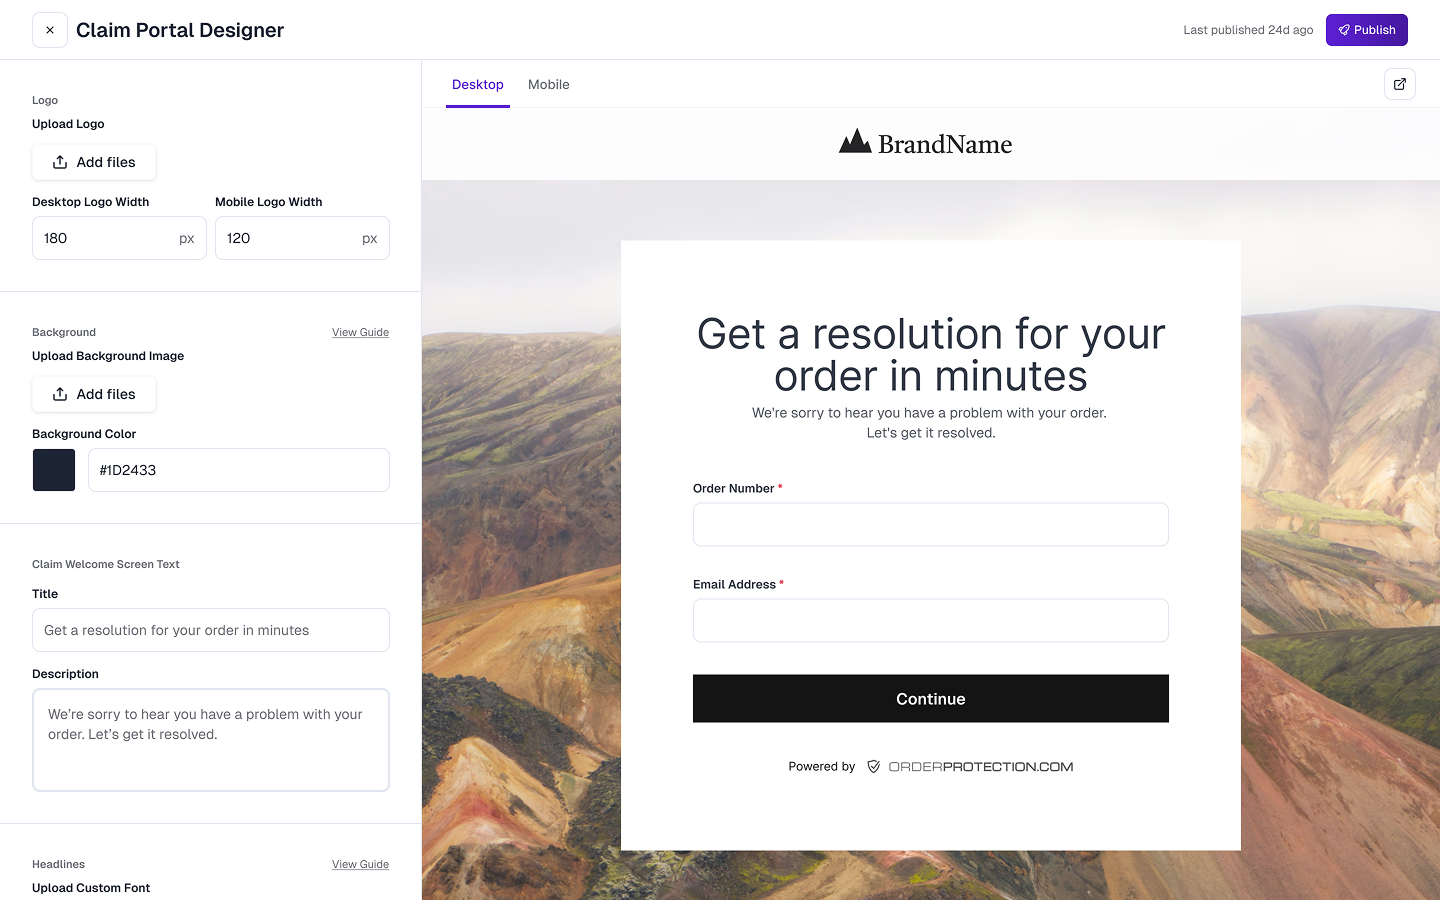
You can edit logos, background colors/images, font type and color, button styles and colors, and page titles and favicons.
For a full walkthrough of all those options, visit our [Education Basecamp](/education-basecamp/customizations/branding-your-portal).
That's it! You have successfully added a custom domain to your claims portal! 🙌
 In the first block called `Custom Domain`, select **edit**. You need to add the following records to your DNS records:
| Type | Name | Value |
| ---- | ------ | ------------- |
| A | claims | 34.117.95.104 |
The `NAME` of the record may vary depending on the domain you selected. Please reference the dashboard for the exact name.
If you need help understanding how to create this record. Please watch the following video:
In the first block called `Custom Domain`, select **edit**. You need to add the following records to your DNS records:
| Type | Name | Value |
| ---- | ------ | ------------- |
| A | claims | 34.117.95.104 |
The `NAME` of the record may vary depending on the domain you selected. Please reference the dashboard for the exact name.
If you need help understanding how to create this record. Please watch the following video:
 For a full walkthrough of all those options, visit our [Education Basecamp](/education-basecamp/customizations/branding-your-portal).