> ## Documentation Index
> Fetch the complete documentation index at: https://docs.orderprotection.com/llms.txt
> Use this file to discover all available pages before exploring further.
# Team Members
> Invite, manage, and configure roles for team members in your OrderProtection.com account.
Below is a brief guide on managing Team Members within your OrderProtection.com account. This includes inviting new members, understanding different roles, and viewing/editing member profiles.
 ## How to Invite a New Team Member
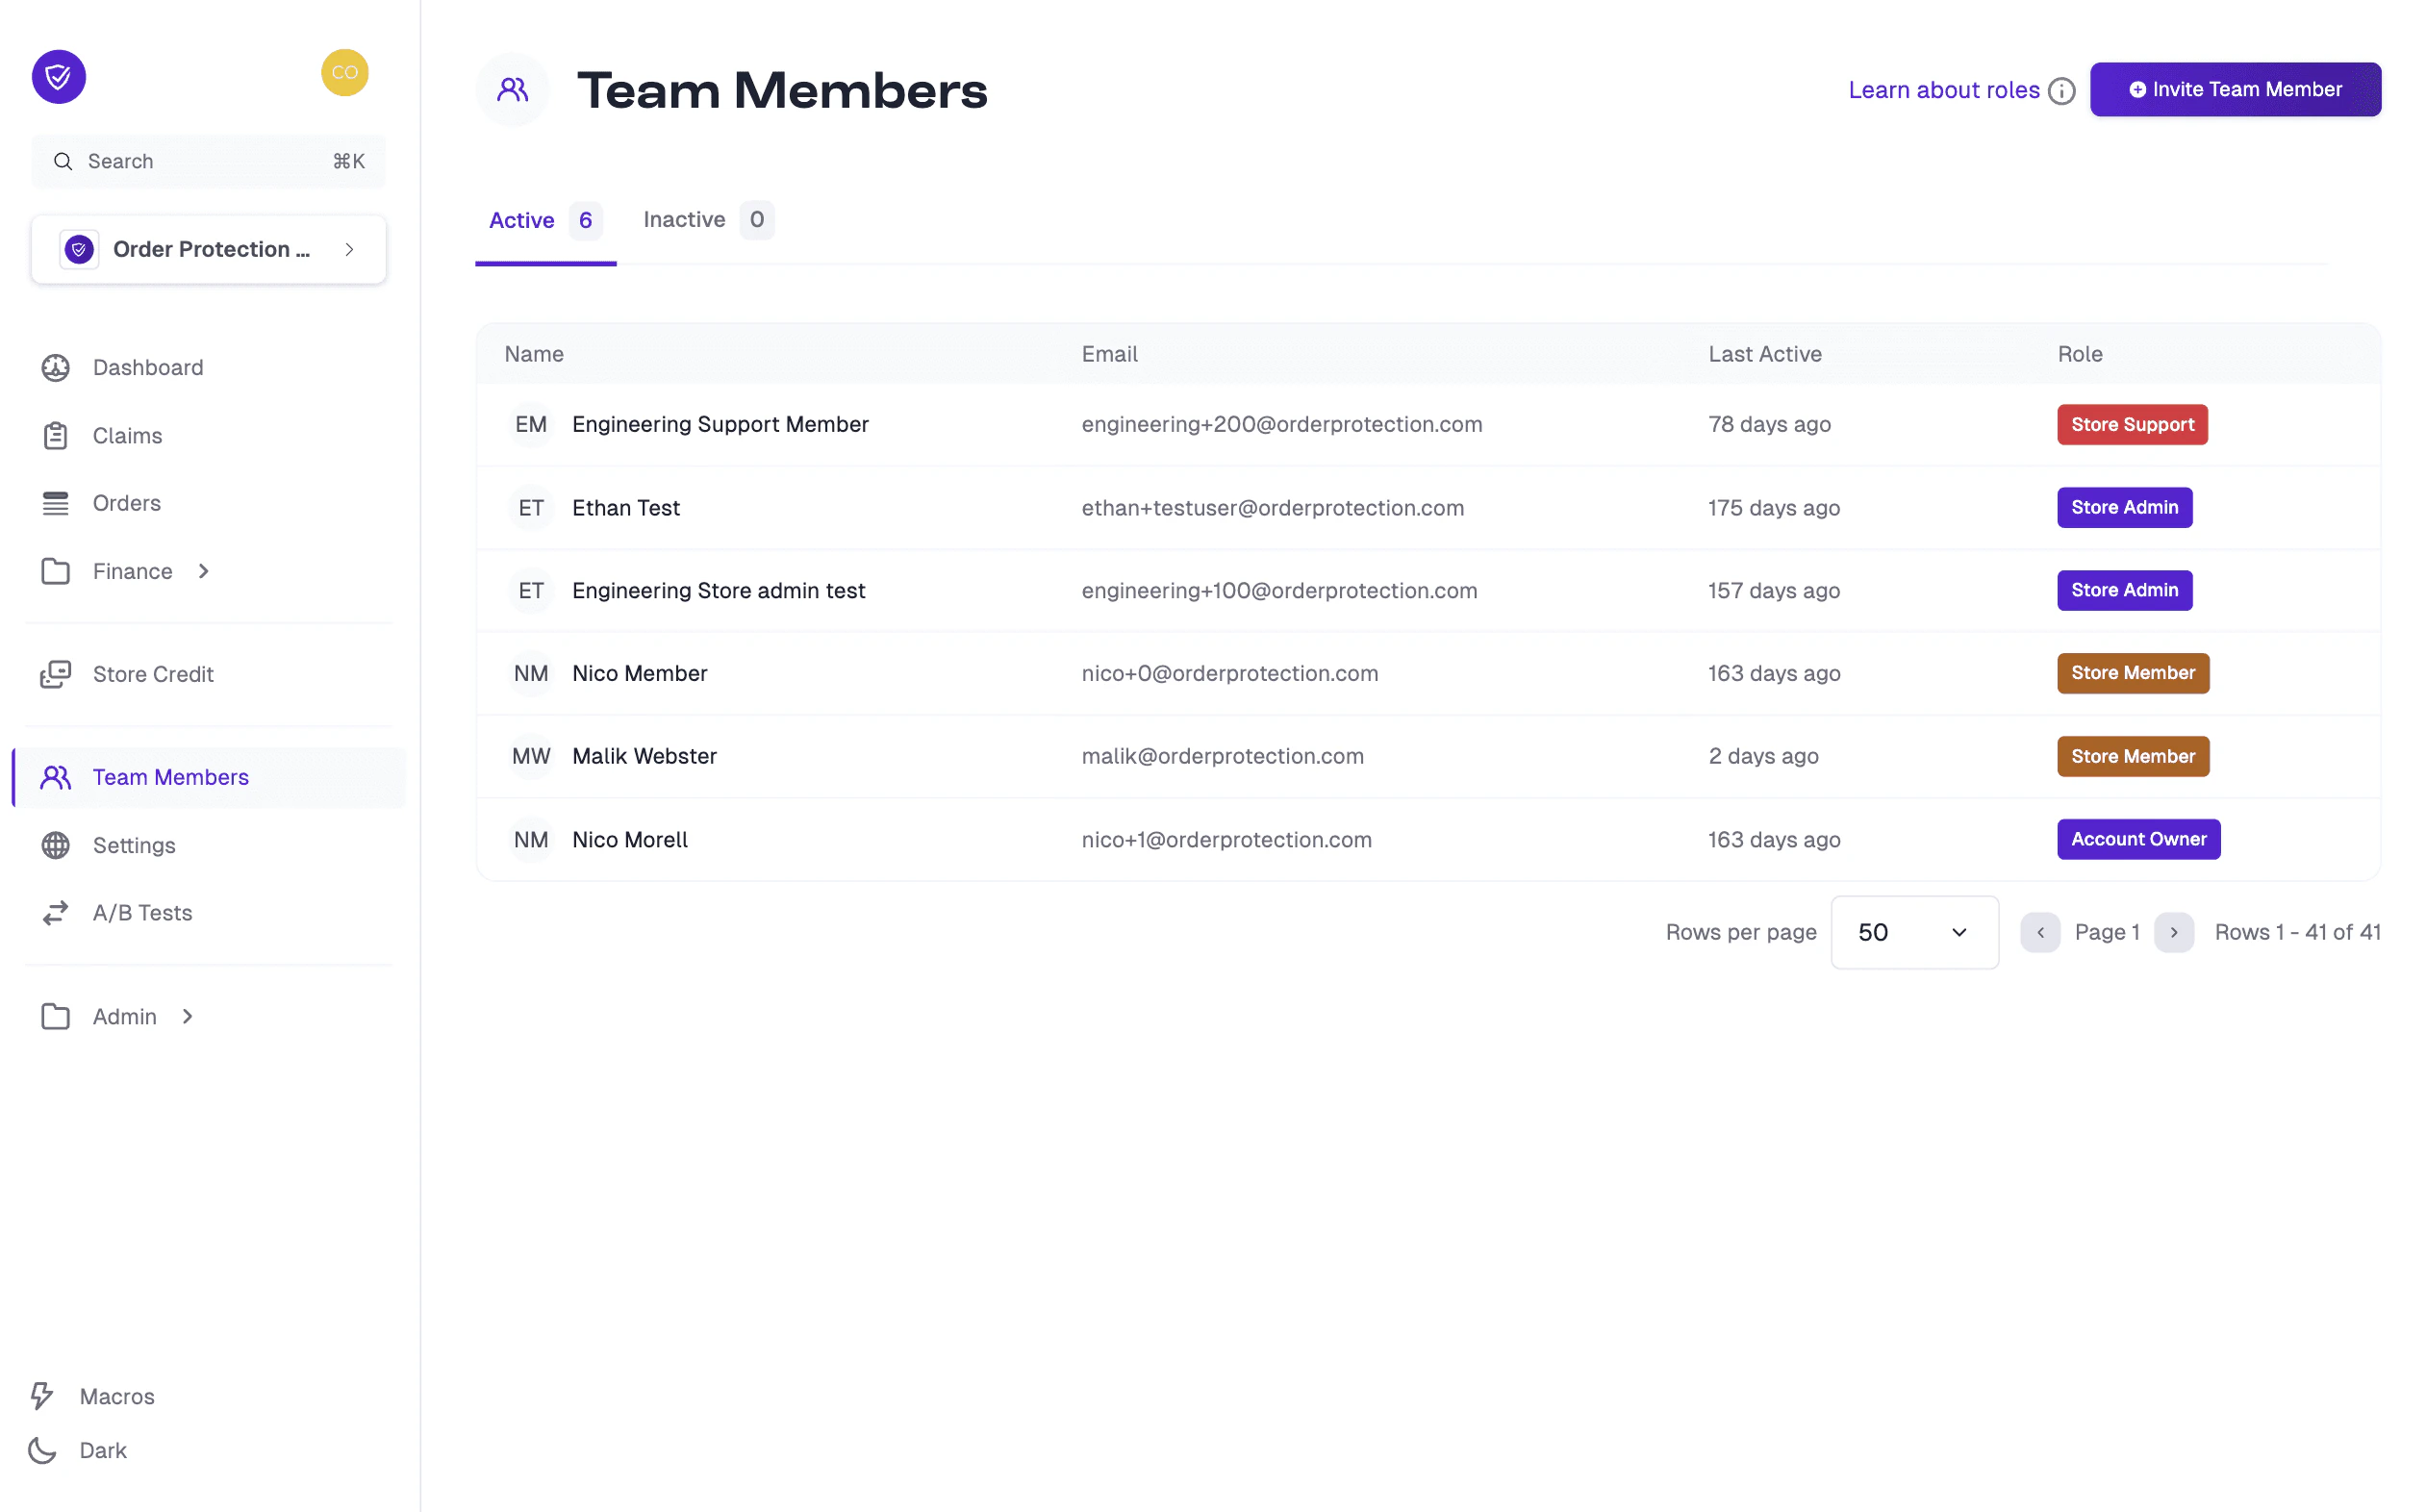
Go to **Team Members** in the left-hand menu.
Click the **Invite Team Member** button (usually at the top-right corner).
Enter the first name, last name, and email address of the new user.
Select the **Member Type** (e.g., Admin, Member, Support).
Click **Save**. The new team member will receive an email invitation with instructions to set up their account.
## How to Invite a New Team Member
Go to **Team Members** in the left-hand menu.
Click the **Invite Team Member** button (usually at the top-right corner).
Enter the first name, last name, and email address of the new user.
Select the **Member Type** (e.g., Admin, Member, Support).
Click **Save**. The new team member will receive an email invitation with instructions to set up their account.
 ## Learn About Roles
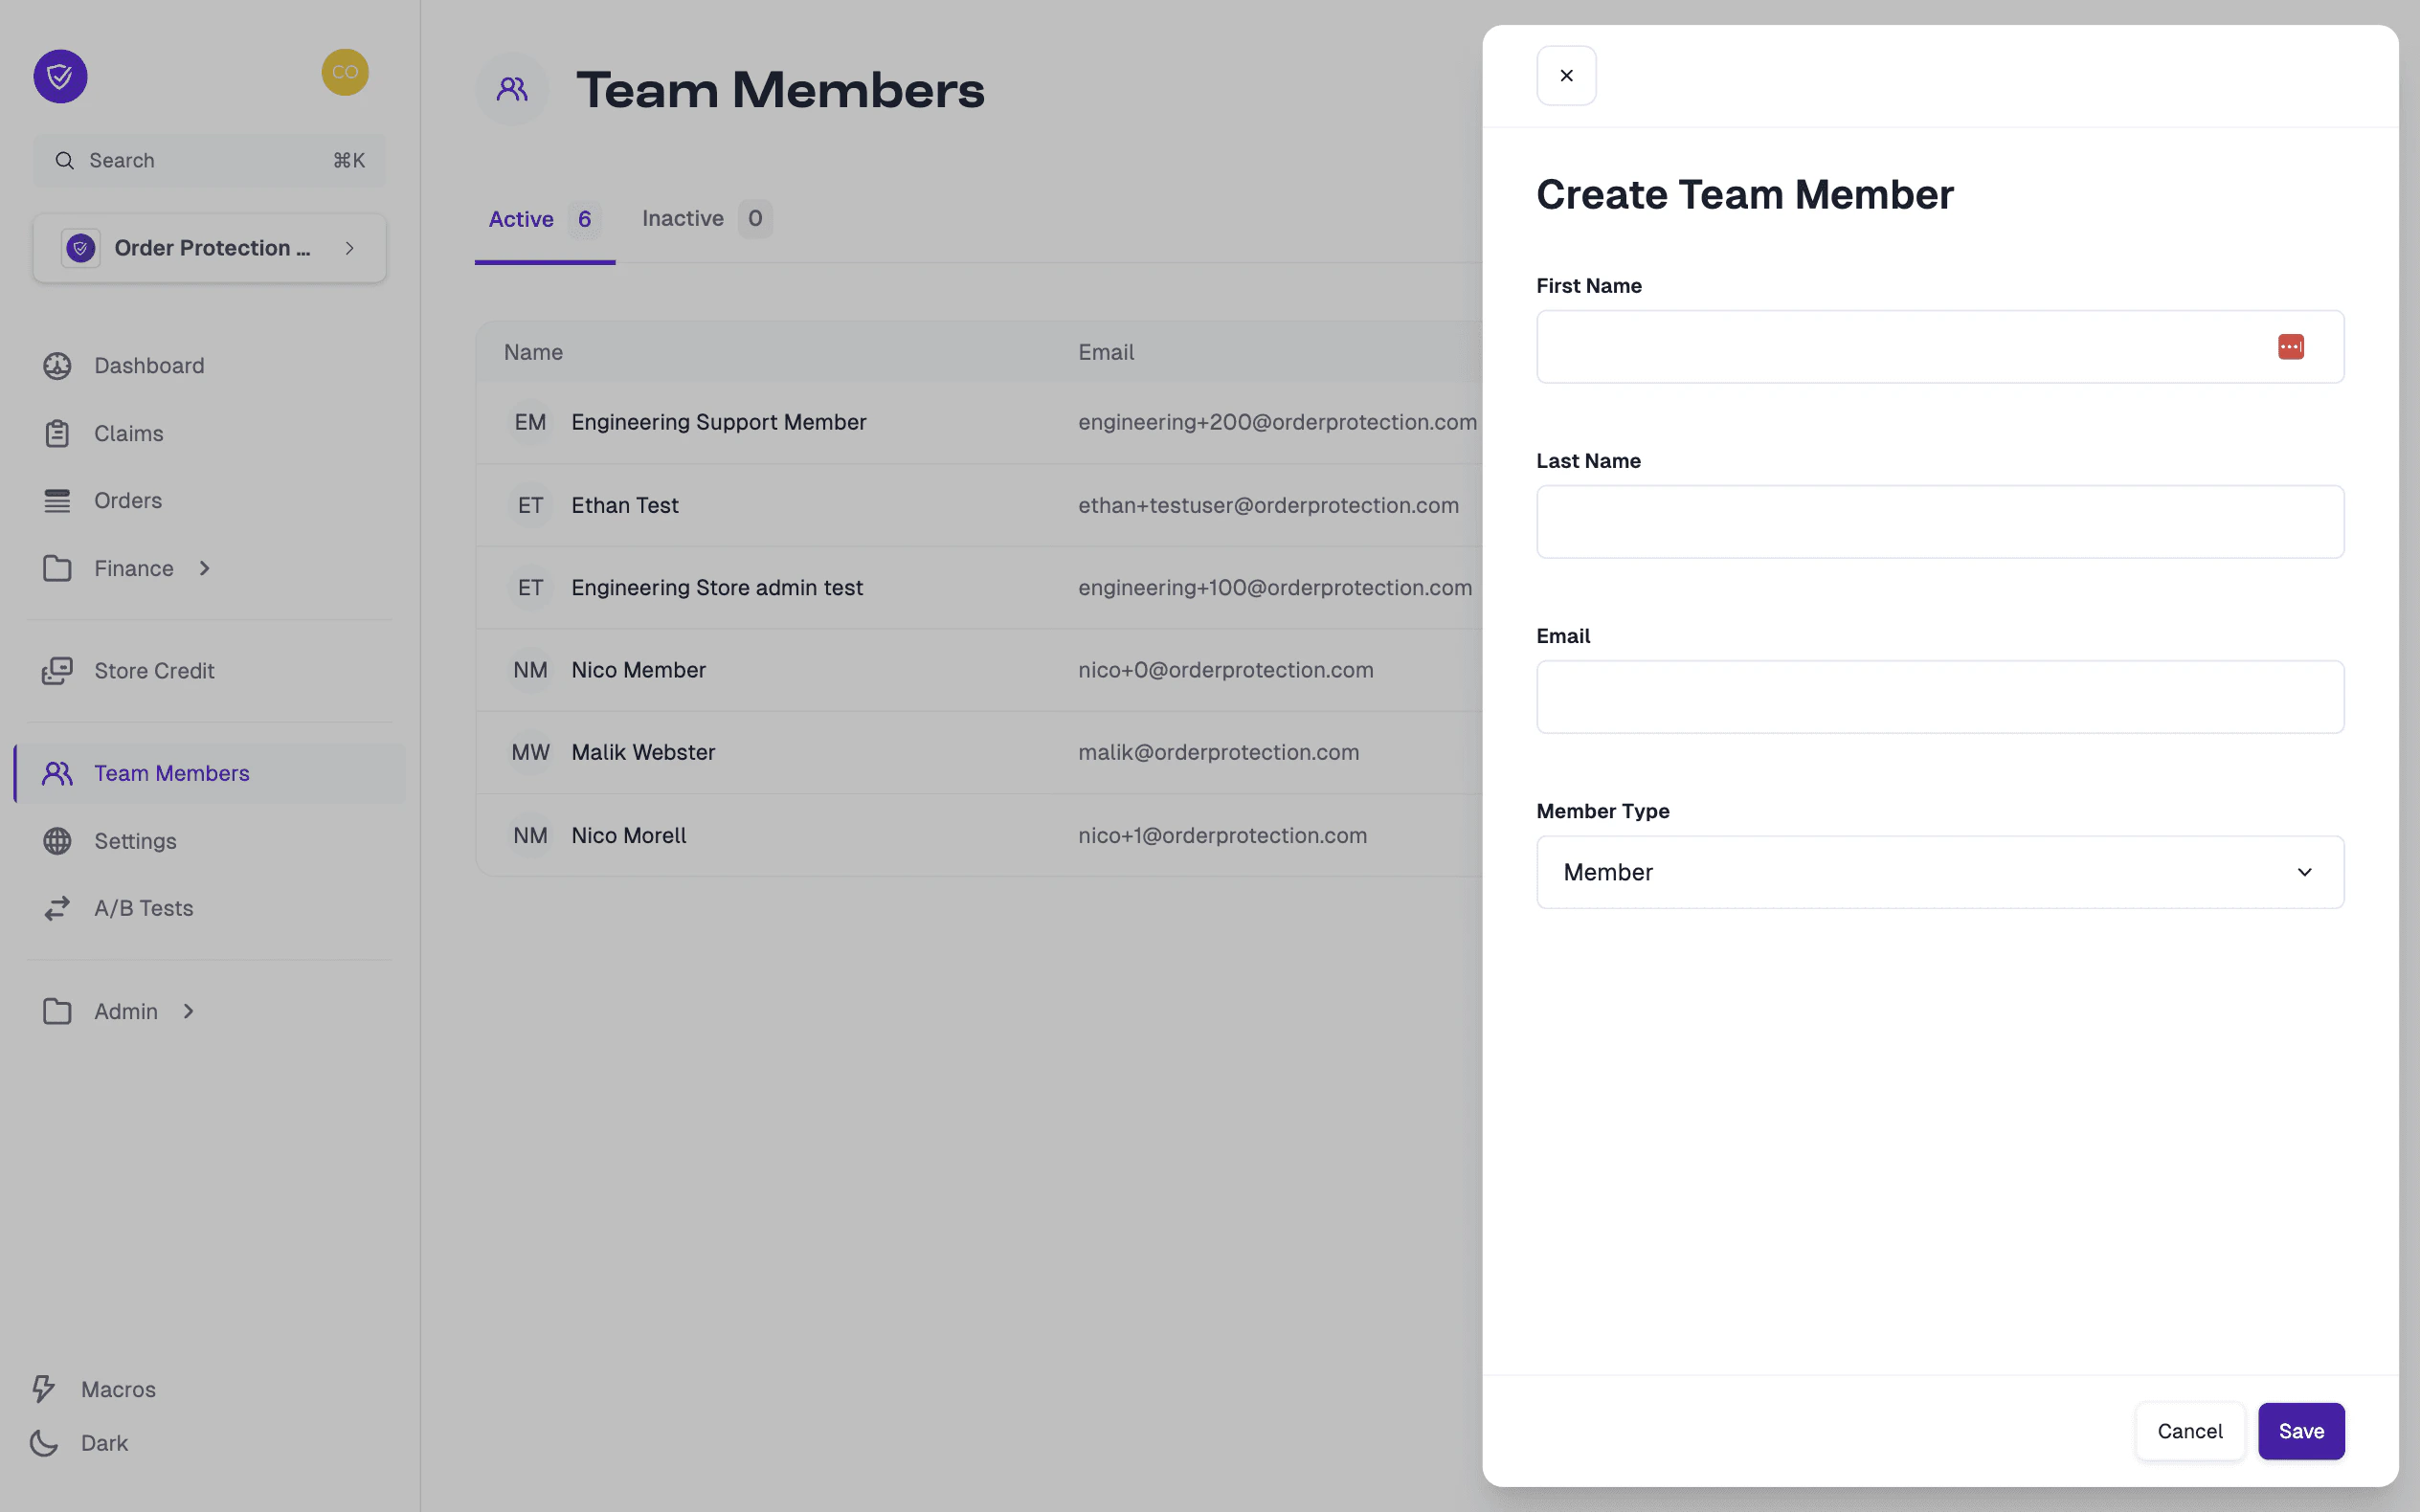
When inviting or editing a team member, you'll notice multiple **Store Role** options. Each role has different levels of access within your OrderProtection.com account:
| Role | Description |
| ----------- | ------------------------------------------------------------------------------------------------------------------------- |
| **Admin** | Highest level of access -- can view, add, edit, and remove most items (claims, team members, payout methods, etc.). |
| **Member** | Standard permissions -- can typically view and resolve claims but may have limited access to settings or financial data. |
| **Support** | Focused on customer-service-related tasks -- can view or resolve claims but may have restricted access to other sections. |
If you're unsure which role fits best, hover over or click on the role description in the Team Members interface to see a breakdown of the permissions, or reach out to your Customer Success Manager (CSM) for clarification.
## Learn About Roles
When inviting or editing a team member, you'll notice multiple **Store Role** options. Each role has different levels of access within your OrderProtection.com account:
| Role | Description |
| ----------- | ------------------------------------------------------------------------------------------------------------------------- |
| **Admin** | Highest level of access -- can view, add, edit, and remove most items (claims, team members, payout methods, etc.). |
| **Member** | Standard permissions -- can typically view and resolve claims but may have limited access to settings or financial data. |
| **Support** | Focused on customer-service-related tasks -- can view or resolve claims but may have restricted access to other sections. |
If you're unsure which role fits best, hover over or click on the role description in the Team Members interface to see a breakdown of the permissions, or reach out to your Customer Success Manager (CSM) for clarification.
 ## Viewing and Editing Team Member Profiles
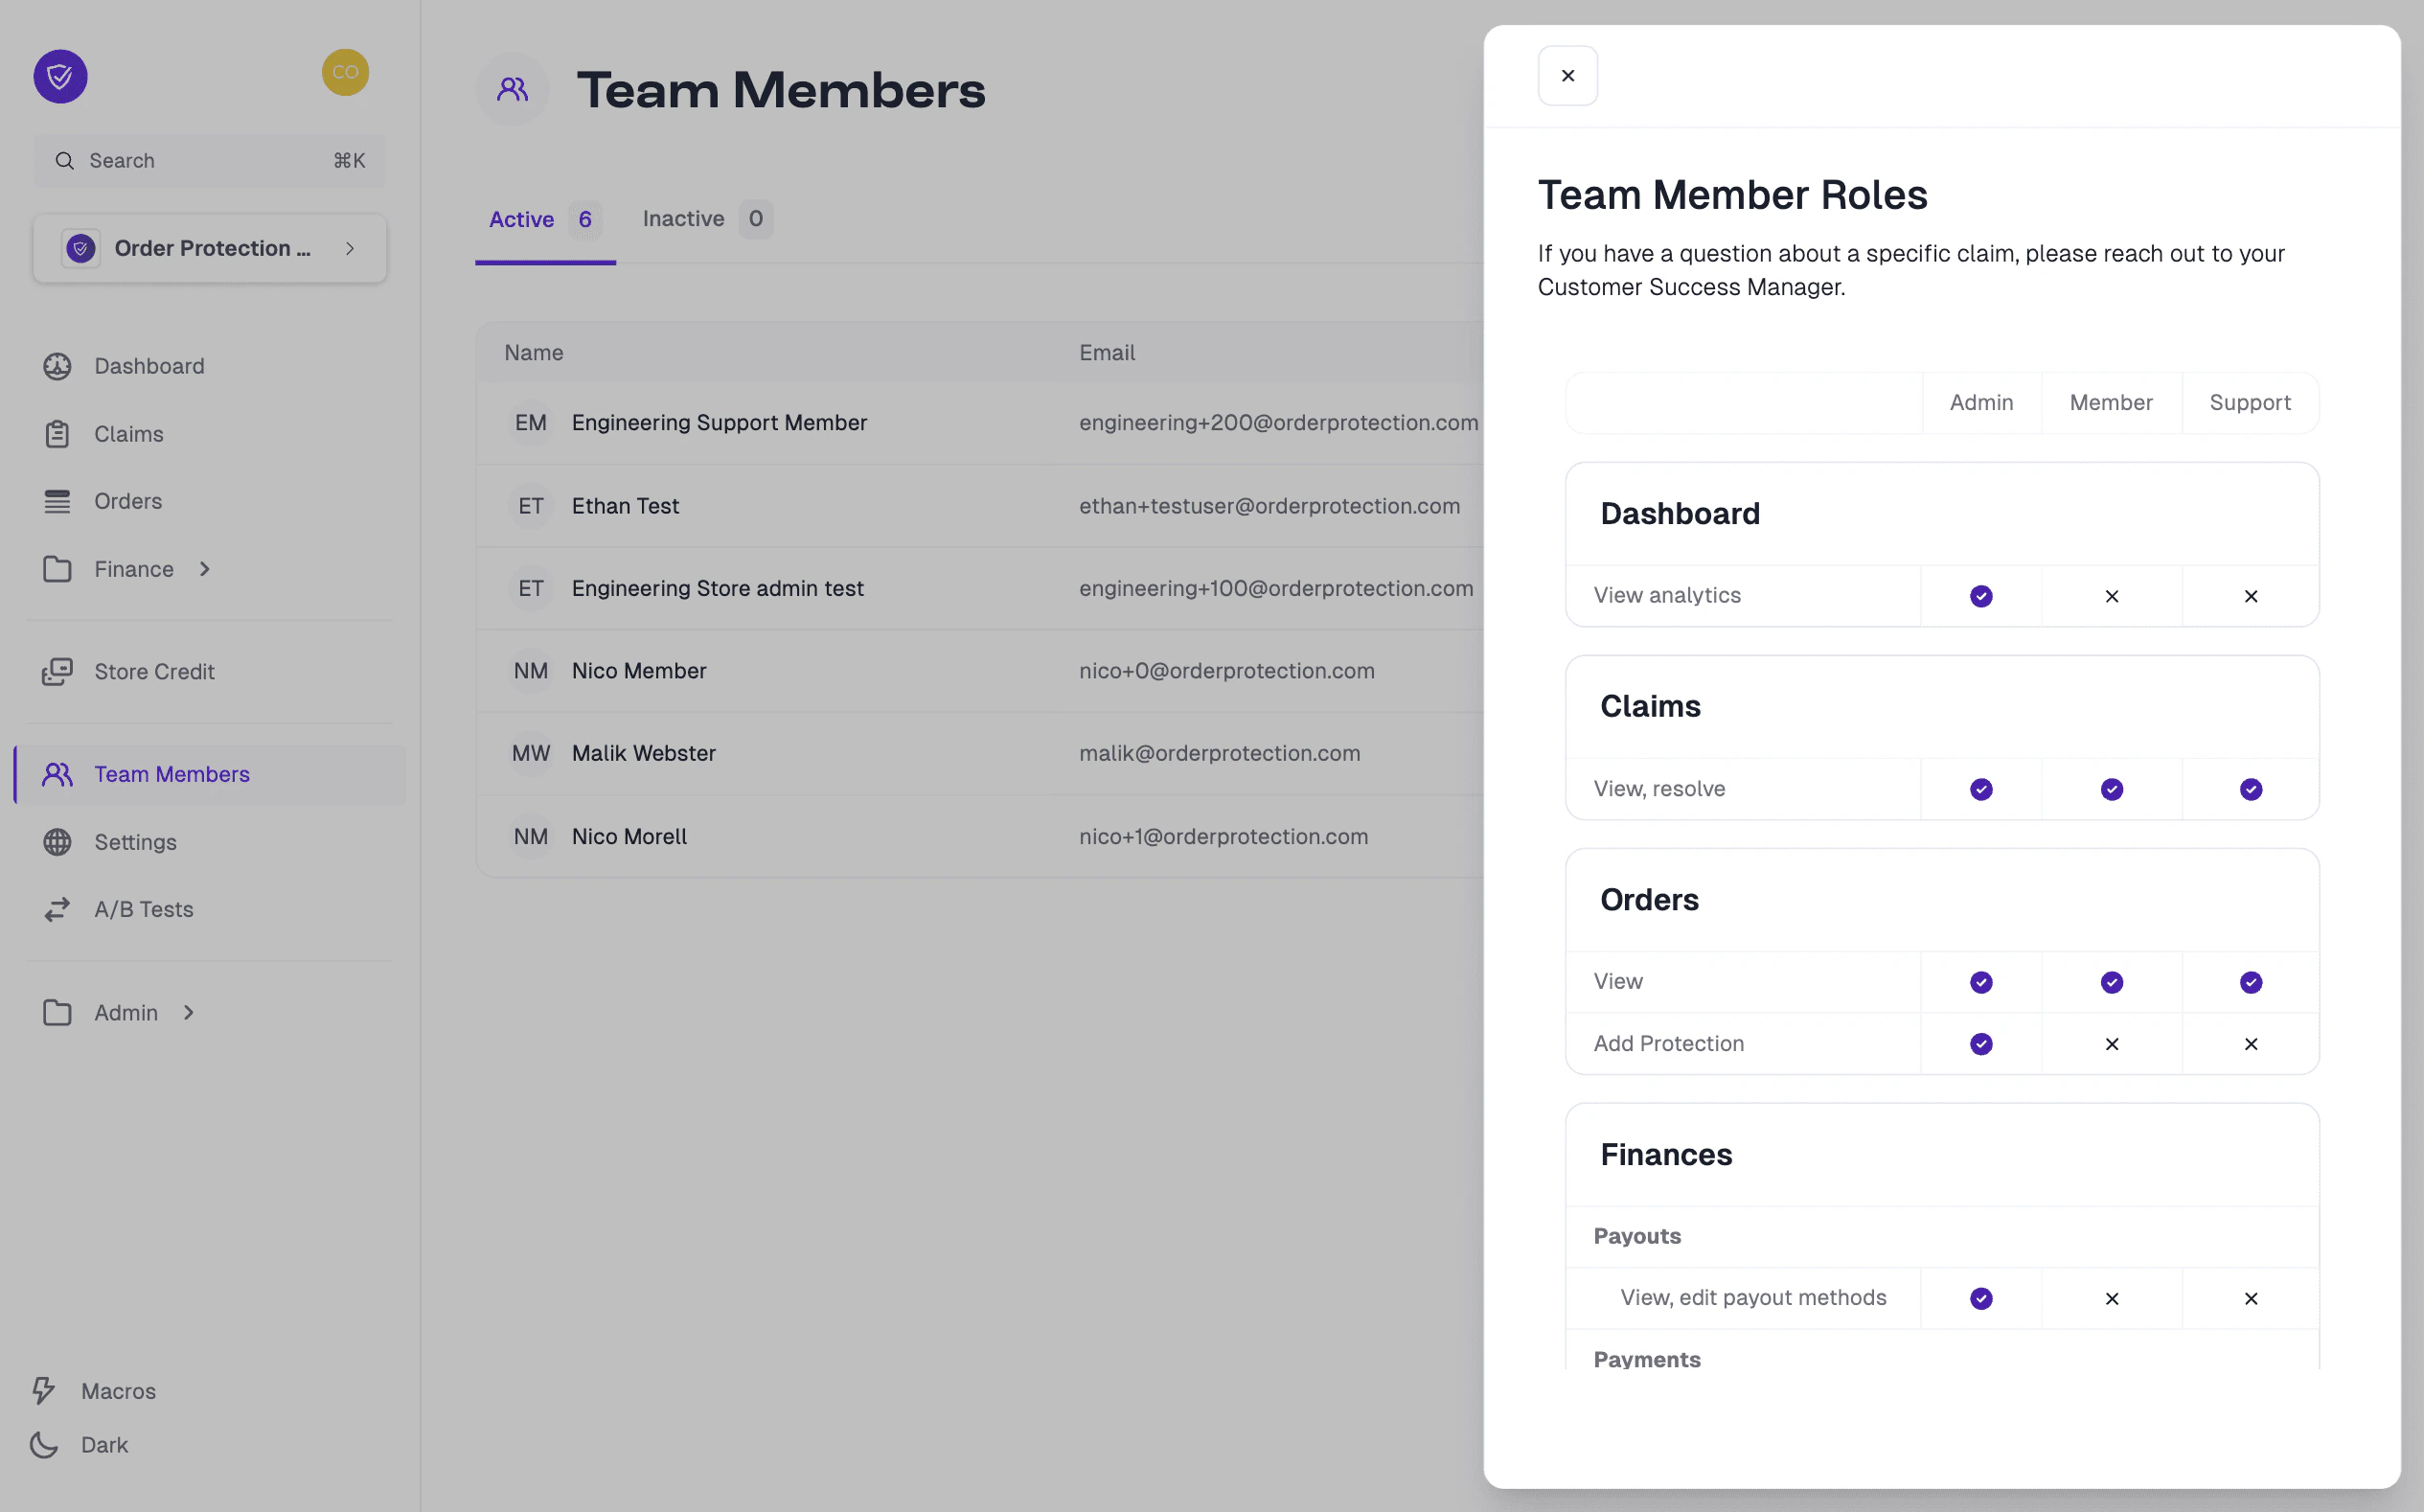
In the **Team Members** page, find the user you wish to manage.
Click on their row/name to open their profile.
From here, you can:
* Edit basic information (first name, last name, email).
* Update their Store Role.
* Review their recent activity (if available).
## Viewing and Editing Team Member Profiles
In the **Team Members** page, find the user you wish to manage.
Click on their row/name to open their profile.
From here, you can:
* Edit basic information (first name, last name, email).
* Update their Store Role.
* Review their recent activity (if available).
 ## Granting Developer App Access
If your account builds [developer apps](/developer/introduction), the **account owner** can let specific team members help manage them — without giving anyone the ability to create or delete apps.
In **Team Members**, click the member you want to grant access to.
On their profile, scroll to the **Developer app access** section. (It only appears when you are signed in as the account owner.)
Check the apps this member should be able to manage, then click **Save app access**.
The member can now manage the apps you selected — edit details, manage installations, and submit or publish — but **cannot create or delete apps**. Only the account owner can grant or change this access.
## Deactivating a Team Member
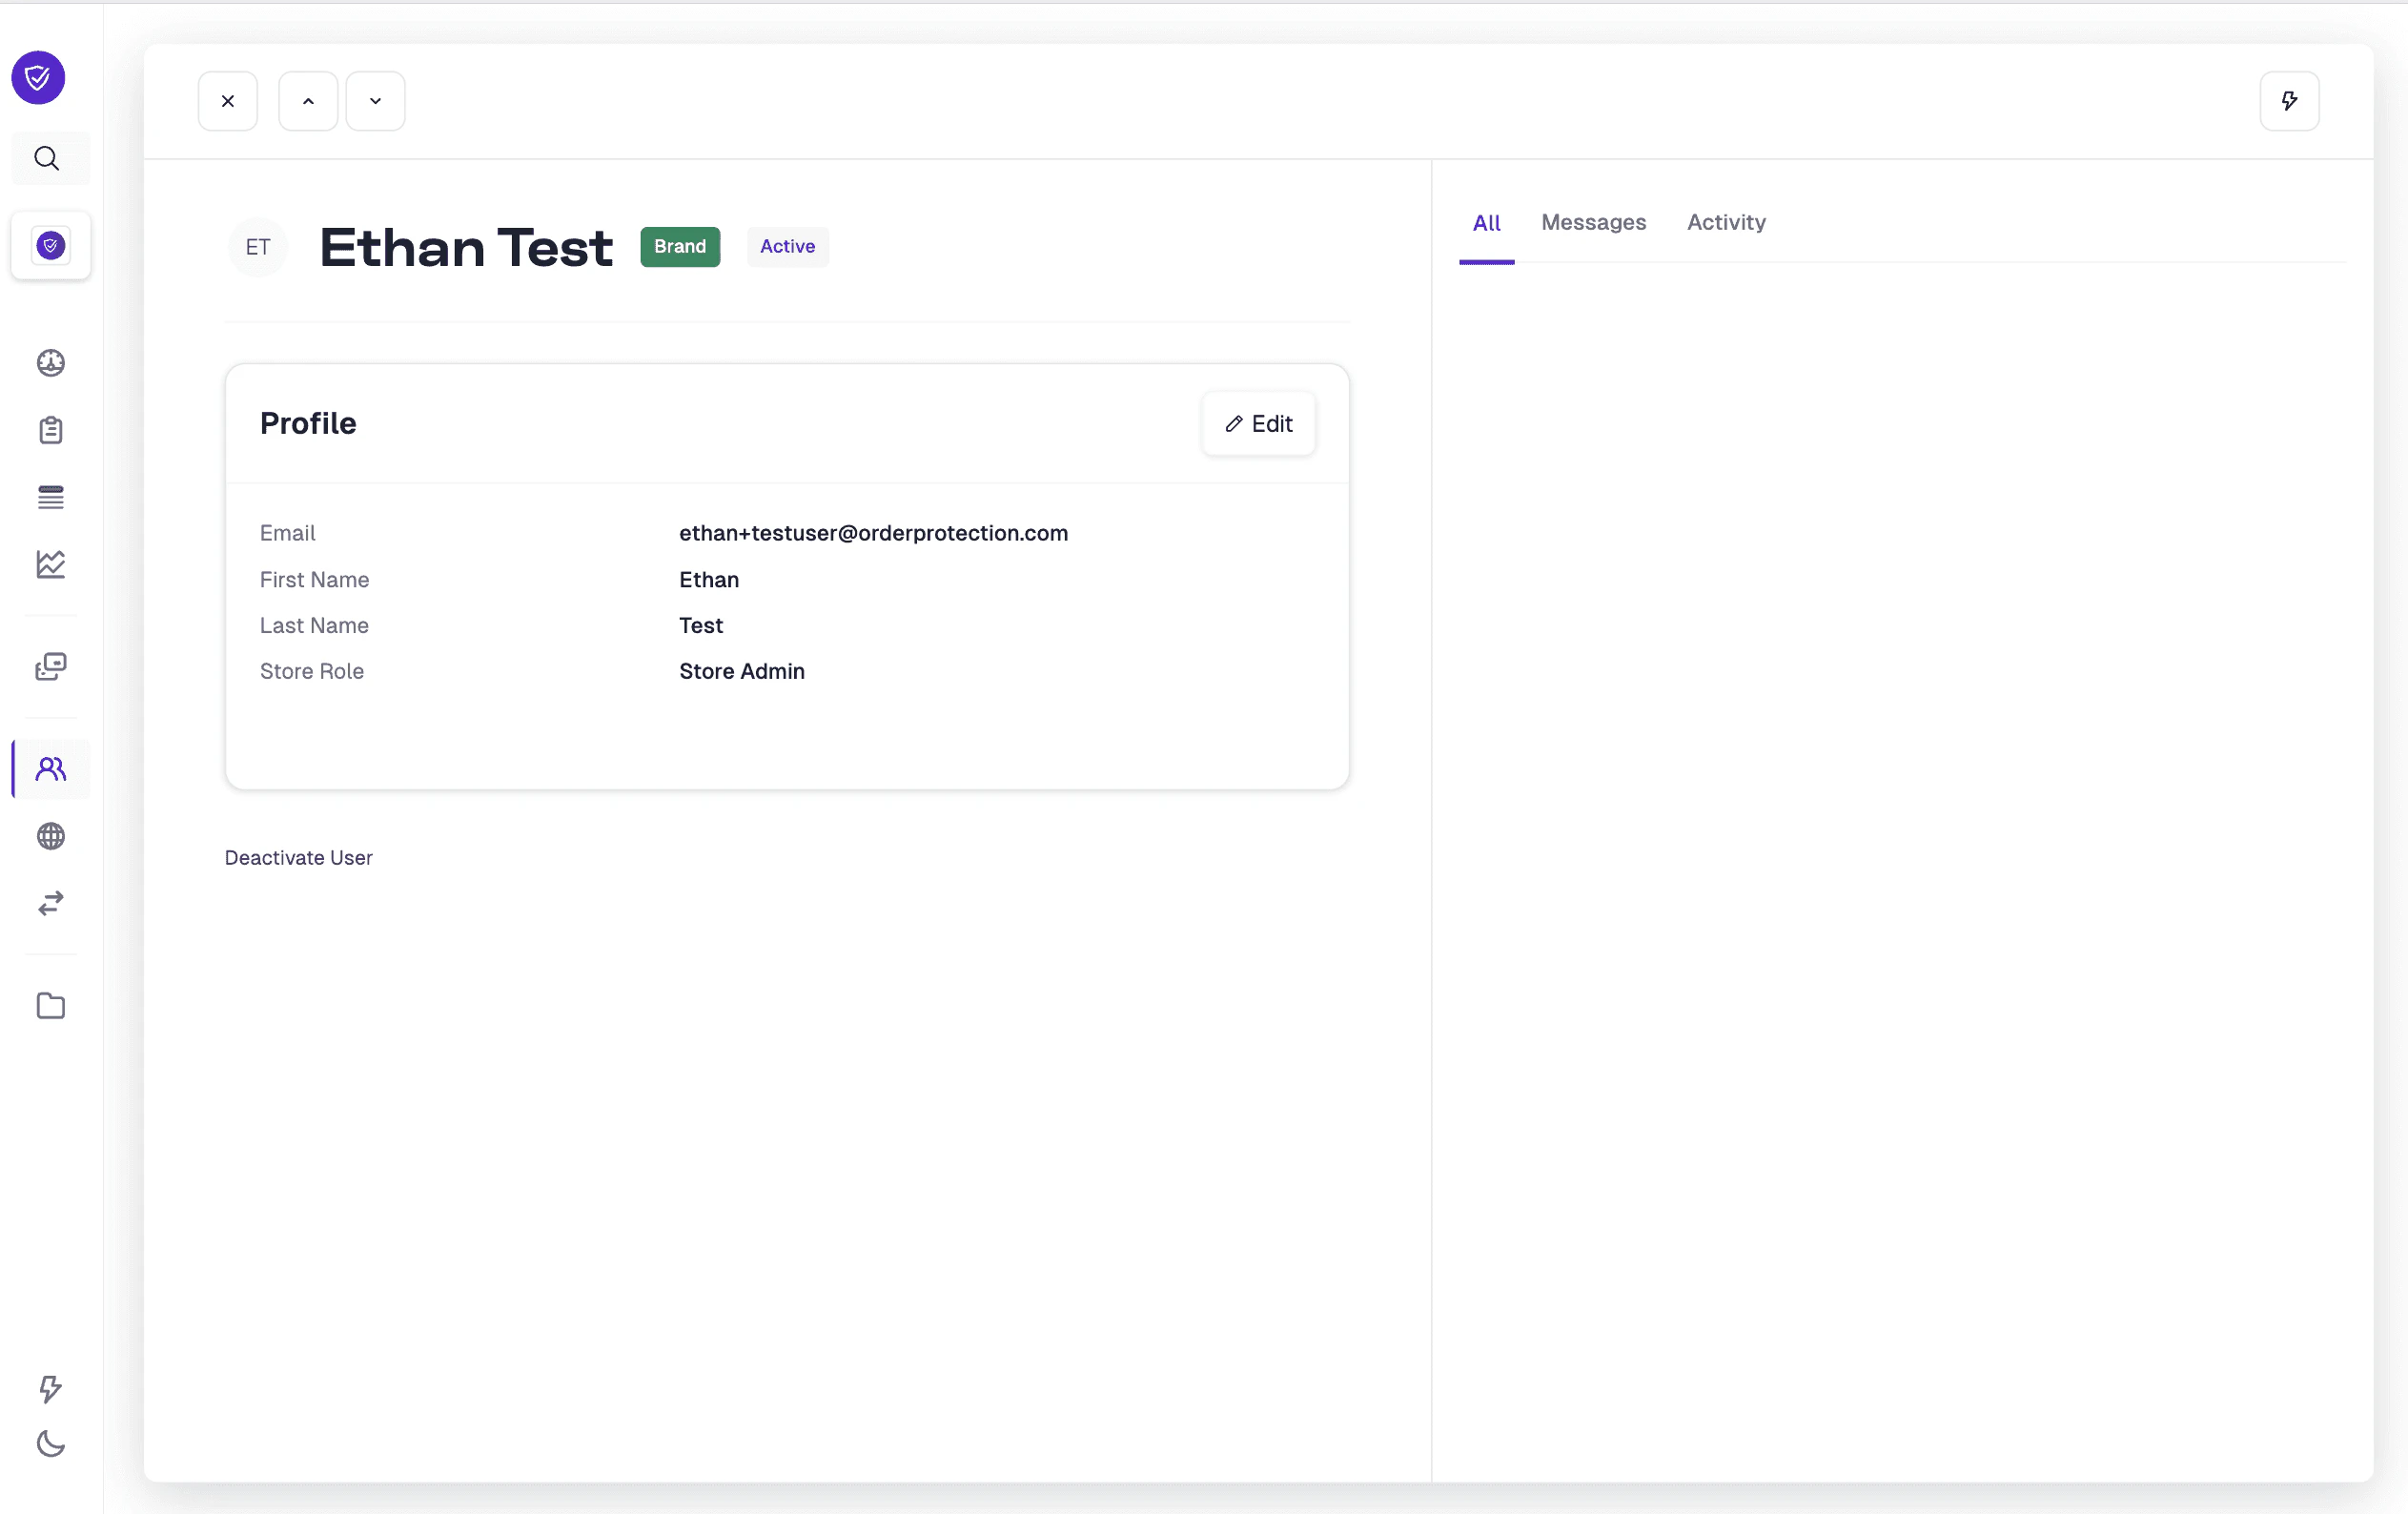
In the **Team Members** list, click on the member's name to access their profile.
Look for a **Deactivate User** or similar button (usually at the bottom of the profile panel). Confirm your action if prompted.
The user's status will be updated to **Inactive**, and they will no longer be able to log in.
## Granting Developer App Access
If your account builds [developer apps](/developer/introduction), the **account owner** can let specific team members help manage them — without giving anyone the ability to create or delete apps.
In **Team Members**, click the member you want to grant access to.
On their profile, scroll to the **Developer app access** section. (It only appears when you are signed in as the account owner.)
Check the apps this member should be able to manage, then click **Save app access**.
The member can now manage the apps you selected — edit details, manage installations, and submit or publish — but **cannot create or delete apps**. Only the account owner can grant or change this access.
## Deactivating a Team Member
In the **Team Members** list, click on the member's name to access their profile.
Look for a **Deactivate User** or similar button (usually at the bottom of the profile panel). Confirm your action if prompted.
The user's status will be updated to **Inactive**, and they will no longer be able to log in.