> ## Documentation Index
> Fetch the complete documentation index at: https://docs.orderprotection.com/llms.txt
> Use this file to discover all available pages before exploring further.
# Order and Claim Tags
> Sync Order Protection tags to Shopify and build custom tag rules for analytics, flows, and more.
This feature is currently available for **Shopify brands only**.
## Background
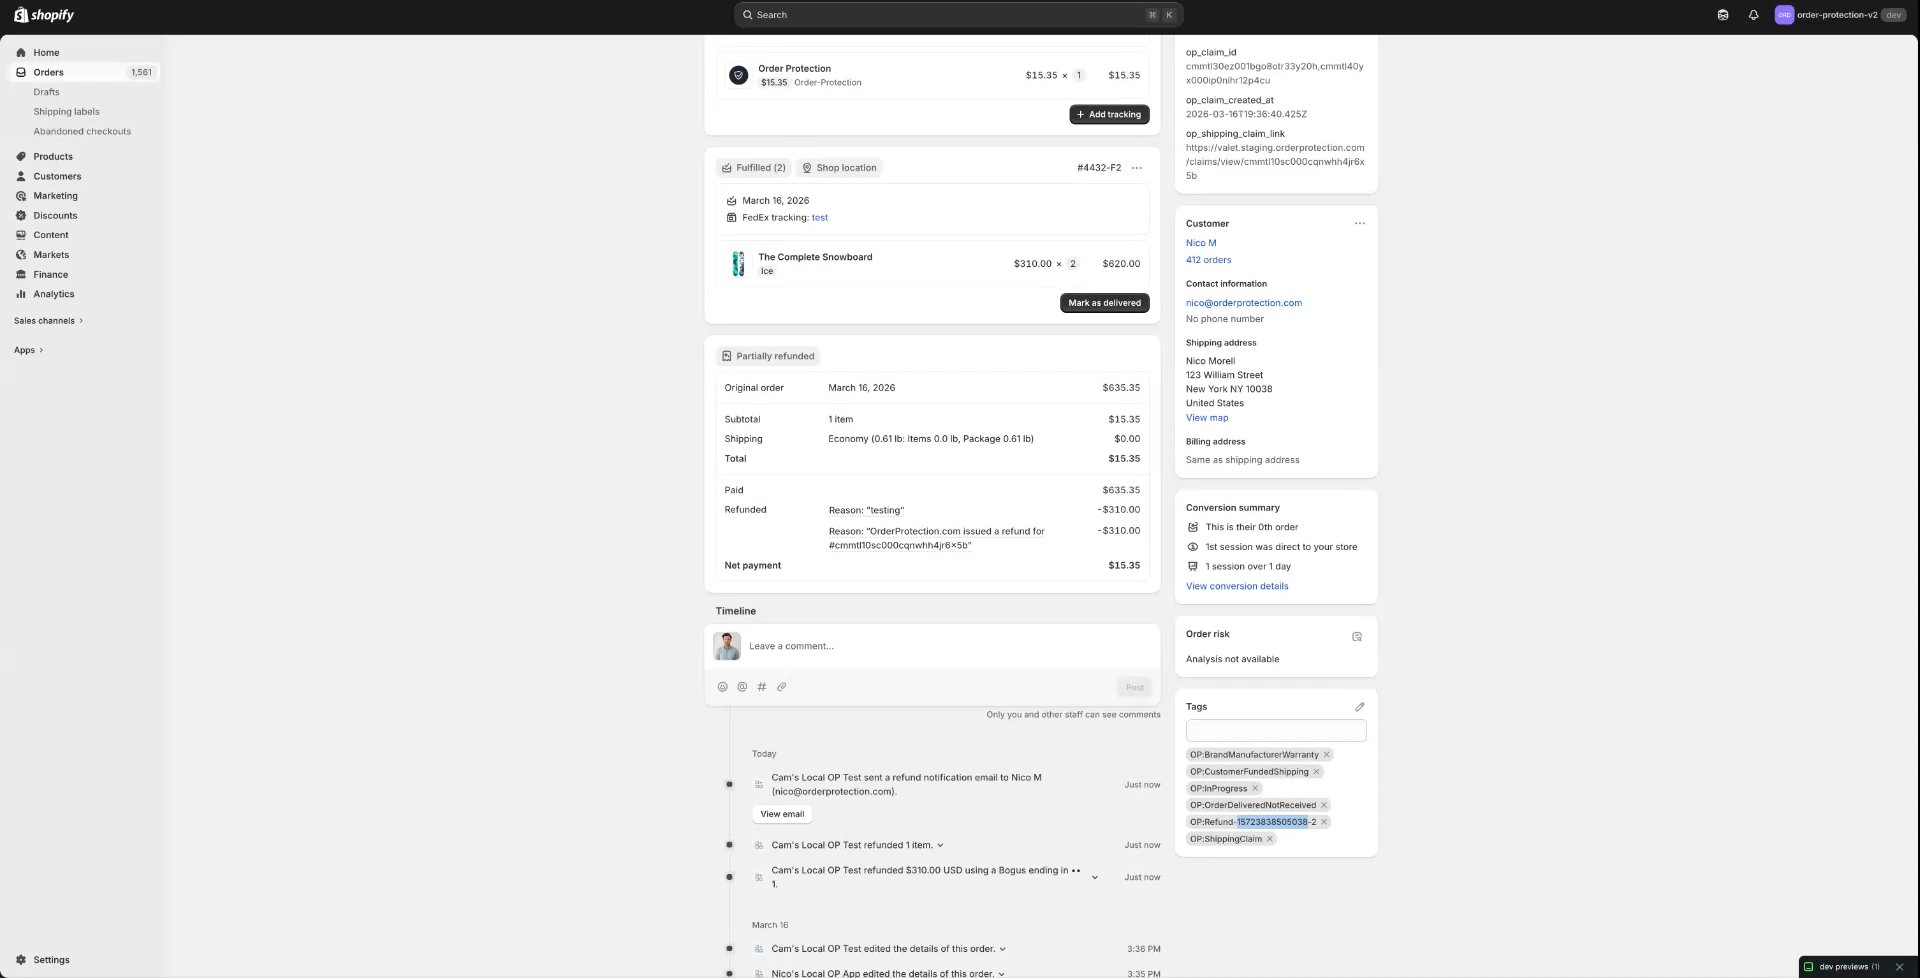
Order Protection has the ability to bring in order and customer tags from Shopify and post tags back to the orders based off of claim events and actions. This allows brands to create analytics views specific to their claim data, set up Shopify flows, and more.
## Sync Tags
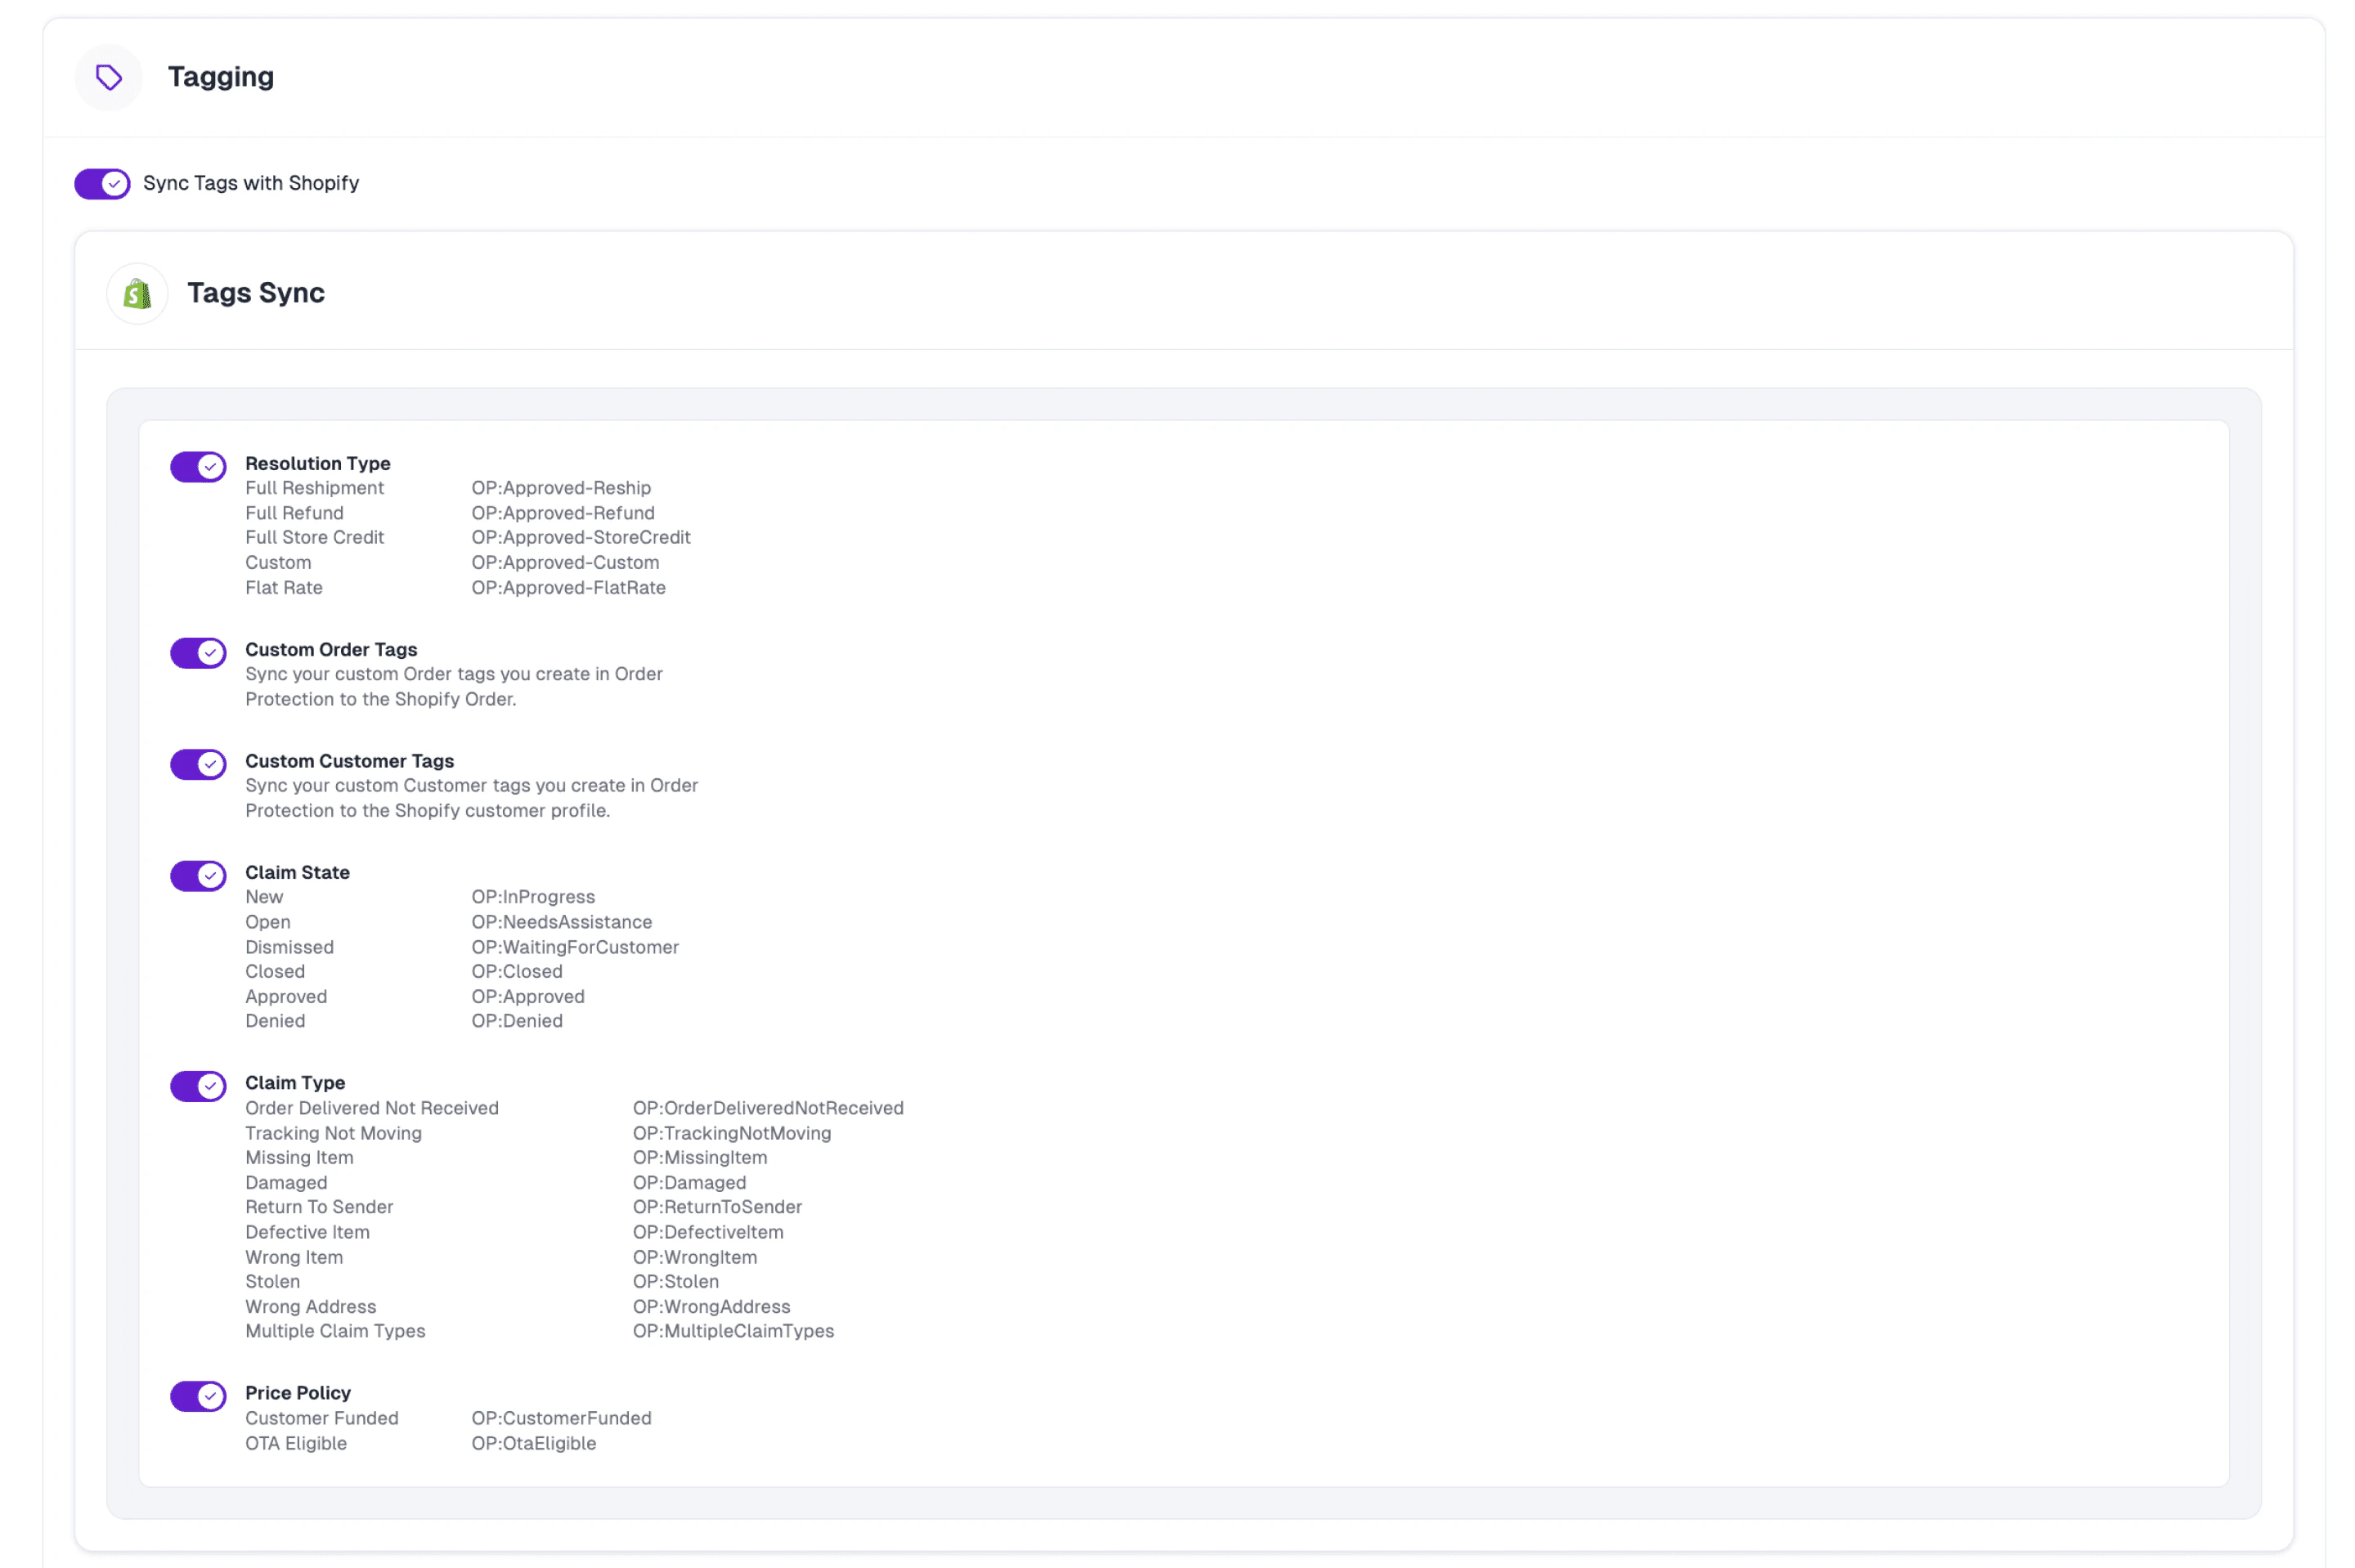
When the **Sync tags to Shopify** toggle is enabled within the **Tagging** block under the general settings tab, Order Protection will start to bring in all tags for your Shopify orders. From here, brands have the option to select which Order Protection tags they want to sync back to Shopify.
 ## Tagging Categories
### Resolution Type
When a claim is approved, we'll post the resolution type for which it was approved.
* **Custom** means that it was a split resolution (1+ items had a refund, 1+ items had a reshipment, etc.).
* **Flat rate** means that the customer received a partial resolution amount (e.g., water bottle paint was chipped and received a \$10 refund).
### Custom Order Tags / Custom Customer Tags
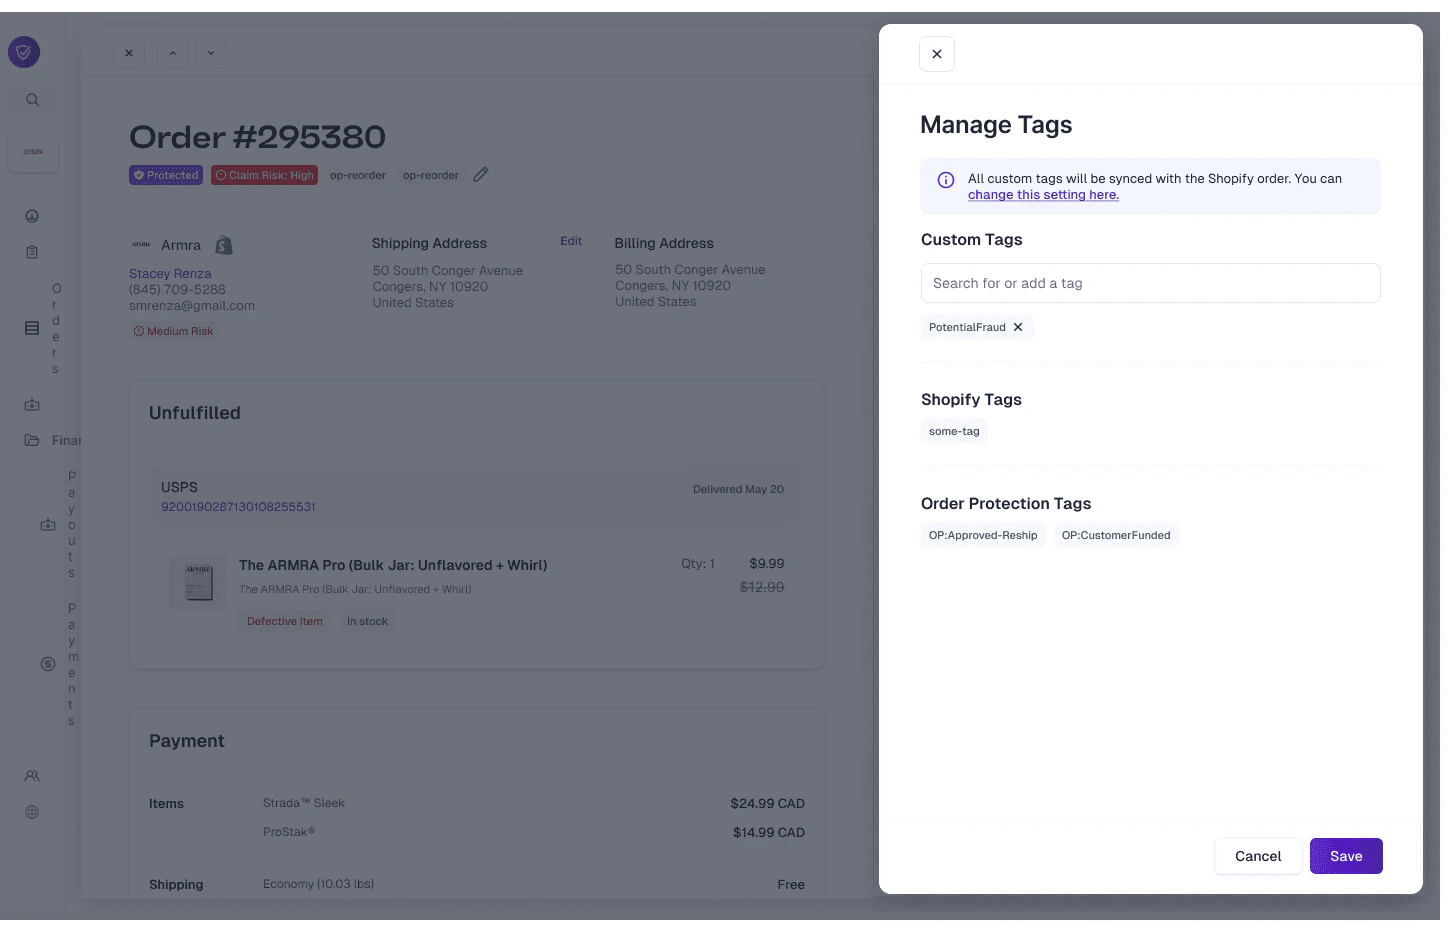
These are tags that are manually added on the order and are distinct from:
* **Shopify tags** -- tags that are set up within Shopify and brought into Order Protection.
* **Order Protection tags** -- our system-generated tags that fall into the categories of Resolution Type, Claim State, Claim Type, and Price Policy.
### Claim State
As claims move through our queues (To Do > Pending > Approved), we update the tag on the order to allow brands to see how many claims they have in each claim state at any given moment.
### Claim Type
These are the selections that customers choose when filing claims.
### Price Policy
These tags are mainly used as a flag for brands to know which customers purchased protection (if customer funded).
## Tagging Categories
### Resolution Type
When a claim is approved, we'll post the resolution type for which it was approved.
* **Custom** means that it was a split resolution (1+ items had a refund, 1+ items had a reshipment, etc.).
* **Flat rate** means that the customer received a partial resolution amount (e.g., water bottle paint was chipped and received a \$10 refund).
### Custom Order Tags / Custom Customer Tags
These are tags that are manually added on the order and are distinct from:
* **Shopify tags** -- tags that are set up within Shopify and brought into Order Protection.
* **Order Protection tags** -- our system-generated tags that fall into the categories of Resolution Type, Claim State, Claim Type, and Price Policy.
### Claim State
As claims move through our queues (To Do > Pending > Approved), we update the tag on the order to allow brands to see how many claims they have in each claim state at any given moment.
### Claim Type
These are the selections that customers choose when filing claims.
### Price Policy
These tags are mainly used as a flag for brands to know which customers purchased protection (if customer funded).
 ## Custom Tags
Beyond the system tags above, you can define your own **custom tag rules** — logic that automatically applies a tag to an order or customer whenever a claim event happens and your conditions are met. Custom tags are ideal for accounting, reporting, customer segmentation, and Shopify Flow automations.
You'll find these under **Settings → General → Tagging**, in the **Custom Tags** block. Click **Create Tag Rule** to build one.
### How a tag rule works
## Custom Tags
Beyond the system tags above, you can define your own **custom tag rules** — logic that automatically applies a tag to an order or customer whenever a claim event happens and your conditions are met. Custom tags are ideal for accounting, reporting, customer segmentation, and Shopify Flow automations.
You'll find these under **Settings → General → Tagging**, in the **Custom Tags** block. Click **Create Tag Rule** to build one.
### How a tag rule works
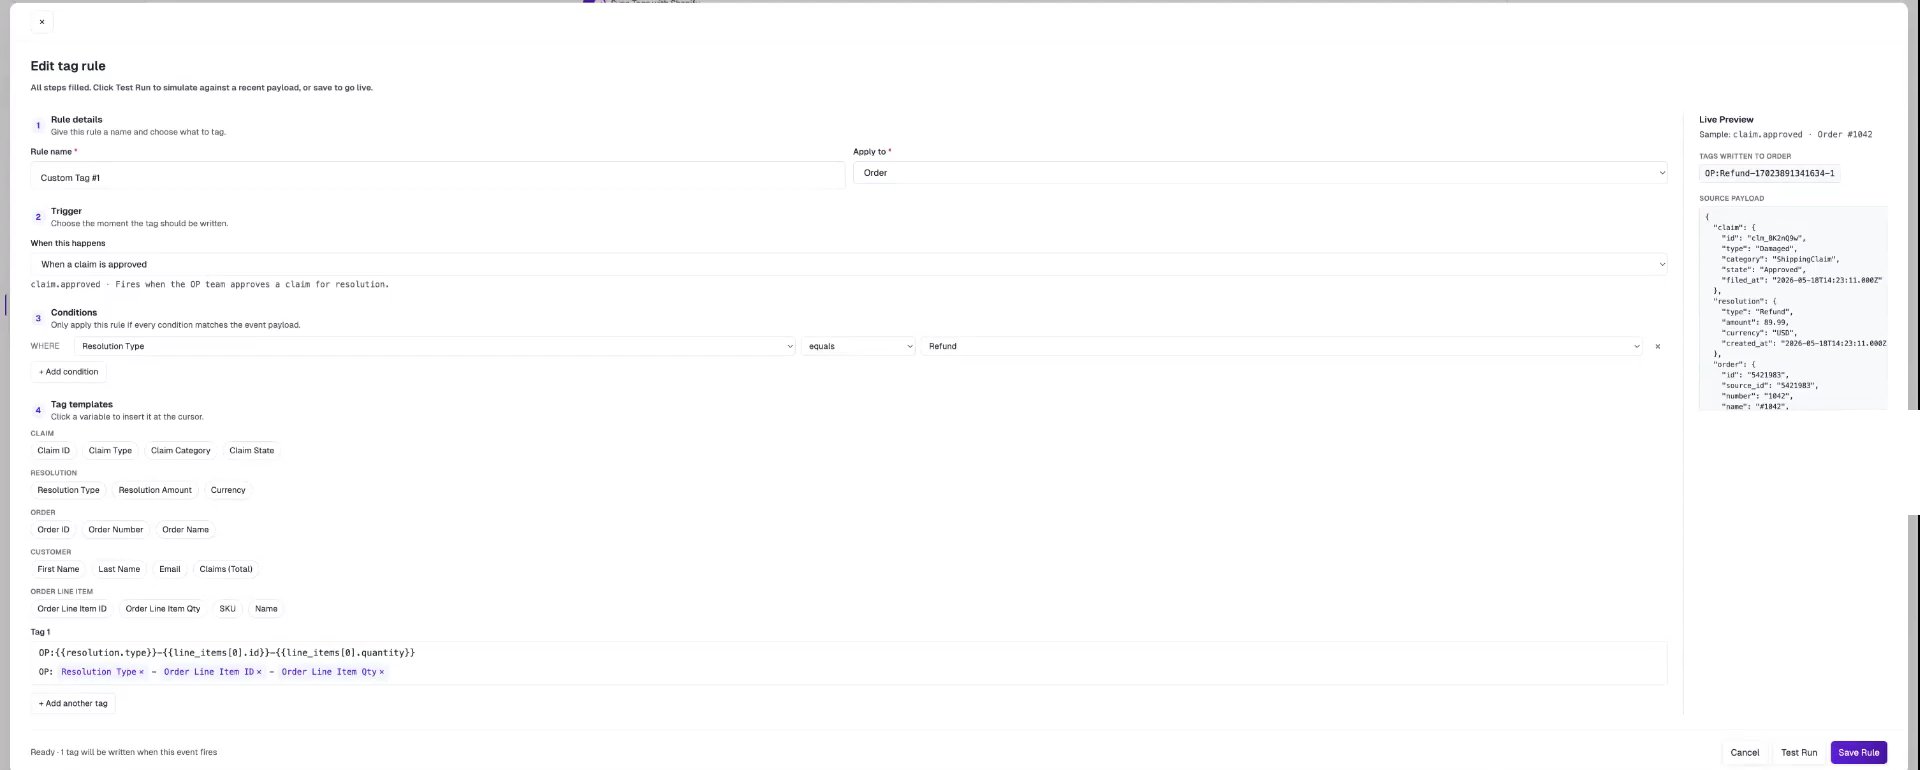 A rule is made up of a few parts:
A label for the rule so you can recognize it later.
Choose whether the tag lands at the **Order** or **Customer** level.
The claim event that fires the rule:
* **When a claim is filed** — a shopper submits a new claim.
* **When a claim is approved** — the OP team approves a claim for resolution.
* **When a claim is denied** — a claim is rejected.
* **When a claim is resolved** — a reship, refund, or store credit is issued.
A **When a refund is issued** trigger is coming soon.
Optionally narrow *when* the rule applies. Each condition is a **field**, an **operator**, and a **value** — for example, *Resolution Type equals Refund*. Add multiple conditions and combine them with **AND** / **OR**. Operators include equals, does not equal, is one of, is not one of, contains, starts with, greater/less than, exists, and is empty.
Build the tag itself from static text and **variable chips** — dynamic values pulled from the claim, resolution, order, customer, or line item. For example, a tag might combine the **Resolution Type**, **Order Line Item ID**, and **Order Line Item Quantity**.
Before saving, use **Test Run** to preview exactly how the tag will render (against the claim you're viewing, or a sample), then **Save Rule**.
### Available variables
Variable chips are grouped by source. The groups available depend on the trigger — for example, resolution values aren't available on *When a claim is filed*, since no resolution exists yet.
| Group | Examples |
| ------------------- | ------------------------------------------------- |
| **Claim** | Claim ID, Claim Type, Claim Category, Claim State |
| **Resolution** | Resolution Type, Resolution Amount, Currency |
| **Order** | Order ID, Order Number, Order Name |
| **Customer** | First Name, Last Name, Email, Claims (Total) |
| **Order Line Item** | Order Line Item ID, Quantity, SKU, Name |
### Where the tag lands
When the trigger fires and your conditions match, Order Protection applies the finished tag to the order (or customer) in **Shopify**. From there you can use it for accounting, reporting, and Shopify Flow. For example, the **Order Line Item ID** in a tag is the Shopify line item ID, so it lines up with what you see in Shopify admin and can be used to differentiate line items for reconciliation and reporting.
A rule is made up of a few parts:
A label for the rule so you can recognize it later.
Choose whether the tag lands at the **Order** or **Customer** level.
The claim event that fires the rule:
* **When a claim is filed** — a shopper submits a new claim.
* **When a claim is approved** — the OP team approves a claim for resolution.
* **When a claim is denied** — a claim is rejected.
* **When a claim is resolved** — a reship, refund, or store credit is issued.
A **When a refund is issued** trigger is coming soon.
Optionally narrow *when* the rule applies. Each condition is a **field**, an **operator**, and a **value** — for example, *Resolution Type equals Refund*. Add multiple conditions and combine them with **AND** / **OR**. Operators include equals, does not equal, is one of, is not one of, contains, starts with, greater/less than, exists, and is empty.
Build the tag itself from static text and **variable chips** — dynamic values pulled from the claim, resolution, order, customer, or line item. For example, a tag might combine the **Resolution Type**, **Order Line Item ID**, and **Order Line Item Quantity**.
Before saving, use **Test Run** to preview exactly how the tag will render (against the claim you're viewing, or a sample), then **Save Rule**.
### Available variables
Variable chips are grouped by source. The groups available depend on the trigger — for example, resolution values aren't available on *When a claim is filed*, since no resolution exists yet.
| Group | Examples |
| ------------------- | ------------------------------------------------- |
| **Claim** | Claim ID, Claim Type, Claim Category, Claim State |
| **Resolution** | Resolution Type, Resolution Amount, Currency |
| **Order** | Order ID, Order Number, Order Name |
| **Customer** | First Name, Last Name, Email, Claims (Total) |
| **Order Line Item** | Order Line Item ID, Quantity, SKU, Name |
### Where the tag lands
When the trigger fires and your conditions match, Order Protection applies the finished tag to the order (or customer) in **Shopify**. From there you can use it for accounting, reporting, and Shopify Flow. For example, the **Order Line Item ID** in a tag is the Shopify line item ID, so it lines up with what you see in Shopify admin and can be used to differentiate line items for reconciliation and reporting.